To enable approval requests to be decided via email, an email service and Approval System Properties settings for emails must be configured.

Typically an approval request will be sent to the designated assignee, from where they can access Salesforce to see more details and approve the request; however, by ensuring these settings are configured correctly, an assignee can indicate their decision and progress the approval by simply replying to the request email.

To configure the email service

  1. Go to Build > Develop > Email Services and click New Email Service.
  2. For Email Service Name, enter ApprovalReplyService, and for Apex Class, select ApprovalEmailHandler.
  3. Select Active and enter an admin-level user's email address in Route Error Emails to This Email Address. The remaining settings are not required.
  4. Click Save and New Email Address and then enter ApprovalReplyService for the email address.
  5. Select Active, select a context user, and click Save. The email address is automatically generated for your Salesforce org, apart from the text that you entered in Step 4. For more details, see Salesforce Help.

This email service can now be used to ensure approval request emails are handled as expected.

To set the email system properties

Have configured your email service, so you can enter the address is Step 2 below.
  1. Go to Build > Develop > Custom Settings and click Manage for Approvals System Properties.
  2. Click Edit and ensure the email approval service address is the one the system automatically generated when you configured the email service.
  3. Select the Enable Email Approval Response checkbox and click Save.
  4.  To enable approval email response, follow the steps at Enable Email Approval Response.

    The queue email address cannot be used for notifications. If the queue's "Send Email to Members" box is unchecked, the current user's email (not the queue email address) will be used for notifications. This is due to Salesforce limitations that we cannot bypass.

When someone replies to an approval request via email, the address their email is sent to is the one set in the Email Approval Service Address field and selecting Enable Email Approval Response means they can enter Approve, Approved, Yes, Reject, Rejected, or No to decide on the approval without logging into Salesforce. 

Bounce back emails

If you make a spelling mistake when replying to an approval request email the system can send you a 'bounce back' email to inform you an error has occurred. As long as the previous tasks have been completed for the email service and email system properties, this will occur automatically.

When you reply to an approval request email by typing in one of the supported words (Approve, Approved, Yes, Reject, Rejected, No), the approval request status will be updated accordingly in the system. If you make a typo when you do this, no update can be made. This feature enables you to be informed of the mistake and make the necessary correction to ensure the approval process progresses as intended.The email will be sent to the approver who made the mistake only.If you do not want to use the default text for the email, you can use Salesforce Translation Workbench functionality to customize the text. A custom label is used to provide the content for the body of the email and you can use translation text to override this.

To customize the bounce back email text

You must have enabled the Translation Workbench for your org.

  1. Go to Build > Create > Custom Labels and select BounceBackEmailBody.
  2. Click New Local Translations / Overrides to display the New Translation page.
  3. Select the Language and enter the text you want included in the email and click Save.


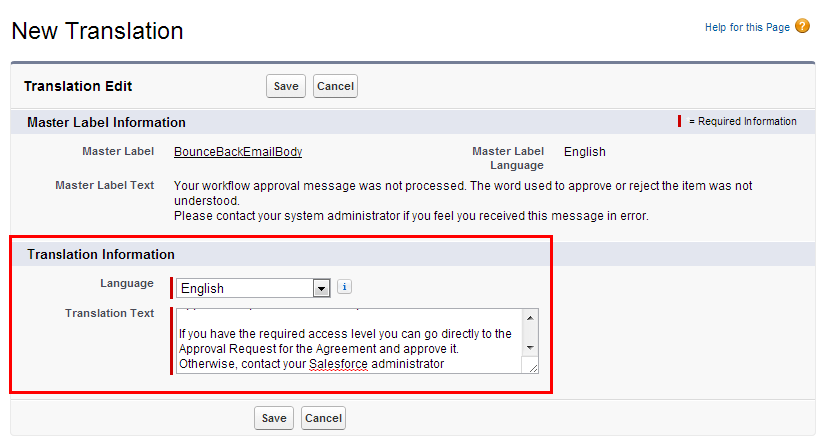
The next time a bounce back email is sent, the body of the email will use the content in the Translation Text field for the corresponding language.

You can edit the text as required and also add different versions for multiple languages.