You can create custom objects to be used with custom assignee types in approval rules. This example shows how a custom object called GO Approver provides assignees when creating an approval rule.
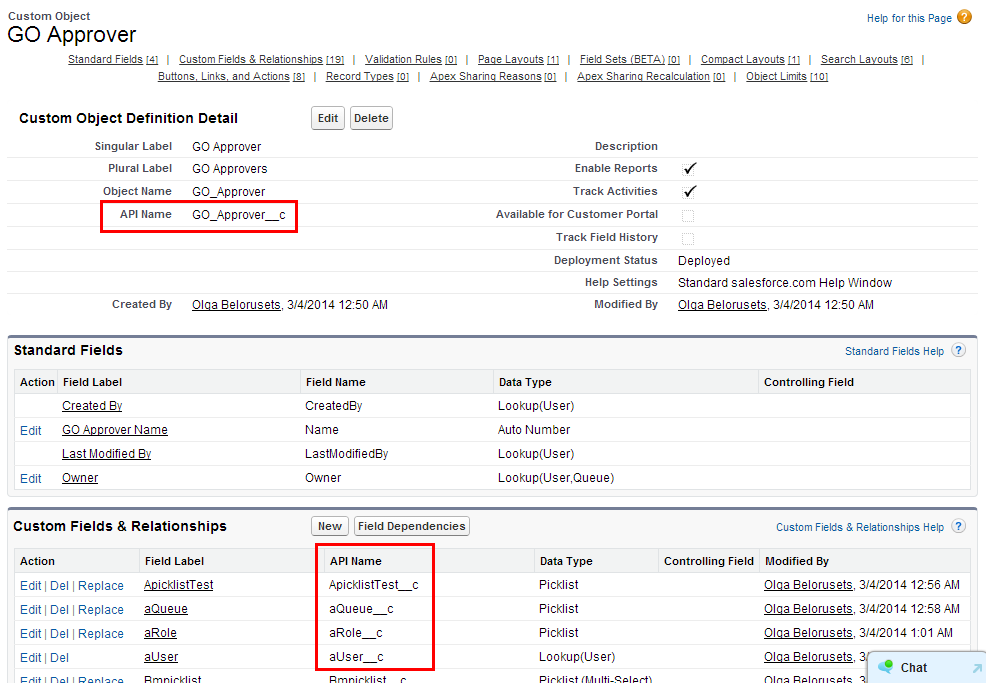
Step 1: Create your custom object.
From Setup, go to Create > Objects and click New Custom Object. Create your custom object, adding the necessary fields to enable you to create a formula for selecting assignees. The API name for the custom object and its fields are used to create the custom formula in the approval rule.
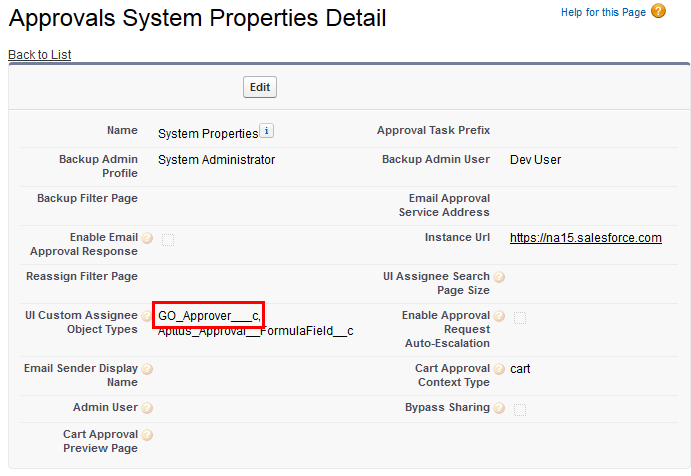
Step 2: Make the custom object available to Intelligent Approvals via a custom setting.
From Setup, go to Develop > Custom Settings and click Manage for Approvals System Properties. Click Edit and enter the names of the custom objects you will use with custom assignees in the UI Custom Assignee Object Types field.
The Approval Systems Property must include the custom object's API name:
Step 3: Create users for the custom object.
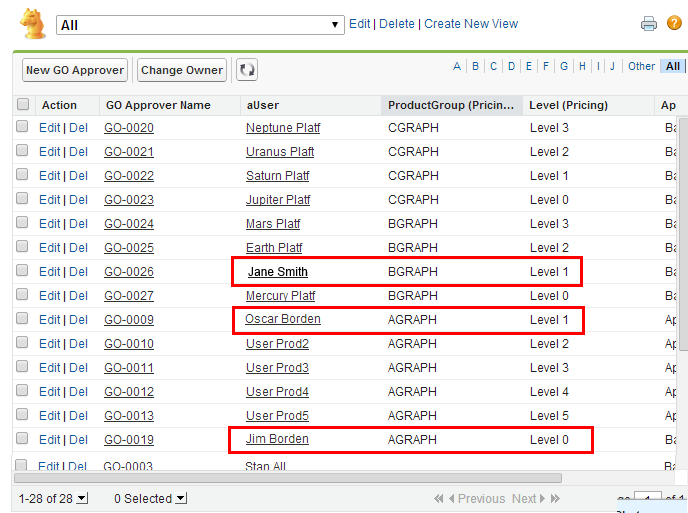
Go to the GO Approver tab to display the page and create all the users you want to approve requests. The values you enter in the fields for each user are used when you create formulas for selecting assignees.
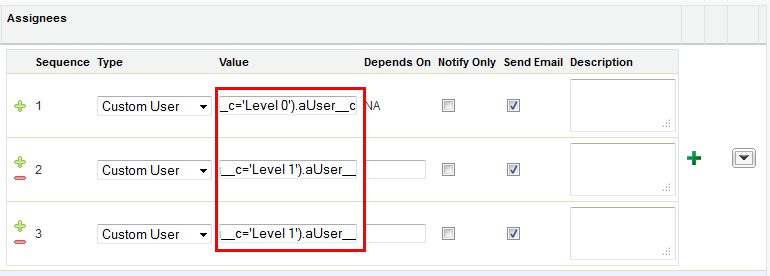
Step 4: Create your approval rules, using formula expressions to select assignees.
Go to a Condition type approval rule and create assignees by selecting Custom User, then entering a formula in the Value field. For example, the following formulas route an approval to the indicated assignees based on the users you created for the custom object:
GO_Approver__c(ProductGroup_Pricing__c='AGRAPH' AND Level_Pricing__c='Level 0').aUser__c | Jim Borden |
GO_Approver__c(ProductGroup_Pricing__c='AGRAPH' AND Level_Pricing__c='Level 1').aUser__c | Oscar Borden |
GO_Approver__c(ProductGroup_Pricing__c='BGRAPH' AND Level_Pricing__c='Level 1').aUser__c | Jane Smith |