Download PDF
Download page Creating a Billing Plan.
Creating a Billing Plan
You can create a billing plan using an already created billing plan template or you can directly create a billing plan.
Billing Plan using a Billing Plan Template
Follow these steps to create a Billing Plan:
- Open your Quote/Proposal page and go to the Billing Plan related list. Click New Billing Plan to create a Billing Plan.
Select a Billing Plan Template from the lookup.
- Because a plan is always associated to a proposal, you can create a plan only for products configured on that proposal. From the list of products, select product(s) for which you want to create a Billing Plan. You can filter products based on their Price Type: One-time and Recurring from Filter by Price Type picklist.
- Enter Billing Start Date and Billing End Date.
The Number of Installments and Billing Method fields are auto-filled based on the template. - Click Next.
Plan Item schedules are populated based on the selected template. Refer the section on Billing Plan Templates to understand how the schedule is created. - Verify the dates and Save all changes.
Billing Plan without applying a Billing Plan Template
To create a new Fixed Billing Plan:
- Open your Quote/Proposal page and go to the Billing Plan related list. Click New Billing Plan. The Select Line Item(s) page is displayed.
- Select the products for which the billing plan must be created.
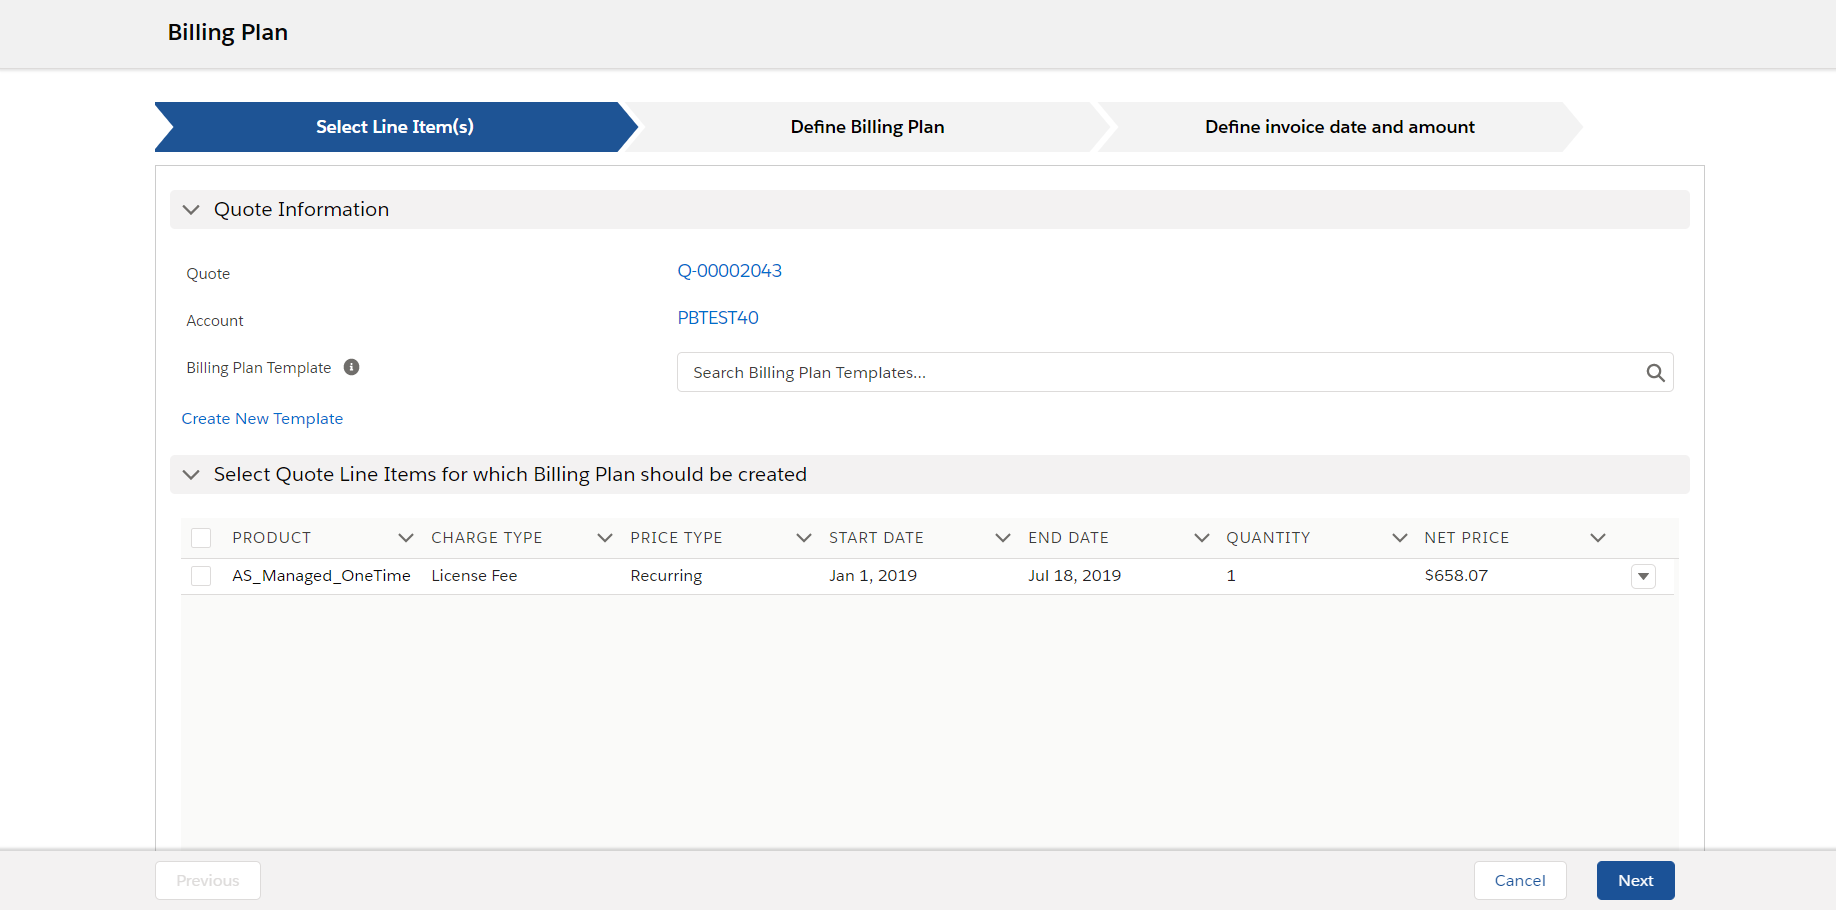
- Click Next. The Define Billing Plan page is displayed.
Enter the following details:
Field Description Plan Name Enter a unique name for this Billing Plan. Consult your administrator for the naming convention that you are required to follow. Plan Type Select one of the following options:
- Full Term
- Fixed
Milestone

You must manually add the Full Term picklist value to the Plan Type field in the Billing Plan Template object.
For more information, see Post-Installation Configurations.
Billing Start Date This field is displayed only if you select Fixed from the Plan Type drop-down. Select the date date from when the billing must start. If you select Billing Start Date, you must also select Billing End Date.
If you do not select a start date, Conga Billing auto-populates a value on the Period Start Date field on the Define invoice date and amount page, for the first Plan Item on the billing plan.
Billing End Date This field is displayed only if you select Fixed from the Plan Type drop-down. Select the date when the billing must end. If you select Billing Start Date, you must also select Billing End Date.
If you do not select an end date, Conga Billing auto-populates a value on the Period End Date field on the Define invoice date and amount page, for the last line on the billing plan.
Billing Method Select from one of the following options:
- Percentage - To bill your customers a percentage of the total amount due at each installment.
- Amount - To bill your customers a specific amount for each installment.
- Split Evenly - To equally divide the Total Amount into the Number of Installments.
If you are upgrading the Conga Billing package, you must manually add the Split Evenly picklist value to the Billing Method field in the Billing Plan object.
You can deactivate only the following picklist values:
- Amount
- Split Evenly
After deactivation, the billing plan creation VF page does not show the picklist value. However, if you deactivate the Percent field, the picklist value continues to appear on the billing plan creation VF page.
For more information, refer to Post-Installation Configurations.
Number of Installments Enter the number of billing schedules by which you want to divide the total amount due. Description Enter an appropriate description of this Billing Plan for ease of use. - Click Next. The Define invoice date and amount page is displayed.
For each Plan Item, enter the following details:
FieldDescriptionPlan Item Name Enter a unique name each Plan item. Amount/Percentage Based on the selected Billing Method (Amount or Percentage) and Number of Installments, Conga Billing automatically calculates and populates this value.
Period Start Date If you selected a Billing Start Date on the Define Billing Plan page, Billing populates the same date as the period start date for the first Plan Item. If you did not select a start date, Conga Billing auto-populates a value on the Period Start Date field, for the first Plan Item based on a certain criteria. For more information, see Use Case: Validation on Period Start Date and Period End Date
You can overwrite the date if you want to select a different period start date for each plan item. Conga Billing considers the number of days in the Payment Term field and validates the Ready for Invoice Date that you select for the current installment.
Period End Date If you selected a Billing End Date on the Define Billing Plan page, Billing populates the same date as the period end date for the last Plan Item. If you did not select a start date, Conga Billing auto-populates a value on the Period End Date field, for the last Plan Item based on a certain criteria. For more information, see Use Case: Validation on Period Start Date and Period End Date
You can overwrite the date if you want to select a different period end date for each plan item. Conga Billing considers the number of days in the Payment Term field and validates the Ready for Invoice Date that you select for the current installment.
Ready for Invoice Date Select the date when you want to generate the invoice for a Plan Item. Based on the Offset Early Invoice Date (Days) field value on the Payment Term, you can select populate the Ready for Invoice Date in a valid date range. For more information, see Use Case: Validation on Ready for Invoice Date.
Payment Term Lookup and select a predefined Payment Term. If you do not specify a payment term, the payment term specified on the quote is used. If a payment term is not specified on the quote, payment term specified on the account or account location is used. If no payment term is attached at the account or account, the payment term, 'Due upon Receipt' is used.
If you select the Payment Term at Billing Plan Line Item, you must populate Payment Term for all line items.
The Amount/Percentage value of the last billing plan item is uneditable.
Click Finish.
The Fixed Billing Plan is successfully created. You can go to the Quote/Proposal related list to see this Billing Plan.
Custom Percent Field
You can configure a custom field to calculate the value of Percentage and Amount till 10 decimal places. This helps in avoiding rounding errors. To configure the custom field,
- Create a custom field on Billing Plan Item object. with Data Type as Percent and Decimal Places as 10.
- Register the API name of the field under Billing System Properties in Custom Billing Plan Item Percent API Name field.
The API name of the custom field created on the Billing Plan Item object and the Billing Plan Template Item should be same.
To apply custom percentage field to existing billing plans, see Post-Installation Configurations.
Bundle and Option Products on the Billing Plan
The visibility of bundle and options product on the billing plan is driven by the Bundle Invoice Level value on the product definition.
Bundle and options products are visible on the billing plan for any of the following configuration:
| Product Type | Bundle Invoice Level |
|---|---|
| Standalone Product/ Service | Bundle |
| Standalone Product/ Service | Blank |
| Option | Detail |
| Option | Blank |
Bundle and options products are not visible on the billing plan for any of the following configurations:
| Product Type | Bundle Invoice Level |
|---|---|
| Standalone Product/ Service | Detail |
| Option | Bundle |
For more details on product configuration, see Configuration for Bundle Products.