Download PDF
Download page Configuring Step Input Rules from the Wizard Designer.
Configuring Step Input Rules from the Wizard Designer
Step Input Rules allow you to configure rules and expressions for your Inputs at Wizard runtime. These rules apply to Inputs which are part of the same step, and generally trigger based on user interaction with the Wizard. Input rule types can be configured to:
- Enable or Disable Inputs
- Show or Hide Inputs
- Determine the Focus Object of the Wizard (e.g., Agreement)
- Determine the Record type for the focus object's record to be created (e.g., SOW, NDA, MSA, etc.)
- Set the value of one input based on the value(s) of other inputs.
- Set the value of a custom field based on the value(s) of inputs in the same step.
If you are creating a Wizard Design which will create an object record you must include at least one Determine Focus Object and one Determine Record Type rule for each object to be determined.
To configure Input Rules for a Step
- From the Step Settings form, click on the Input Rules tab. A graphic representation of the list of inputs for the step is displayed.
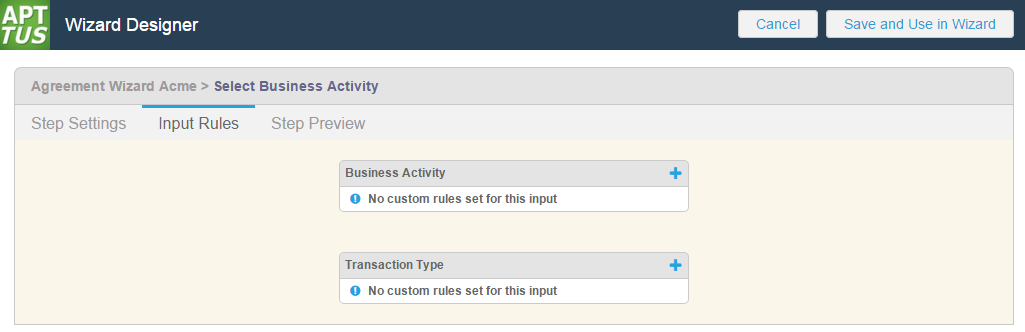
Inputs are displayed in the sequence you defined in Step Settings. Each input is displayed on the page with each input rule listed below the name of the input. - To create a new rule for an input, click on the
 icon next to an input name or hover over the list of rules and click New. A dialog is displayed for defining the input rule.
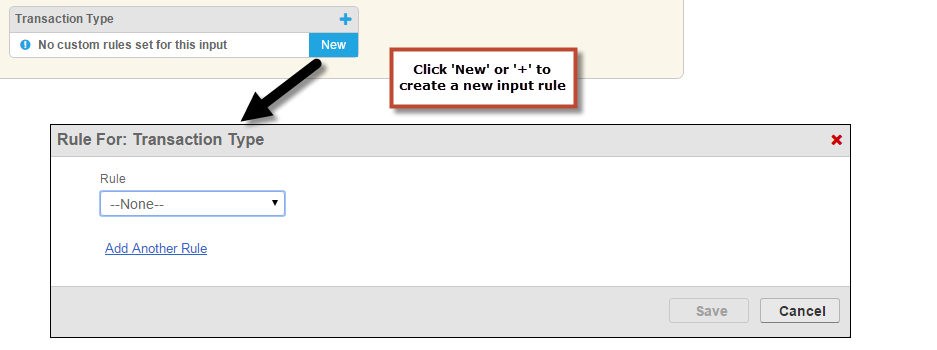
Choose a rule type to use from the Rule drop-down list.
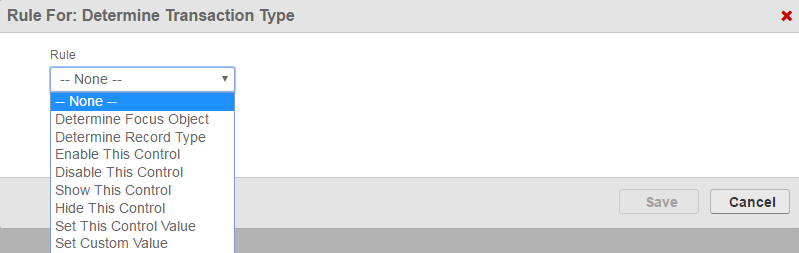
Rule Type Description Determine Focus Object Use this rule to allow the user to determine the focus object for the runtime record to be created (e.g., Agreement object). Note: If this rule is used, there must also be a Determine Record Type rule used to create a record from the Wizard if record types have been defined for the object.
Important: When using this rule, make sure to select the Rule Type before the Object to avoid configuration errors.Determine Record Type Use this rule to allow the user to determine the record type for the focus object's record to be created (e.g., SOW, MSA, NDA for Agreement). Note: If this rule is used, there must also be a Determine Focus Object rule used to create a record from the Wizard. Enable This Control Use this rule to allow the user to edit the field value for this input. This is the default setting for an input in a step. You can use this as a rule to conditionally enable the input if a previous input rule caused it to be disabled. Disable This Control Use this rule if you want to prevent the user from editing this input's value. You can use this rule to conditionally make an input read-only. Show This Control Use this rule to show the field value for this input at runtime. This is the default setting for an input in a step. You can use this rule to conditionally show the input if a previous input rule caused it to be hidden. Hide This Control Use this rule to hide the field value for this input at runtime. You can use this rule conditionally to allow different inputs to be exposed within a step based on previous responses in the step. Set This Control Value Use this rule to set the field value for this input based on the response values of one or more other inputs in the same step.

When you set APTS_WizardPersistHiddenValue to true and you run a wizard containing a field that has a combination of Set this control value and Hide this control input rules, the field value is set in the object you are creating. For more information, see Admin Entries.
To make your rule conditional, click Add Another Rule to add a condition to your rule type.
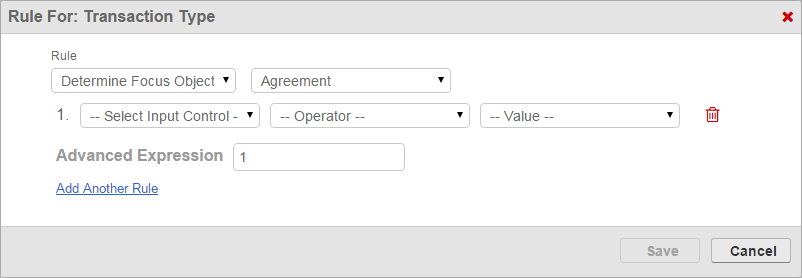
Note: If you choose not to add conditions to your rule type, the Input rule you create will always trigger regardless of other rules in the step.
- Use the drop-down menus to build a condition expression:
- Choose an input from the list of inputs in the current step
- Choose an operator for the expression which is specific to the chosen input's data type
- Choose a value for the expression which defines the condition
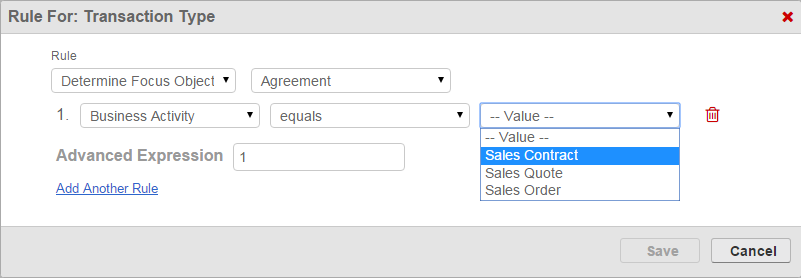
Add more conditions as necessary to complete the rule. By default, all expressions use AND logic, meaning all conditions are required for the rule to execute. You can use the Advanced Expression field to change condition logic to OR, or create your own custom condition (for example, (1 OR 2) AND 3 if you want to make only 1 of the first 2 conditions required).

There is no limit to the number of conditions you can create for a single input rule.
- Click Save to save your new input rule or Cancel to discard rule changes. The step inputs graphic changes to reflect the newly-created rule.

- From the Input Rules tab you can:
- Click the
 icon to create another rule for an input.
 - Click Edit next to an existing input rule to make changes.
- Click Delete next to an existing input rule to delete the rule.
- Click Step Settings to return to the step and create or add more inputs or save the step.
- Click the