Download PDF
Download page Routing Documents to Content Libraries.
Routing Documents to Content Libraries
When you activate an agreement, executed agreement documents are stored in the Document Folder Apttus Documents. This option will be sufficient for some users but may prove to be too basic a solution. Conga CLM offers an alternative contract repository option that takes advantage of Salesforce CRM Content by allowing you to publish executed agreements to content libraries. There are many advantages to using content libraries:
- Multiple content libraries can be created by administrators to store agreements by any number of classifications.
- Library content can be tagged with labels and libraries are fully searchable and allow you to create filters to locate agreements.
- Content access can be restricted based on member groups that are configured when libraries are created.
- Users can subscribe to specific libraries to get notifications when content has been changed or added.
To publish activated agreements to the Salesforce CRM content repository:
- The Apttus Content Integration package must be installed in your Salesforce organization.
- Salesforce CRM Content must be enabled.
- The Libraries tab and other settings must be configured.
You can also create "Content Workspace" Agreement Rules to route activated agreements to different libraries based on expressions you define.
Installing Apttus Content Integration
- Navigate to the Community Portal > Resources> Install Center.
- In the left-hand navigation, click the Integrations tab.
- In the Integrations packages page go to Apttus Content Integration, click Install Now, and follow the instructions to install the package in your Org.
- Choose the type of org where you will install the package (Production or Sandbox).
Enabling Salesforce CRM Content
To properly route agreements to your content libraries, you must first enable Salesforce CRM Content in your Salesforce Org. To enable Salesforce CRM content:
- Go to Setup > Customize > Salesforce Files > Settings > Salesforce CRM Content or enter "Salesforce CRM" into the Quick Search dialog and select Salesforce CRM Content.

- Click Edit on the Salesforce CRM Content page and select Enable Salesforce CRM Content and Autoassign feature licenses to existing and new users.
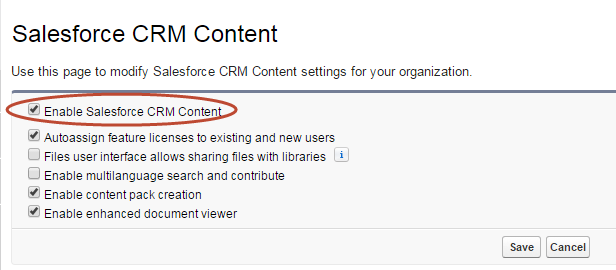
- Click Save.
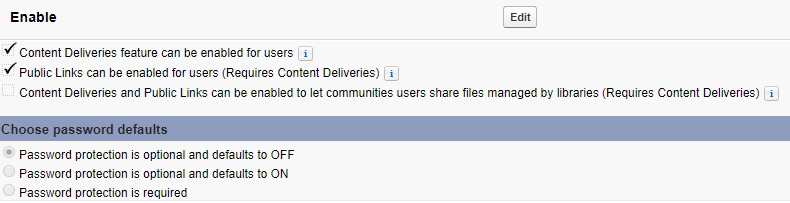
- (Optional) Go to Setup > Customize > Salesforce Files > Settings > Content Deliveries and Public Links.
- Click Edit and select Content Deliveries feature can be enabled for users and Public Links can be enabled for users.
- Select Choose password defaults option per your requirement.
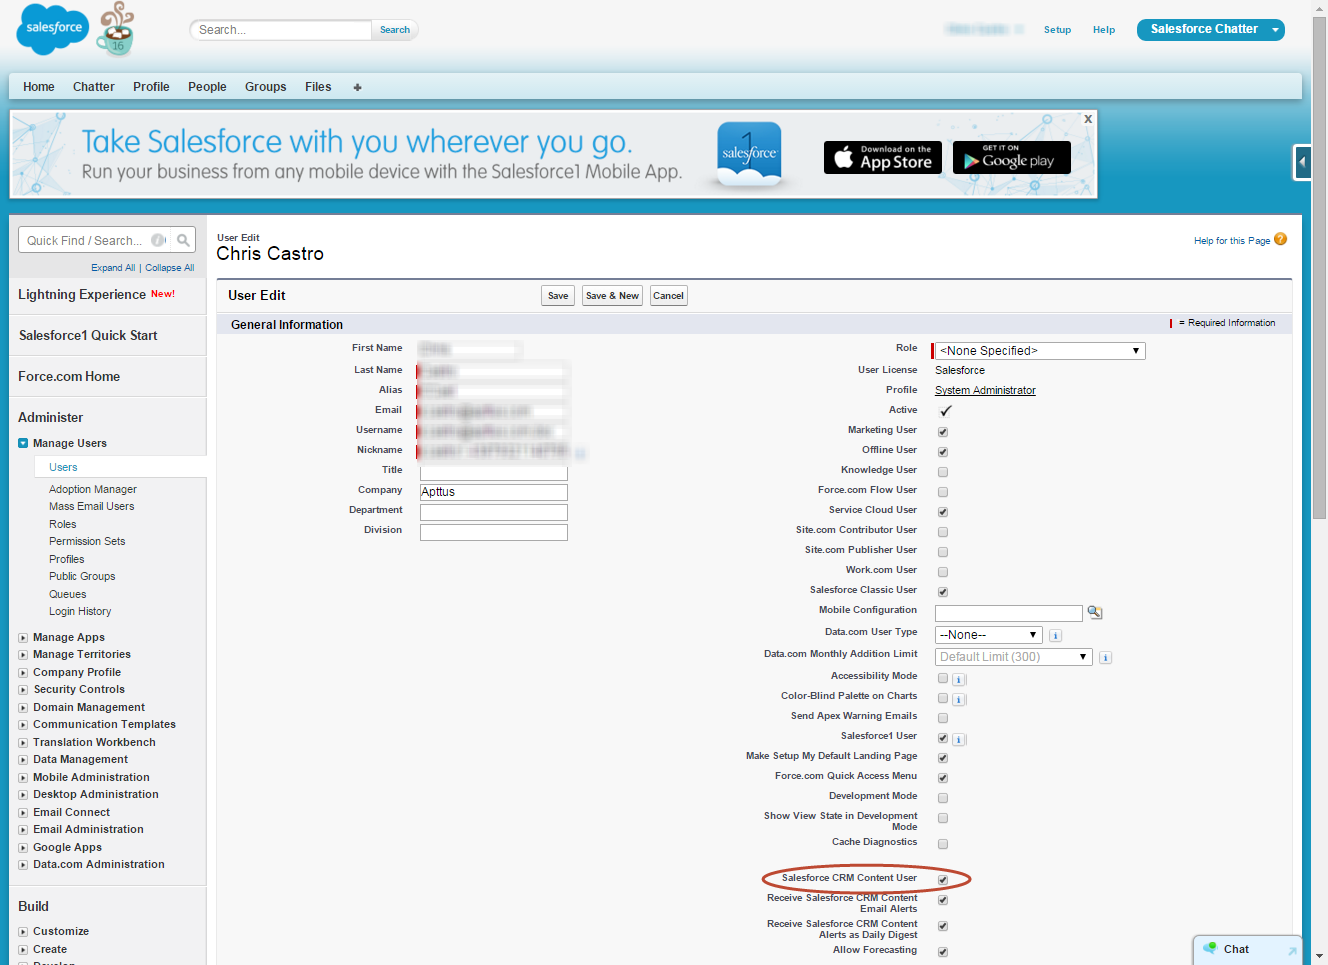
- Users who are activating agreements must also have Salesforce CRM Content enabled. Turn on Salesforce CRM Content for all users who will be activating or managing agreement documents published to your content libraries. Go to Setup > Administer > Manage Users > Users.
Configuring Admin Properties
Several Admin Objects (properties) must be created or modified to identify the type of content to be routed and the default workspace to use for activated agreements.
- Go to the Admin tab (click '+' and choose the Admin tab.) Click Go to view all Admin objects (your list will vary depending on which objects have already been created).
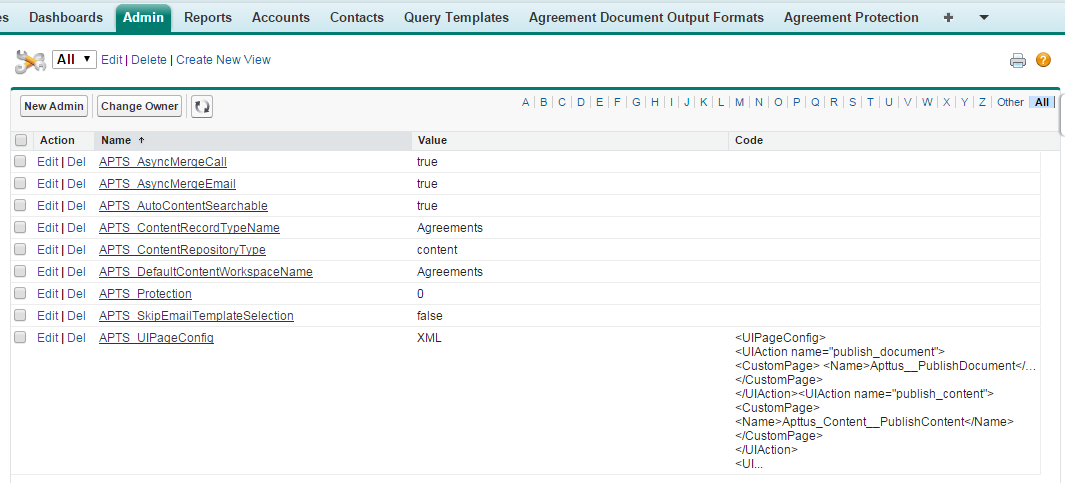
- Create the following four Admin properties to enable content delivery for your activated agreements. Set values as required:
- APTS_ContentRepositoryType – Set this property value to "content." The default setting is "document," which routes ALL activated documents to an Apttus folder. Changing this setting tells the system to use content repository settings for routing documents.
- APTS_ContentRecordTypeName – Set this property value to "Agreements."
- APTS_DefaultContentWorkspaceName – Set the default workspace name for your content library to "Agreements." This is the default content library that will store all activated agreements that are not routed to other content libraries defined in your Agreement Rules.
- APTS_UIPageConfig – Set up a UIPage Config for the content repository type. Enter "XML" as the value and the following chunk of XML under Content:
<UIPageConfig>
<UIAction name="publish_document">
<CustomPage> <Name>Apttus__PublishDocument</Name>
</CustomPage>
</UIAction><UIAction name="publish_content">
<CustomPage>
<Name>Apttus_Content__PublishContent</Name>
</CustomPage>
</UIAction>
<UIAction name="publish_chatter">
<CustomPage> <Name>Apttus__PublishChatter</Name>
</CustomPage>
</UIAction>
</UIPageConfig> - APTS_AutoContentSearchable – (Optional) Set this property to "True" to skip the optional step when activating an agreement that allows a user to determine which agreement documents are available for content search. This property is not required but recommended when you are routing content to ensure that all relevant agreement documents make it into the library and are searchable.
- APTS_ContentConfig – (Optional) Set this property to override the default field mappings used by the Apttus Content Integration package. The default field mapping only maps the Agreement name field to the same field in the Content Version object and is found as a Static Resource in the Contract Management package labeled "ContentConfig" (Go to Setup --> Quick Search --> Static Resources --> ContentConfig to view the static resource).
- Copy the XML contents from the ContentConfig static resource into your new Admin Object (APTS_ContentConfig).
- Any custom fields you add to the Content Version object and layout (detailed in the next section) which you want to be displayed in Content Version details for any stored agreement document must be mapped as part of this Admin property.
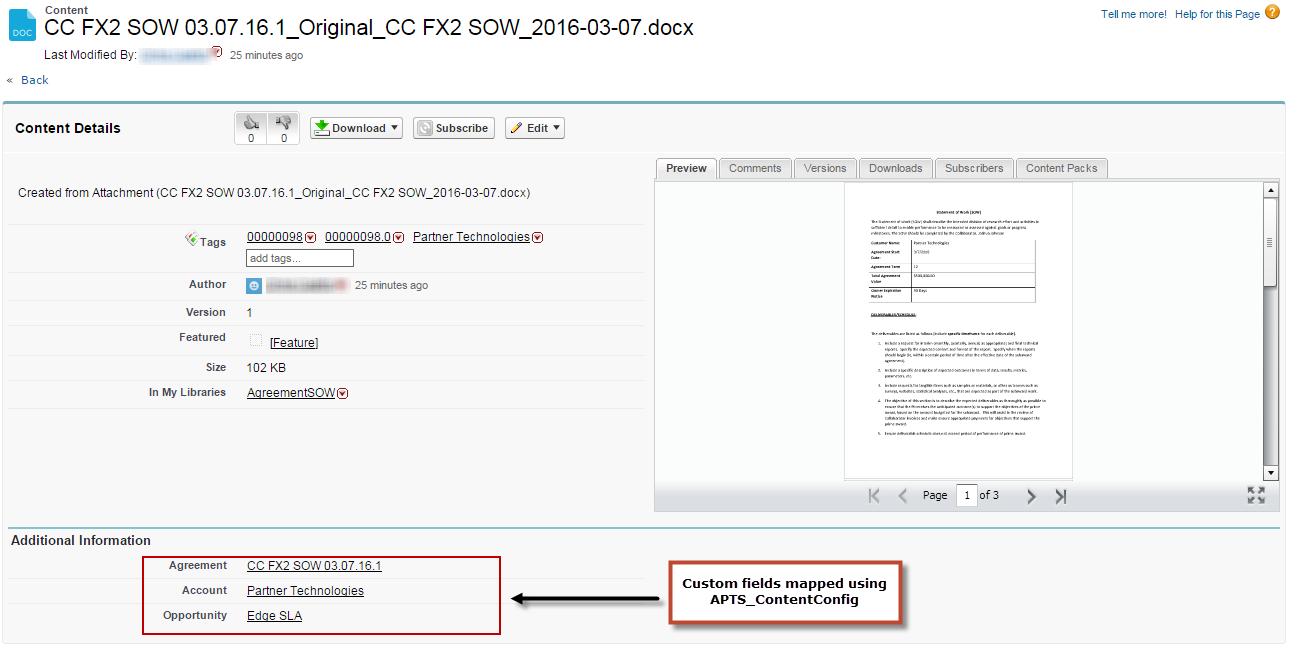
For example, if you want the values of the Account and Opportunity for the document's related Agreement automatically added to Content Version details, you would create the Admin Object and code as shown in the following image: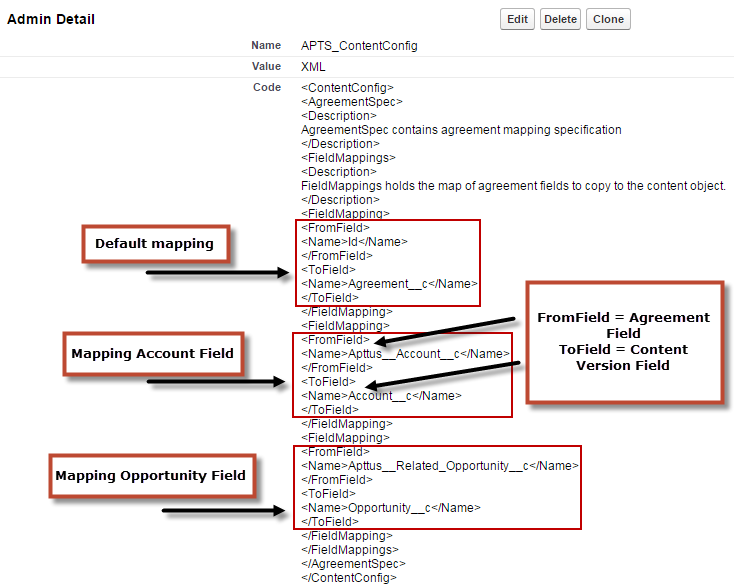
- After an agreement document is activated and routed to the proper library, mapped fields will pull data from the document's associated agreement record and be displayed on the Content Version Details page.
Setting Up Salesforce Files for Content
Before you can configure the content libraries which will store your activated agreements, you must create a custom field lookup relationship to Agreement on the Content Version object, to associate Content Version records with Agreement records and to allow for related records to appear on Agreement layouts. You can also create different page layouts to display content version data, depending on the library where your documents are stored.
Configuring Content Permissions for Libraries
You can define content permissions for managing your libraries. Each library's permission represents a set of user privileges.
Go to Setup > Customize > Salesforce Files > Content Permissions to view, edit, or add library permissions.
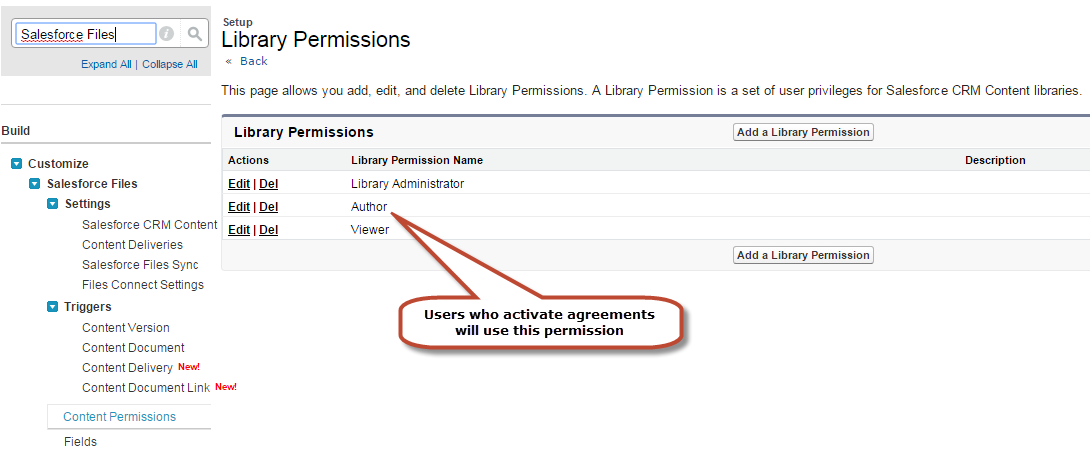
Users who will be activating agreements must have "Author" permission for content libraries. When you configure the libraries and edit members you will be able to assign permission to users.
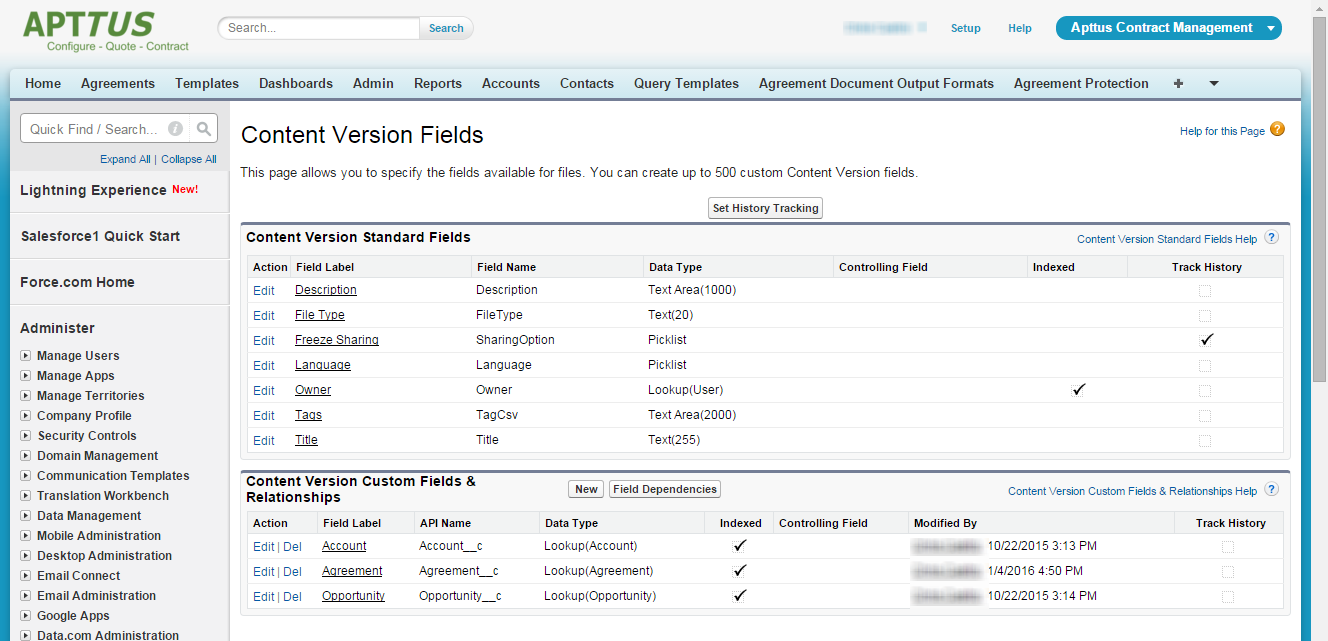
Adding Custom Fields to the Content Version Object
To properly view information and navigate to your contract repository from the Content Versions related list on your Agreements, you must add "Agreement" as a custom lookup field to the Content Version object. The following configuration is required for configuring email agreement documents if you have installed the Apttus Content Integration package and if you have not created a lookup field for Agreement object.
- Go to Setup > Customize > Salesforce Files > Fields.
- Click New in the Custom Fields & Relationships related list.
- Choose the type of field to create, and click Next.
- For relationship fields, associate an object with the field and click Next.
Enter a field label. The field name is automatically populated based on the field label you enter.

The field name can contain underscores and alphanumeric characters and must be unique in your organization. It must begin with a letter, not include spaces, not end with an underscore, and not contain two consecutive underscores. Ensure the custom field name is not identical to any standard field name for that object.
Choose the page layout that should display the field as an editable field.
If you want any custom fields beyond Agreement to map field data from the Agreement record to your content library, you need to configure the optional APTS_ContentConfig Admin object, as detailed in Set Admin Properties.
Assigning Custom Fields to Page Layouts
Now that you have created custom fields for your content, you must assign them a page layout. Which page layout is used determines which fields are displayed when for the content you are storing. You can use the pre-existing General layout, or you can create additional layouts to display Content Version data.
- Go to Setup > Customize > Salesforce Files > Record Types.
- Click New to create a new record type with its own Library Content Version Layout.
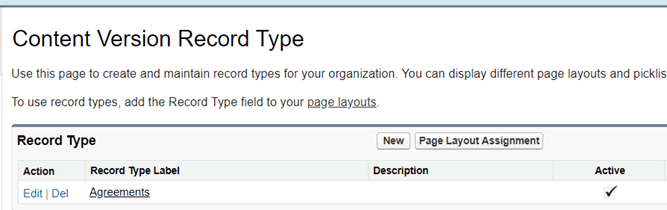
- Create the record type "Agreements" and assign it to profiles you want to give access to Content Version data.
- Ensure that you select the Active checkbox.
- Repeat steps 2 – 4 to create additional Content Version Record Types as needed.
- Go to Setup > Customize > Salesforce Files > Page Layouts.
- Click New to create a custom layout and name it "Agreements."
- Click Edit next to the General layout.
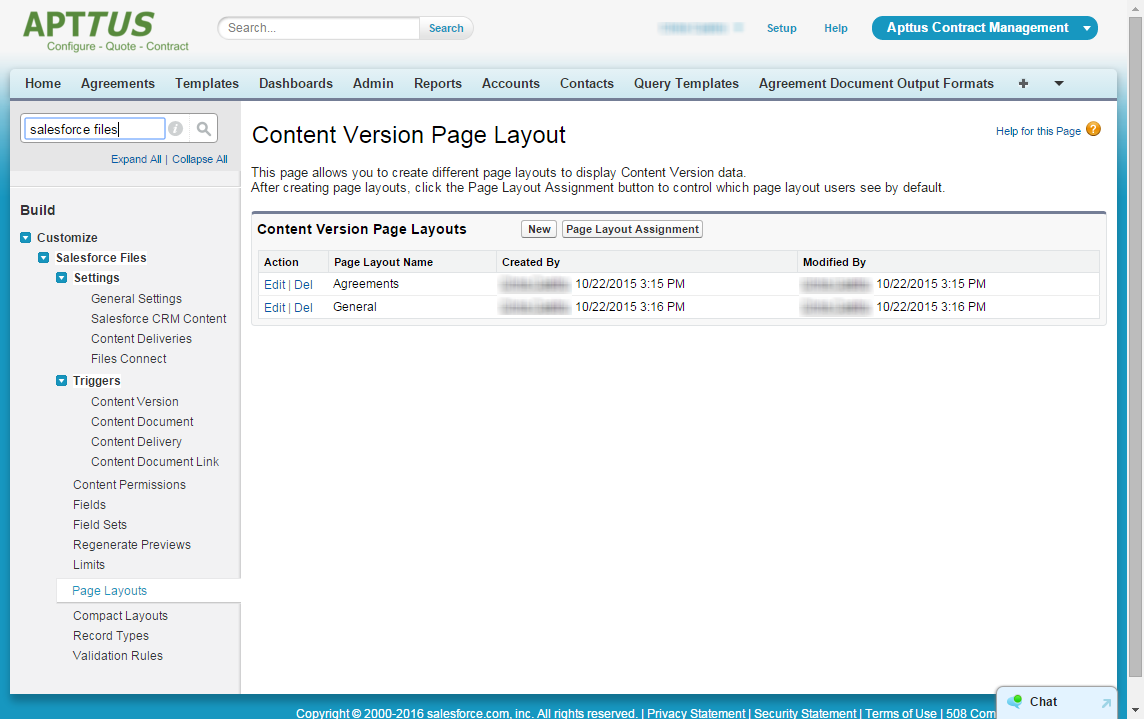
- Add the new Agreement lookup field and any other Content Version fields you want to add to the General layout.
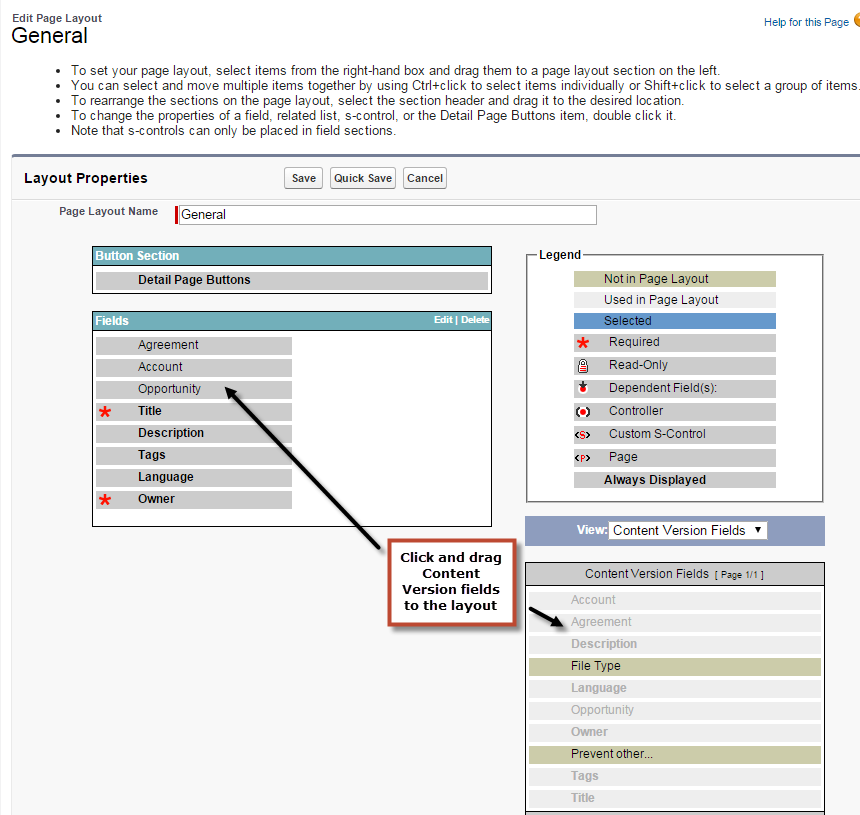
- Click Save.
- Repeat steps 7 – 9 for the Agreements layout.
Configuring the Libraries Tab
You now need to create the content libraries that will hold your documents. You can create as many content libraries as you want. Your initial content library will be the default library for stored agreements when no agreement rules are applied. You can create additional libraries for content routed using agreement rules.
- Go to the Libraries tab (click + and click Libraries).
- From "My Libraries," click New to launch the New Library Wizard.
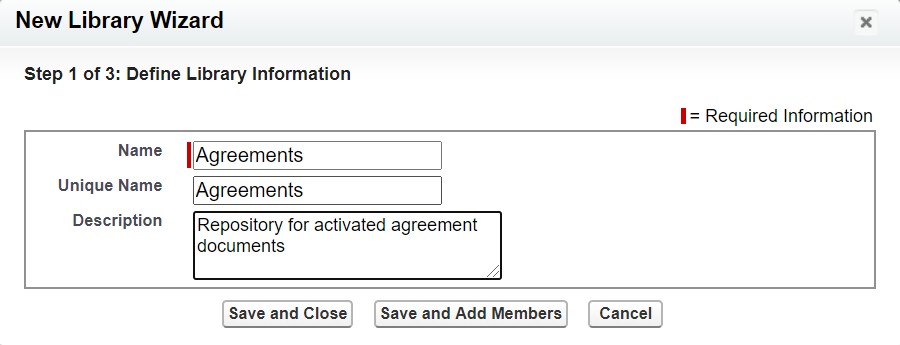
- Enter the name you want to use for your library (e.g., "Agreements") and a description (e.g., "Repository for activated agreement documents") and click Save and Close.
- From "My Libraries," click on the library name.
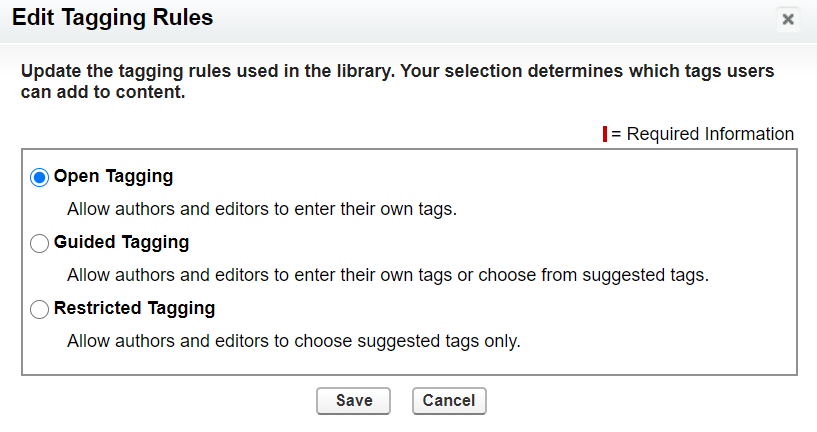
- Click Tagging Rules to edit tagging rules for your library. Click Save to save any changes.
- Click Record Types to assign content version record type restrictions to your library.
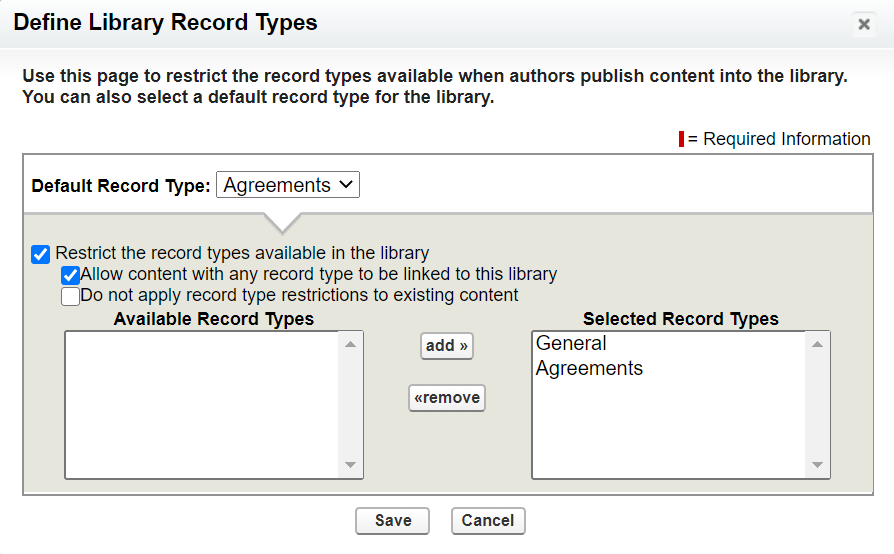
- Choose which record types to restrict to your library. Be sure to add the Record Type you defined in the previous section.
- Click Save.
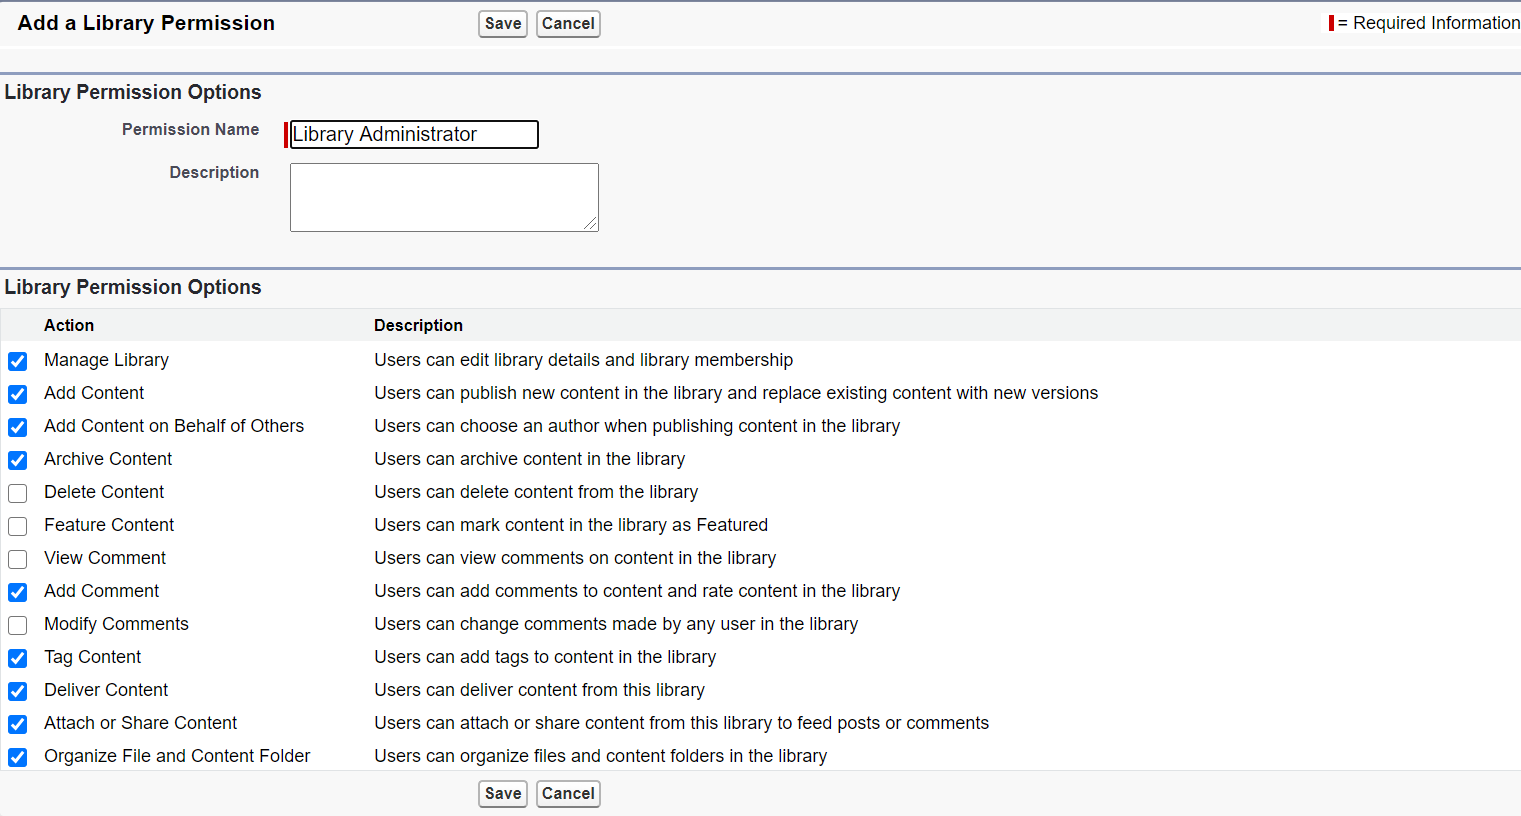
Configuring Library Permissions
- Go to Setup > Customize > Salesforce Files > Content Permissions.
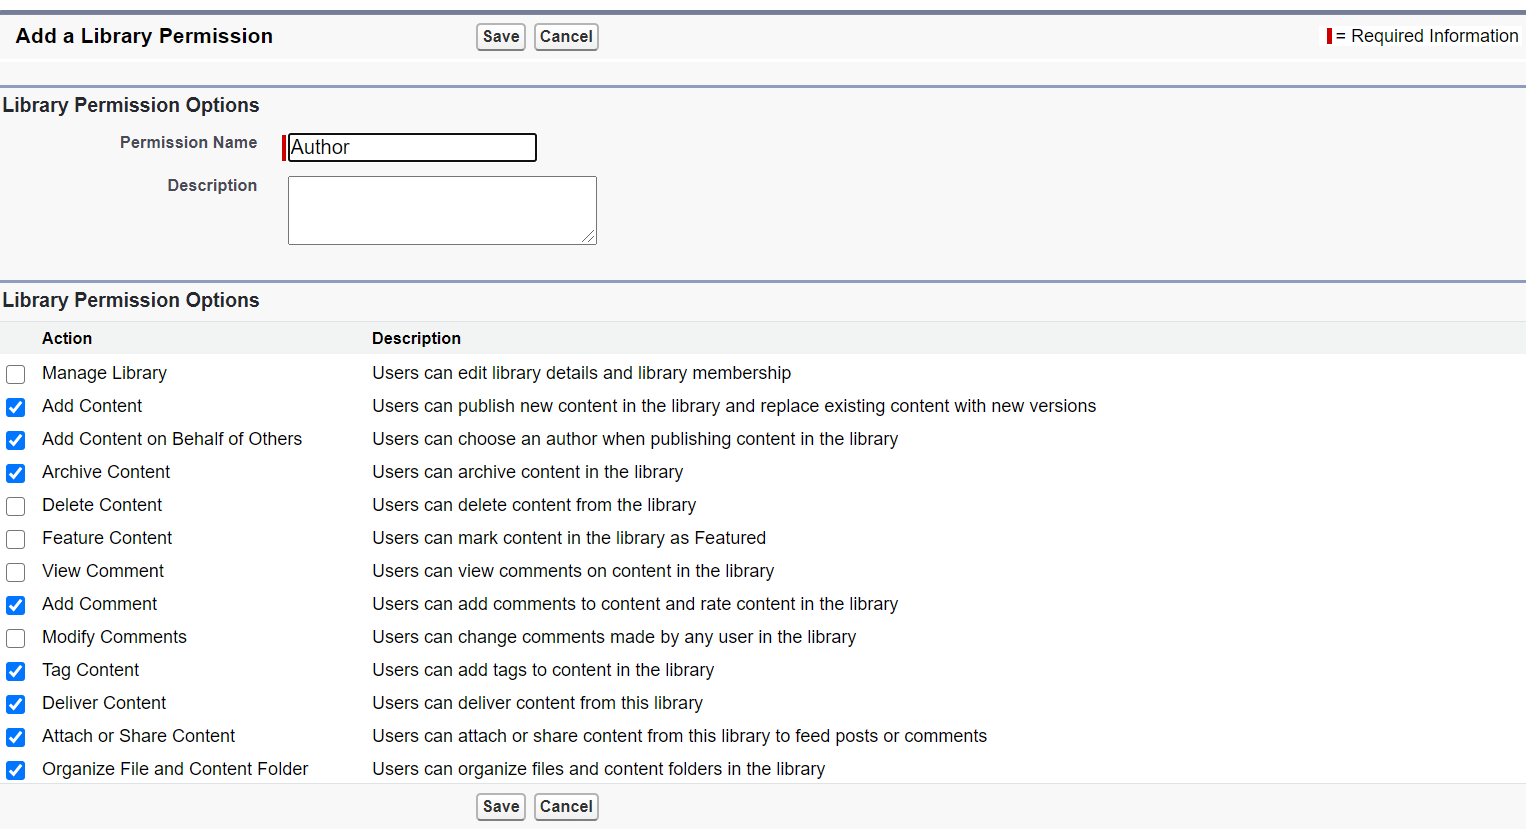
- Click the Edit action for the Author Library Permission Name. Ensure that the following permissions are selected:
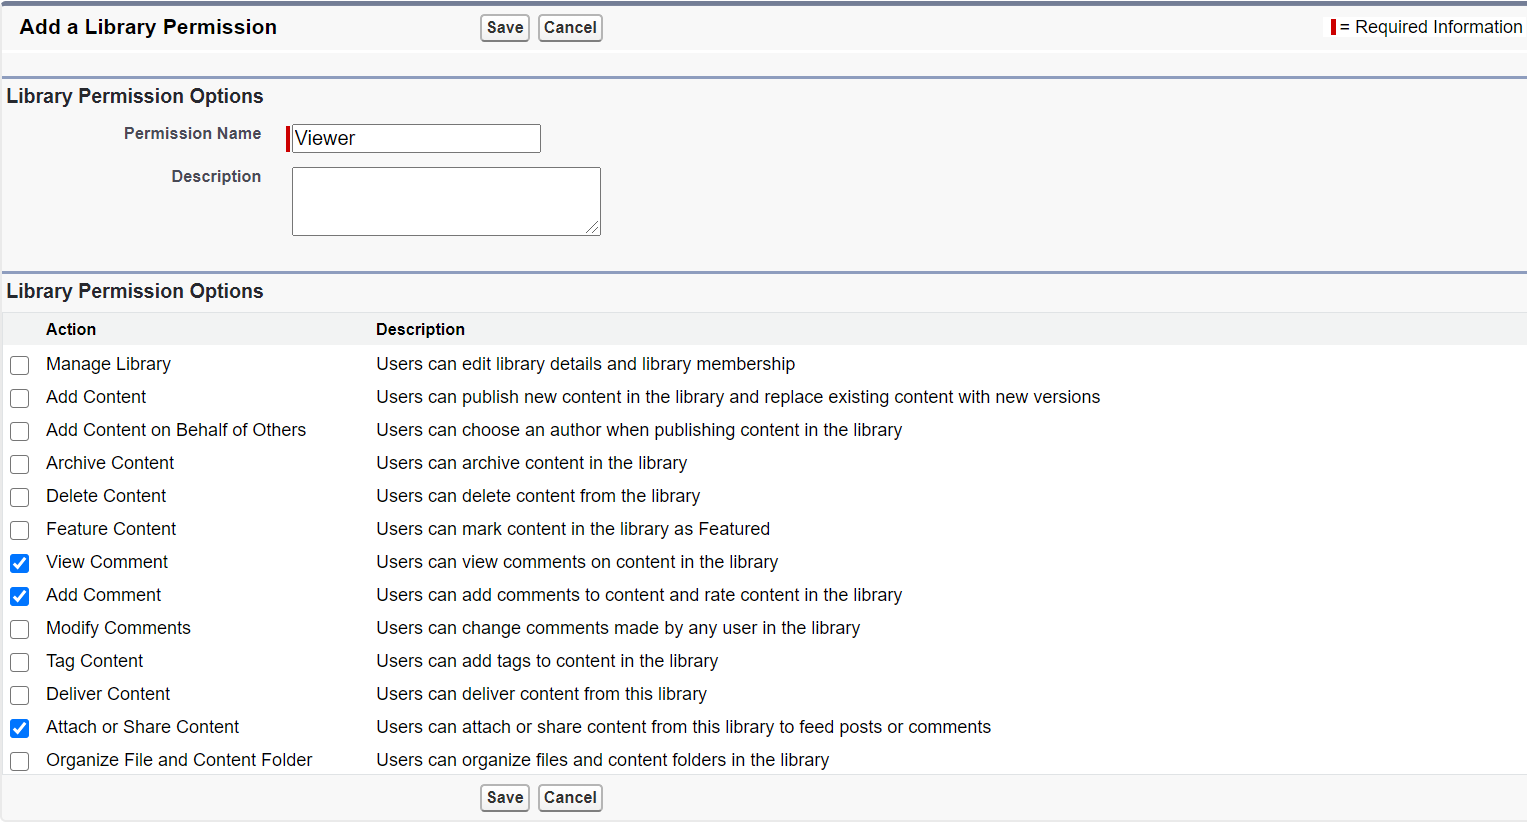
- Click the Edit action for the Viewer Library Permission Name. Ensure that the following permissions are selected:
- Click the Edit action for the Library Administrator Library Permission Name. Ensure that the following permissions are selected:
- Go to the Libraries tab.
- From "My Libraries," click on the library name.
- Click Edit Members to choose which members have access to this library.
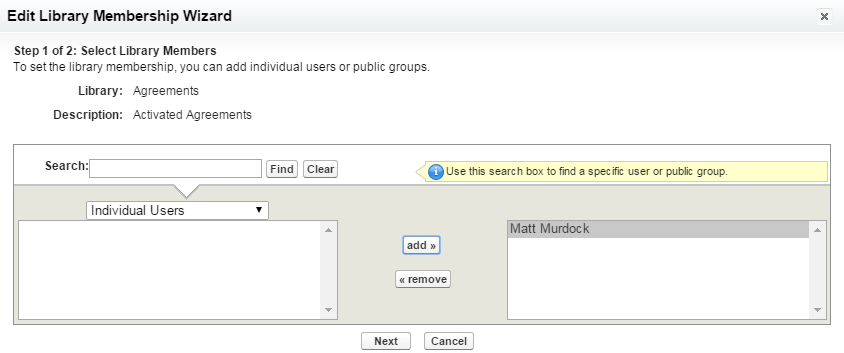
- Add a user and click Next to choose which permission profile to apply to the library members you added. Remember, members must at least have "Author" permissions to publish documents to the library.
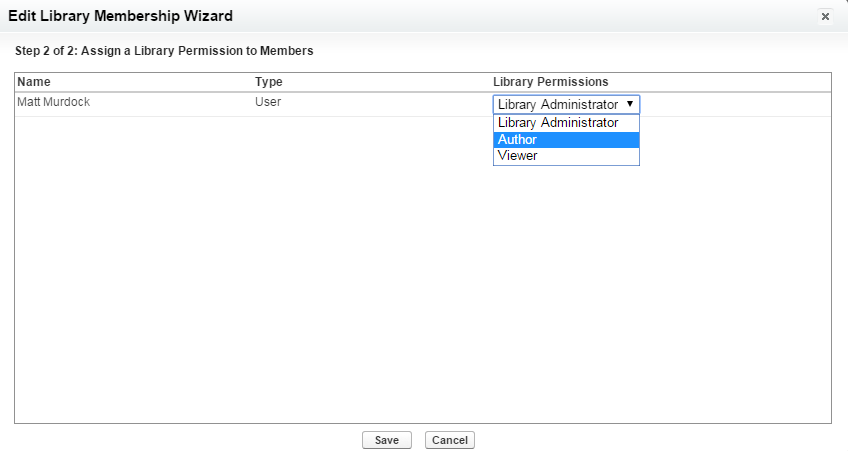
- Click Save. Your content library is now ready to use! Repeat the process to create additional libraries. Route content to specific libraries using Agreement Rules to Route Content.