Download PDF
Download page Creating Products.
Creating Products
A Product in CPQ terminology is a product or service that can be set up to be sold on its own as a standalone product or options of other products. Products or services are set up as standalone, bundle, or options of other products. You can associate a product with a category or a price list. If you created an option product, you must first associate it with an option group.
- Standalone - This is an individual product that can be sold on its own.
- Bundle - Any product that has other products (options or bundles) associated with it.
- Options - This is a product that can be sold with a bundle product only through an option group.
To create a product
- On App Menu, click Apttus CPQ Admin and then click the CPQ Admin tab. The new admin console is launched.
- On the Products menu, click Manage Products. Click New Product. The product details page is displayed. Details tab opens by default.
Enter the following product information, as required.
Option Description Product Name Enter a name for the product. Product Code The Product Code can be an internal code or a product number to identify the product within your organization. Product Family Enter a Product Family to categorize the products. If the required Product Family is not displayed in the list, you must add a picklist value in the Product Family field on the Product object. For more information refer to Configuring Product Families. Uom Select a unit of measurement. Product Description Enter a description of the product. This description is displayed when the user clicks the product name on the catalog page. Disable Bundle Expansion Select this checkbox to disable the expansion of the bundle or a sub-bundle on the Cart page. This does not allow the Sales Rep to expand the bundle to view the options and secondary line items. If you only disable the expansion of a sub-bundle, the Sales Rep can still expand the parent bundle.
You must create this field in the Product object. The checkbox is only considered if the Configuration Type is Bundle and Has Options is selected. Otherwise, CPQ does not disable expansion.

You must create this field on the Product object. Refer to Configuring Bundle Expansion on Cart Page.
Configuration Type Select one of the following types of product: - Standalone
- Bundle
- Option
Must Configure Indicates that the user has to configure a product to add options or attributes or both. The Configure button is the only option available on the Catalog page. When you select Must Configure, you must also select either Has Options, Has Attributes, or both. Clearing the checkbox allows an end user both the options; either add the product to cart directly or configure the product with attributes or options, or both. Has Options Indicates a product as a bundle that has options (bundles/options). You can associated options and option groups to the bundle on the Structure tab. Options and Options groups are not displayed on the Configuration page, is this disabled. Has Attributes Indicates that the product has attributes associated to it. During the quote creation process, the end user can enter values for those attributes. Using the product attributes administration tool, you can associate product attributes to products. Active Indicates the product is active. The Product is not displayed on the Catalog page if this setting is not selected. Product Type Select a type of product. For example, Equipment, Service, and so on. Has Search Attributes Indicates that the product has search attributes and is useful for searching related products based on product attribute values. Renewal Lead Time Enter a value when the renewal quote must be created for this product after an order is activated and an asset is generated.
By default, the value is 0, which indicates that the renewal quote is created immediately after the order is activated, with the same number of Line Items in the order. If you specify 30, the renewal quote is created 30 days before the Asset End Date.
The fields on the details page are customizable. For more information refer to the Navigating the CPQ Admin User Interface topic.
- Click Save.
A product is created and saved.
Associating a Product with Option Group
- On App Menu, click Apttus CPQ Admin and then click the CPQ Admin tab. The new admin console is displayed.
- On the Products menu, click Manage Products. Select the Product created in the previous section. The product details page is displayed. The Details tab opens by default.
- Click the Associations tab.
- Drag and drop the required Category from the Category Hierarchy or
Click New Category to create a new category and click the check box next to the required option group you want to associate the new product with. Enter the following product information, as required.
Field Description Name Enter a name for the Option Group. Label Enter the label for the Option Group. Default Search Category When selected, the Default Search Category displays the product by default under the category or sub-category on the catalog page. If not, the user has to first select the category from the category panel or the browse section to see the product. Expanded By Default Indicates that the hierarchy is expanded at all times on the catalog page Include In Totals View Indicates that the mode is displayed in the totals view on the shopping cart Hide All Search Filters Indicates that all the search filters in Narrow Your Search and Refine Your Search on the Catalog page are hidden. Search Filter Fields Selected filter fields are displayed in the Refine Your Search section. Select fields from the dropdown menu, and click anywhere on the screen once you have selected all the desired fields.
Long Description The Long Description is displayed for categories with bundle products on the Options page. Upload Image You can add an image like a symbol or an icon for the sub-category. Click Browse to select an image from your local machine. - Click Save.
Creating and Associating Attributes with the New Product
You can create attribute groups and associate them with your product based on your requirements. For more information, see Creating and Maintaining Attributes.
Creating and Associating Product Rules with the New Product
You can create product rules for your product based on your requirements. For more information, see About Manage Rules Page.
Adding Collateral to the New Product
You can add multimedia such as icons, symbols, or images to your product from your local system. This enables sales representatives to identify the correct image while adding and configuring the products on the catalog page.
To add collateral to the new product
- On App Menu, click Apttus CPQ Admin and then click the CPQ Admin tab. The new admin console is displayed.
- On the Products menu, click Manage Products. Select the Product created in the previous section. The product details page is displayed. The Details tab opens by default.
- Click the COLLATERAL tab. A new pop-up window is displayed where you can add collaterals by uploading a multimedia file, using a multimedia URL address, or using embed code. By default, the UPLOAD FILE tab is selected.
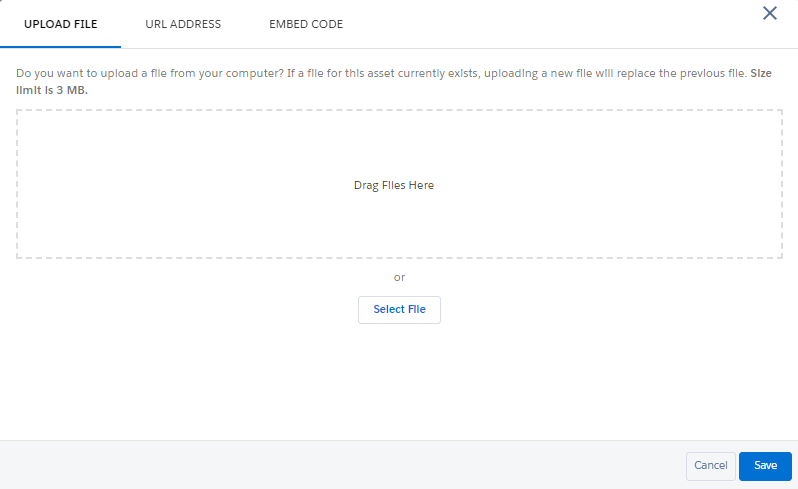
- To upload a multimedia file.
- Using UPLOAD FILE:
- Drag and drop the multimedia file or
- Click Select File and choose the required file from your local system.
- Using URL ADDRESS:
- Click the URL ADDRESS tab.
- In the URL field, enter the multimedia file URL address.
- Using EMBED CODE
- Click the EMBED CODE tab.
- In the Embed Code field, refer to the sample embed code and enter the multimedia embed code.
- Using UPLOAD FILE:
- Click Save.