Download PDF
Download page Configuring DocuSign Parameters in Conga Platform.
Configuring DocuSign Parameters in Conga Platform
This topic explains the steps required to integrate DocuSign with Conga Platform.
Prerequisites
The following information from your DocuSign Account:
- DocuSign admin user API ID
- DocuSign API account ID
- DocuSign auth server
- Integration key
- DocuSign account base URL
- DocuSign account ID
- Private key
- Public key
To set up DocuSign
- Log in to Conga Platform.
- Click the menu icon (
 ) on the top right corner and go to Admin Console.
 - Click Integrations.
- Navigate to the eSignature API Connections tab.
- Under the Action column, click Configure or Edit for DocuSign. The DocuSign Setup page opens.
Enter the following details:
Field Name Description DocuSign Admin User API ID
To get the DocuSign admin user API ID, log in to DocuSign as an administrator, go to Settings > Apps and Keys and enter the user ID value in the DocuSign Admin User API ID field. DocuSign API Account ID
To get the DocuSign API account ID, log in to DocuSign as an administrator, go to Settings > Apps and Keys, and enter the API account ID value in the DocuSign API Account ID field. DocuSign Auth Server
Enter https://account.docusign.com.
Integration Key
To get the integration key, log in to DocuSign as an administrator, go to Settings > Apps and Keys, and enter the integration key value in the Integration Key field. DocuSign Account Base URL To get the DocuSign account base URL, log in to DocuSign as an administrator, go to Settings > Apps and Keys, and enter the account base URI value in the DocuSign Account Base URL field. DocuSign Account ID To get the DocuSign Account ID, log in to your DocuSign account and, click your profile image in the upper-right corner. Your account number is under your name and/or org name in the drop-down menu. Copy and add it to DocuSign Account ID field.
Private Key and Public Key To get the private and public Keys, see Creating Apps and Keys in DocuSign Account. - Turn on the DocuSign Templates Enabled toggle button to enable the Apply Template dropdown to the Recipients segment of the eSignature process. Turn off this toggle button to display recipients list, email subject and email message from the default template configured in CLM.
- Turn on the Retrieve as Combined Document toggle button to enable the generation of a single PDF document containing all documents that were signed during the eSignature process.
Turn on the Active toggle button to make the DocuSign option available for selection while sending documents for eSignature.
When the Default Option for Signature toggle button is turned on, you can not turn off the Active toggle button.
- Turn on the Admin Consent toggle button to grant consent at the administrator level.
- Click Save. You are redirected to the DocuSign login page. Enter your email and password to log in.
- Select your organization, and click Access.
- Click Allow Access to grant consent.
- Keep the Admin Consent toggle button turned off to grant the consent at individual level.
- Click Save. You are redirected to the DocuSign login page. Enter your email and password to log in.
- Click Allow Access to grant consent.
The following are the prerequisites to grant consent at administrator level:
- Your account must include the Access Management with SSO feature. The administrative consent does not require that you install SSO, but you do need the product feature which includes SSO. For testing purposes, if your developer demo account does not include the feature, you can contact DocuSign at go-live@docusign.com and request that the feature be added to your account. Be sure to provide your Developer Demo Account ID.
- You must claim your email DNS domain via the DocuSign administration tool. A domain can be claimed both by the DocuSign developer demo account and DocuSign production account.
- Your users' email domains must match the claimed email domain.
- Your integration keys management account must be one of the accounts in the DocuSign organization.
- Turn on the Finalize toggle button to display the Finalize button to the users for adding fields for each recipient, when they send documents for DocuSign signatures. If turned off, the Finalize button is not displayed and users can only send the documents for signatures. In that case, the recipients have to drag and drop the required fields in the document after opening it from the email.
- Turn on the Send for Signatures toggle button to display Send for Signatures button to send documents for signatures without adding signature-related fields for the recipients. In that case, the recipients have to drag and drop the required fields in the document after opening it from the email.
You must turn on at least one of the above buttons i.e. Finalize button or Send for Signatures button.
Under Reminders and Expirations, you can set admin-level reminders and document expiration.
Toggle the Please set the custom reminder and expiration values button on and provide values for the parameters mentioned in the table below. These values will be considered and users will not be displayed an option to configure these parameters when they send documents for signature.
Note
If you toggle the button off then the users will be given an option to specify reminders and expiration related values at the time of sending documents for signature. For more information, see Sending Documents for eSignature with DocuSign.
If you toggle the button off but have specified the values for the below parameters, the system displays these values as default to the users when they initiate Send for Signature through DocuSign. They can override these values if needed.
If you toggle the button on but don't specify the parameter values, the system considers the values configured in the DocuSign account. For more information, see Configuring Reminders and Expirations in DocuSign Account.
Field Description Remind After Enter the number of days after you send the document to send a reminder to sign it. For example, if you send the document today and you enter the value as 5, a reminder will be sent to the signer after five days. Remind Every Enter the frequency, in days, of sending reminders until the document is signed. For example, if you send the document today and enter this value as 2, a reminder is sent every two days until the signer signs the document.
Expire In Enter the number of days after you send the document for the envelope to expire. For example, if you send the document today and enter the value as 365, the envelope will be valid for a year. Warn Before Expire Enter the number of days before document expiration to send the signer a warning. For example, if you set the value as 10 and the document is valid for a year, a an expiration warning is sent ten days before the expiration of the document.
- Click Save.
If you selected Admin Consent toggle button, you are redirected to the DocuSign setup page. DocuSign is configured in your org. To edit the configuration, click Edit under the Action column.
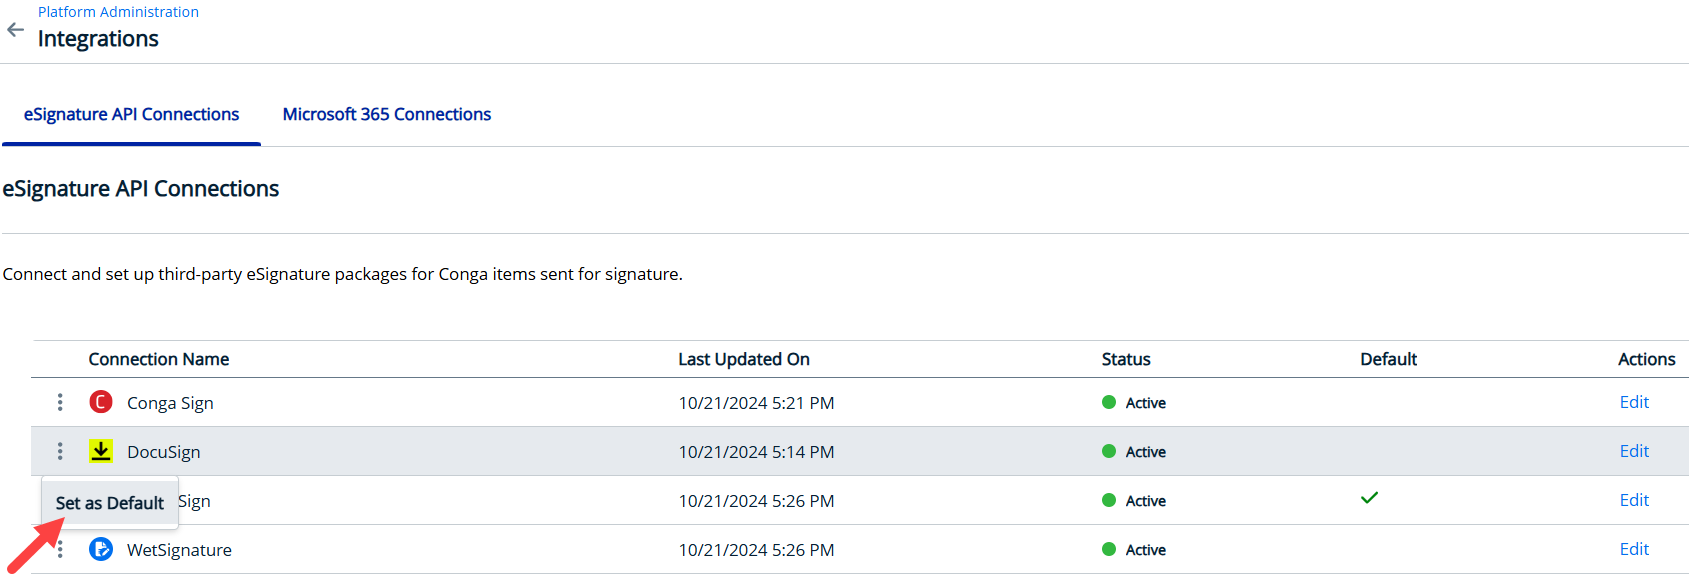
To set DocuSign as default option
You can set DocuSign as the default option for sending documents for eSignature.
Only one sign provider can be set as the default at any given time.
- In the eSignature API Connections tab, click More (
 ) icon for DocuSign.
 - Turn on the Default option for signature toggle button.
If another sign provider was previously set as default, it will be deselected.

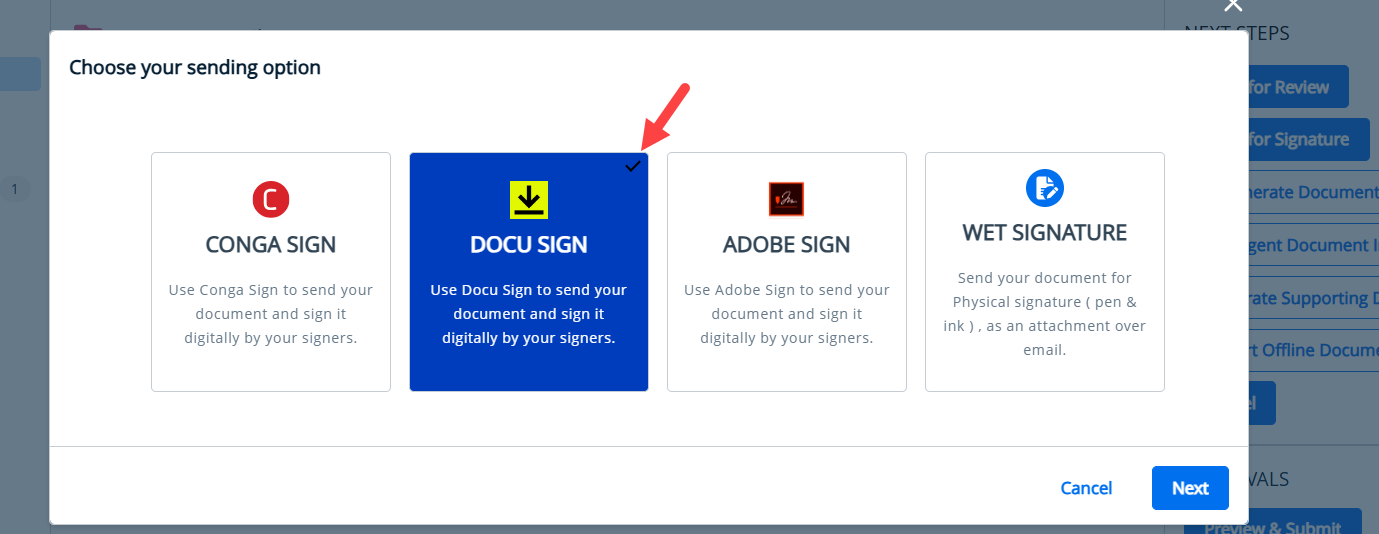
When users initiate Send for Signature, by default DocuSign is displayed as selected.
