Download PDF
Download page Setting Up Notifications.
Setting Up Notifications
For Max users to receive Salesforce notifications, set up notifications as follows:
Prerequisites
Download the zip file named “Max Implementation Package.zip” from the link you received from your Conga contact and save it to your local machine.
Ensure that embedded Max is setup in your Salesforce Org. For information on setting up embedded Max, refer to Max Setup on Salesforce.
Updating Named Credential
This is required only if the named credential includes "sendSfdcData".
Go to Setup → Named Credential.
- Search for APTSMD_MAX_Connection credential.
- Go to Apex Classes → APTS_getUserDetails class.
Update it with the latest version of APTSMD-getUserDetails.cls from the downloaded zip files.
Adding the Max Token Label
Go to Setup → Custom Label.
- Click User Interface → Custom Labels.
Click New. Enter the following values:
Short Description Name Value APTSMD_MAX_Token APTSMD_MAX_Token Enter the connected app ID, concatenated with the connected app secret.
For information on getting the connected app ID, refer to the Salesforce Create a Connected App documentation.
- Click Save.
Enabling Notifications
Go to Setup → Custom Notifications.
Click New. Enter the following values:
Field Values Custom Notification Name MaxNotification API Name MaxNotification Select Desktop and Mobile as supported channels. Click Save.
- Click Notification Delivery Settings in the Setup column.
Under Custom Notification Types, find MaxNotification, and click Edit from the drop-down menu.
Ensure that all boxes are selected and click Save.
Adding Custom Notification Flow
Go to Setup → Flows.
- Click New Flow.
- Select the Autolaunched flow and click Create.
Click and drag Action in the main window.
Select Notifications.
Click the search bar, then click Send Custom Notification. The Send Custom Notification edit screen appears.
- Click Edit next to Custom Notification Type ID.
- Click New Resource and create a new resource as follows:
Select Variable as the resource type.
- Set the API name to
NotifTypeId. Select Text as the data type.
Select Available for Input.
- Click Done.
Repeat step 8 for:
The Notification Body. Set the API name to
NotifBodyThe Notification Title. Set the API name to
NotifTitle.Recipient IDs. Set the API name to
NotifRecipients. This variable must be a collection, so check the Allow multiple values checkbox.The Target ID. Set the API name to
NotifTarget.
Connect the Start node to the Action node
Click Save and name the flow.
After saving, click the Activate button
Creating Apex Classes
Using the zip files you downloaded, create the apex classes in the following order.
APTSMD_JITNotificationMaxResponse
APTSMD_NotificationMaxInput
APTSMD_NotificationObject
APTSMD_MaxQueryResponse
APTSMD_JITNotificationInput
APTSMD_SendMaxNotification
APTSMD_ProcessMaxTimedNotification
APTSMD_MaxResolveQuery
Creating Apex Triggers
Create two apex triggers as follows:
Agreement (Apttus__APTS_Agreement__c)
- Go to Setup → Object Manager.
Go to the Agreement object.
Select Triggers. Click New.
From your zip file, copy TestAgreementInSignature.tgr from Apex/Notifications and paste it.
Click Save.
Review Cycle (Apttus__ReviewCycle_c)
- Go to Setup → Object Manager.
Go to the Review Cycle object.
Select Triggers. Click New.
From your zip file, copy ReviewCycleJITTrigger.tgr from Apex/Notifications and paste it.
Click Save.
Scheduling Flows
Go to Setup → Flows.
- Click New Flows.
- Select Schedule-Triggered Flow. Click Create.
- Drag Action to the main window.
Set Filter By to Type. Click Apex Action.
Click the search bar. Select APTSMD_MaxResolveQuery.
Enter the following values for each flow:
Notification Flow
fieldToSave
notificationType
query
PendingApprovals
Apttus_Approval__Initial_Submitter__c
pendingApprovals
show all the agreement approval requests that were created before yesterday and are assigned
ReviewCycleInProgress
CreatedById
reviewCycleStatus
pull up review cycles in the last 30 days that are in progress
Connect the Start Node to Action Node. Set the schedule and activate it.
Creating Custom Object: CongaEvent
Go to Setup → Object Manager → Create.
Enter the following details:
Field Description API Name Conga_Event_c Singular Label Conga Event Deployment Status Deployed Create the following fields:
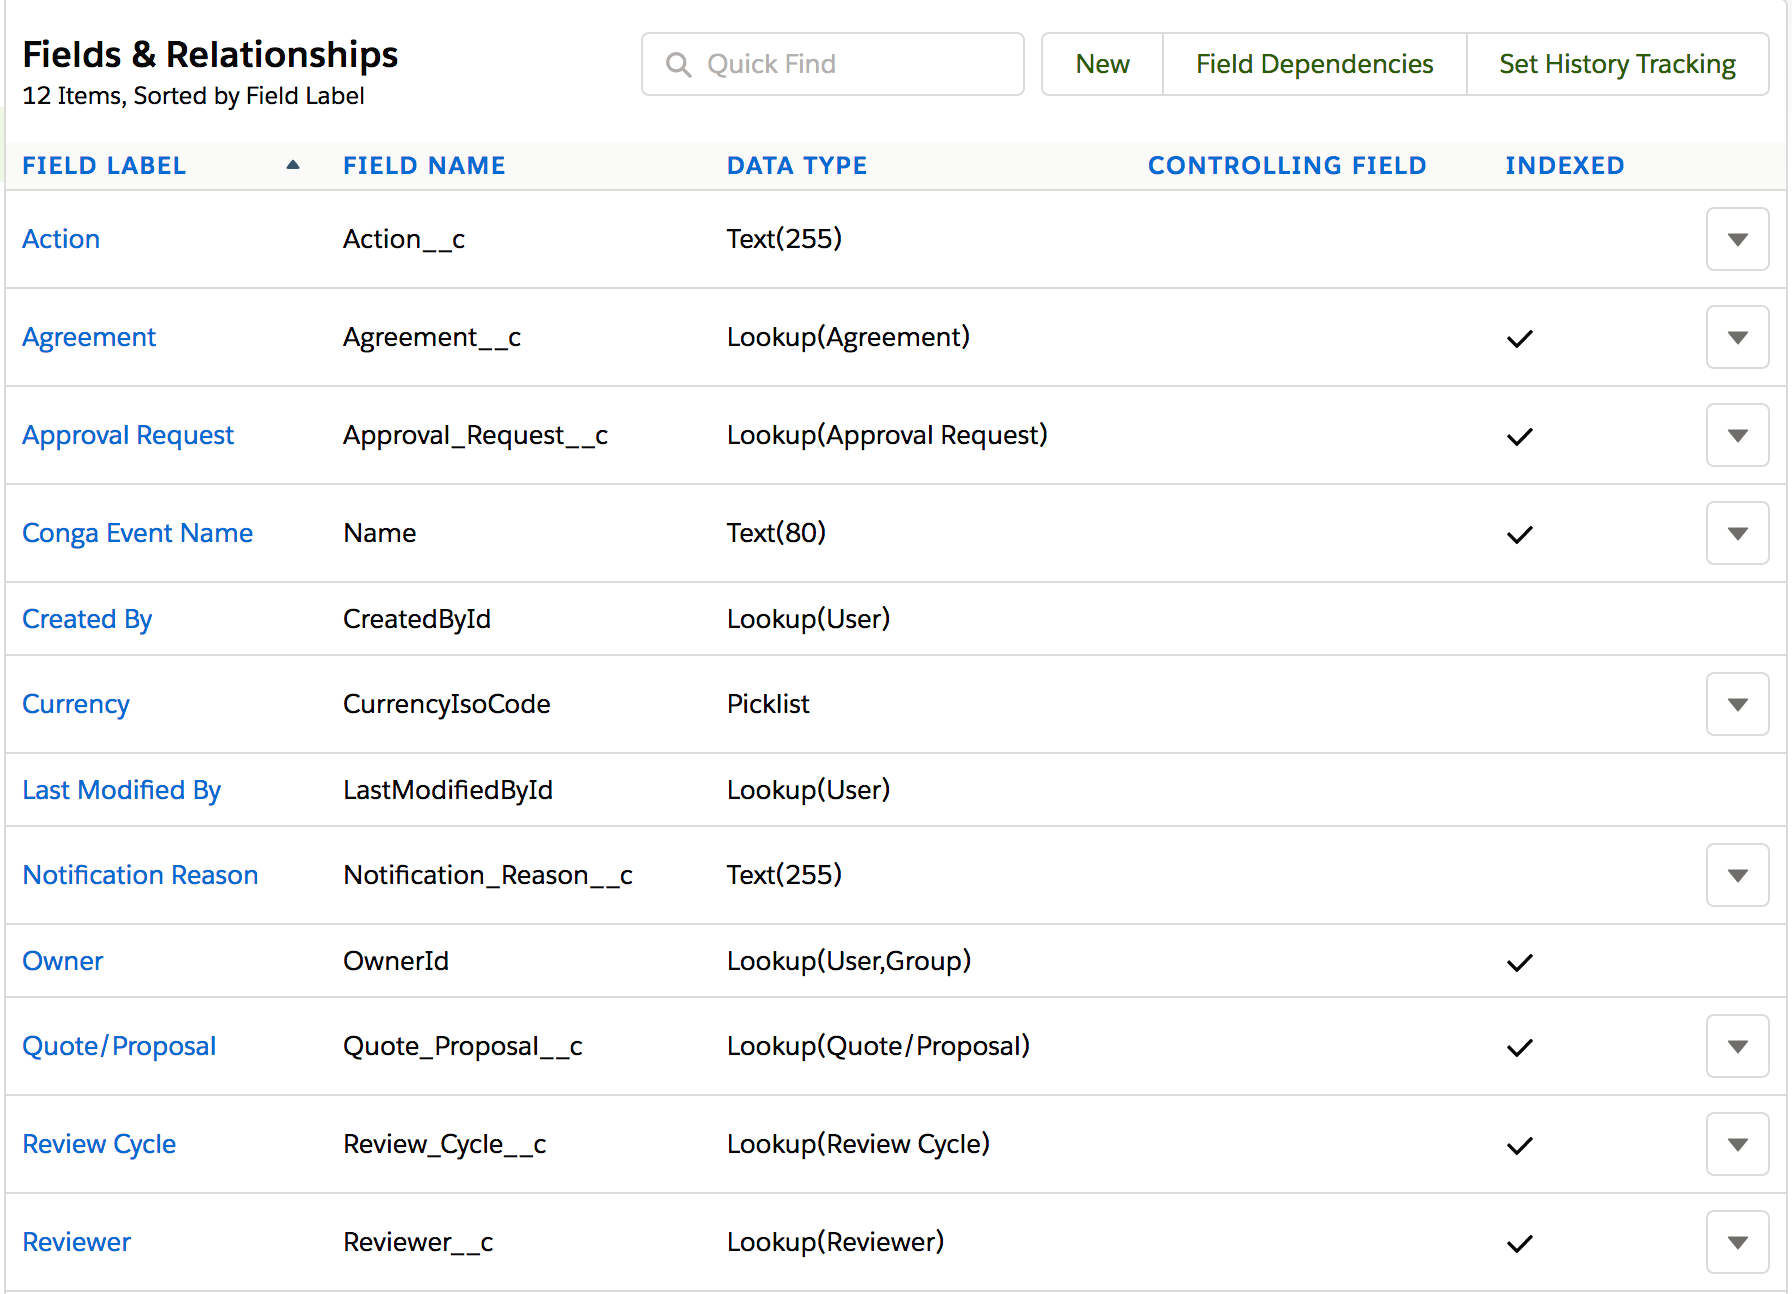
Create a button as follows:
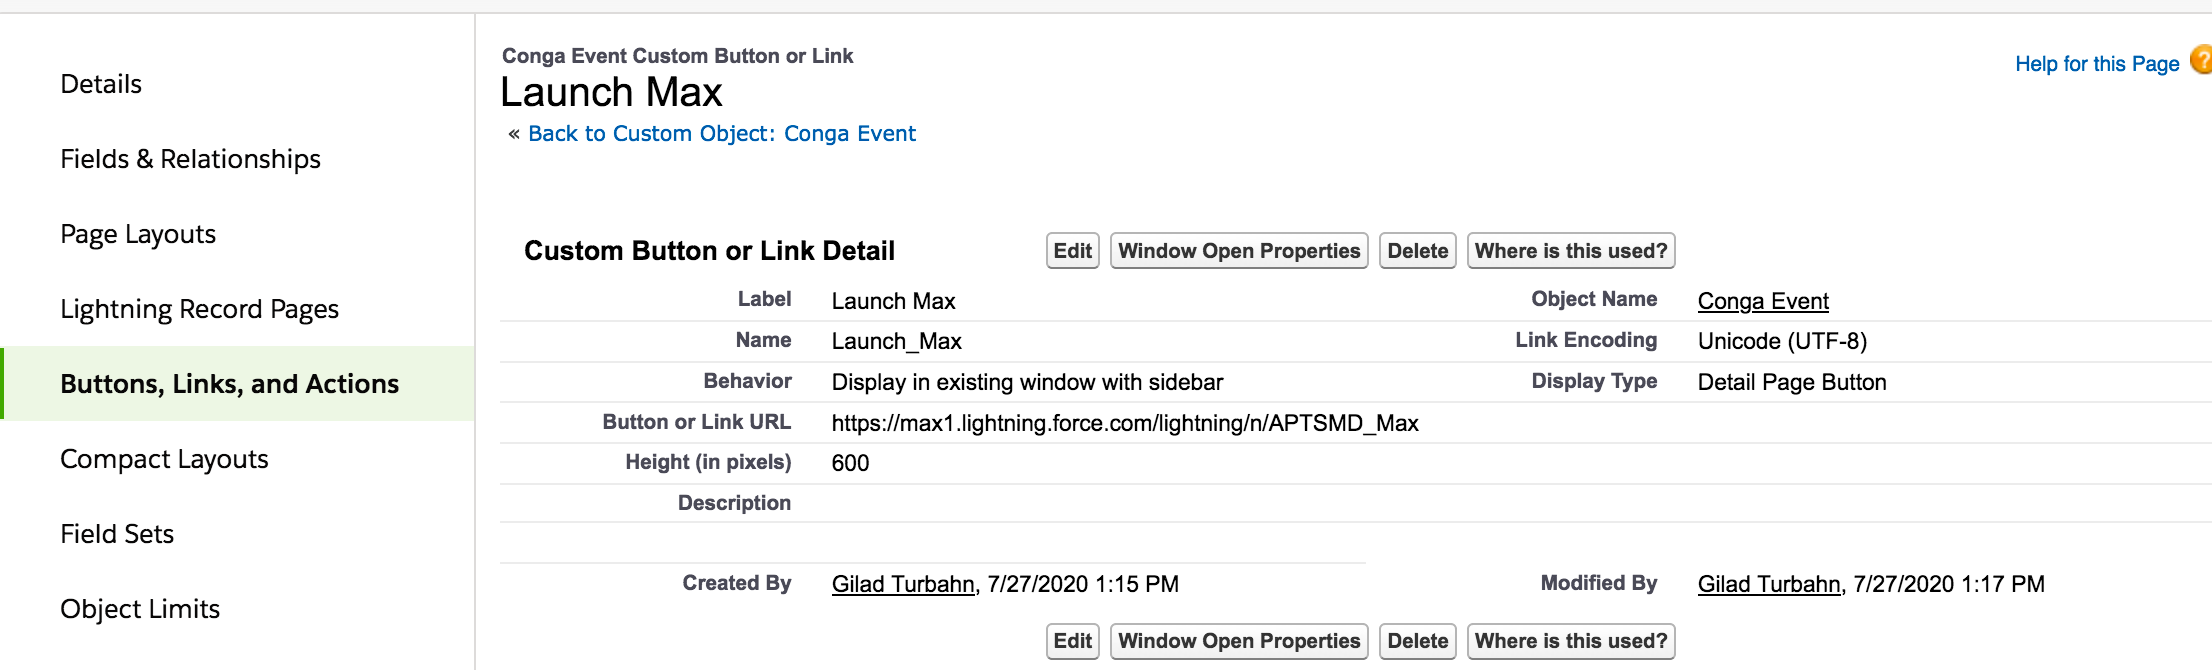
Under Conga Event Layout, add the created fields and buttons.
Notification setup is complete. To enable notifications, refer to Notification Control Center.