Download page Navigating the TurboEngines Callbacks Administrator User Interface.
Navigating the TurboEngines Callbacks Administrator User Interface
This section provides information on navigating the TurboEngines callback administrator user interface.
Log in to the Salesforce org.
Click Switch to Lightning Experience.
Open the Salesforce App Launcher (Lightning) and launch the TurboEnginesAdmin app.
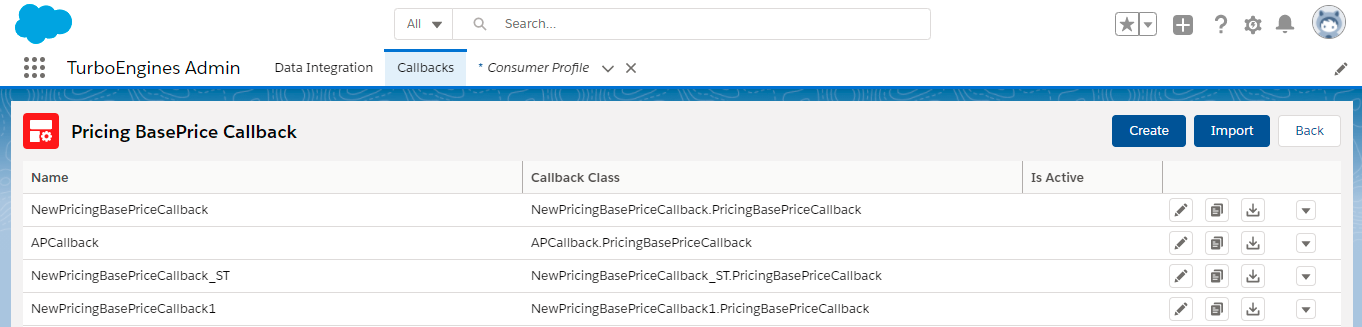
Click the Callbacks tab. A list of callbacks is displayed.
If a callback is enabled, the project name is displayed in the Callback Name column.
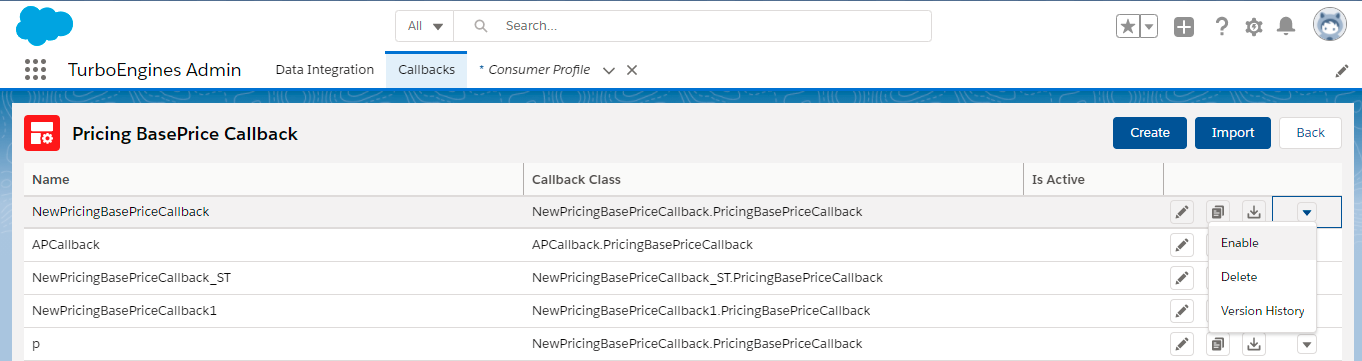
Click Manage under the Actions column for the required callback to configure it. The detail page of the selected callback with a list of projects related to the callback is displayed.
Click the Code Difference icon () to see the difference between the original and modified code. The differences are highlighted for easy identification.
At the bottom of the code editor panel:
Click the Collapse icon () to show the panel and Expand icon () to hide the panel.
Output: This tab displays the output of your code. Whenever you execute a method, the returned result is displayed in this tab.
Input: This tab displays the input of your code. You can verify what values CPQ has set for parameters or what values CPQ retrieves by reference for a parameter when you execute some code.
Profiler: This tab displays the order of execution of methods and performance of methods. You can also check how long CPQ takes to execute each method.
Console: This tab displays the log statements that you have added in the callback code when you test the callback code using the authoring UI.
Managing Files and Folders in the Explorer Panel of the Edit Project Page
This section describes how you can manage files and folders in the Explorer panel of the edit project screen. You can click the Collapse icon () to show the panel and Expand icon () to hide the panel.
Adding an Item
Select a folder if any and click the Add Item icon (). The Add Item pop-up is displayed.
From the Type drop-down, select what type of item you want to add. The supported values are File and Folder.
Enter a name for the item in the Name field.
Click Create.
Renaming an Item
Select a file to be renamed.
Click the Rename Item icon (). The Rename Item pop-up is displayed.
In the Name field, enter a new name and click Save.
Deleting an Item
Select a file to be removed.
Click Delete Item icon (). The Delete Item pop-up prompting you to confirm deletion is displayed.
Click Yes to delete the item.
If there is only one item, the Delete Item icon () is disabled. You must have at least one item on the edit project page.
Testing a Callback Method by Executing the Code
CPQ allows you to test the code you have written for a callback method before saving it. In the Test Run panel, click the Collapse icon () to show the panel and Expand icon () to hide the panel.
From the Class drop-down, select a class. It displays all classes available in the project callback.
From the Method drop-down, select a method. It displays all methods currently available in the class. You can execute a method of that particular class. CPQ does not display private methods on the Method drop-down.
In the Parameters field, enter the code.
Click the Refresh project metadata icon () to refresh project data. For example, if you have an unsaved method and want to execute it for validation, click
the Refresh project metadata icon. The new method is listed in the Method drop-down.