Download PDF
Download page Approval Flows.
Approval Flows
The Approval Flows screen orders approval flows for convenient review and maintenance. From this screen you can find and select approval flows for review, and create, edit or delete flows. Flows consist of reviewers and rules being applied in the defined order. See Approval Rules for more on these predefined criteria.
To access the Approval Flows window
- Click Shared Apps > Approvals in the left navigation bar:
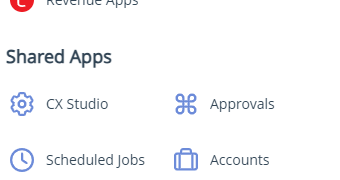
- If the Approval Flows window does not open by default, click Approval Flows from the left-side menu to open it.
From here, you can create, edit, or delete an approval flow.
To create an approval flow
- Click the Create New button.
- In the New Approval dialog box, enter the process name, the object type (what sort of thing is being approved), and a brief description of the new approval flow.
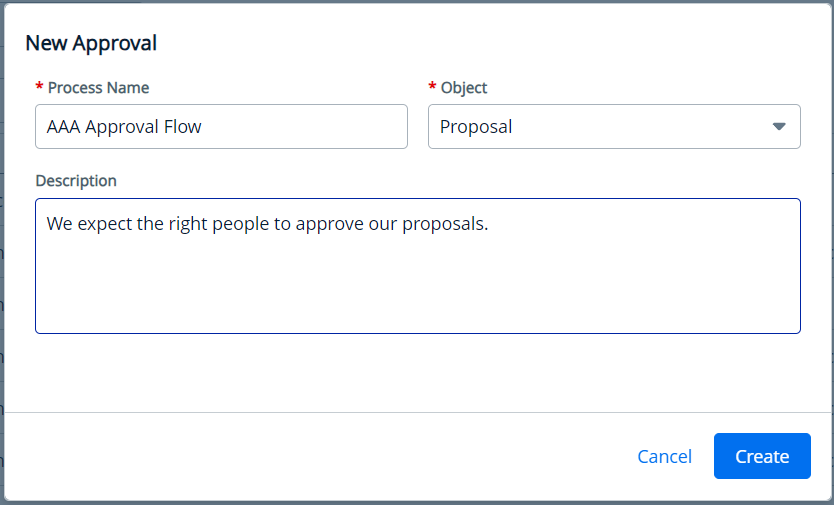
- Click Create, opening the Approval Flows window to the Setup tab.
- An approval process consists of at least one step, with a person or procedure deciding whether and where the next step will occur. For each step, click the step box in the Setup window or the plus button in the appropriate location in the Approval Flows Setup window.
- For each step:
- You must name the step: enter a step name in the Step Name field.
- You may describe the step: enter a brief description in the Step Description field.
- You must define the step type: select whether the step is a standard step, a child process, or a sub-process by selecting from the Step Type pull-down menu. When you do this, additional options will appear based on the step type you have selected.
- Selecting the Standard step type raises the required Assignee Type and Assignee fields, and the optional Assignee Description field. It also offers the following toggles: Step Auto Complete, Send Email, Notify Only, Skip Unresolved Assignee, Step Level Comments. See Standard Step Type Options.
- Selecting the Child Process step type raises the required Context Object and Approver Rule fields. See Child Process Step Type Options.
- Selecting the Sub Process step type raises the required Approver Rule field. See Sub Process Step Type Options.
- Flip the Step Level Comments toggle to enable reviewers to make comments when they interact with this step in the approval flow.
- You can search user names in the Carbon Copy (cc) field to nominate notification recipients.
- You can shape the flow using the Step Dependencies field to select a dependency that must be fulfilled before a given step can occur. A step dependency is a step that must be completed before the present (dependent) step becomes active. If a flow is established without dependencies, all flow steps occur simultaneously. Using this logic, you can give two different steps a common dependency to make them occur at the same stage (parallel processes) in a flow.
- When you have completed the flow, click Save.
Standard Step Type Options
Standard step types have a single approver, and cannot use rules.
When you select the standard step type in step 5. c. above, these options appear:
- Step Auto Complete: Fill in values for the user when the authorization or review is presented to them.
- Send Email: Notify reviewer of an approval step with a call to action.
- Notify Only: Notify recipient of approval step with no call to action.
- Skip Unresolved Assignee: Allow the approval flow to continue when an assignee cannot be reached.
Child Process Step Type Options
Child processes require a preconfigured rule to be available for inclusion before you can configure them.
When you select the Child Process step type in step 5. c. above, these options appear:
Context Object. You must choose one of the following from the Context Object pull-down menu:
- Contract: The step pertains to a contract.
- Contract Clause: The step pertains to a contract clause.
- Clause Approval: The step requires a contract clause to be approved.
Approver Rule. You must assign one approver rule. Enter the name of the rule you will apply here. Rule name auto-completion begins when you enter three characters.
Sub-Process Step Type Options
Sub-processes require a preconfigured rule to be available for inclusion before you can configure them.
Approver Rule. You must assign one approver rule. Enter the name of the rule you will apply here. Rule name auto-completion begins when you enter three characters.
To edit an approval flow
- Find an approval flow from the Approval Flows window and click the More (kebab) icon
- Select Edit from the pull-down menu, raising the Setup window.
You can edit, add, or delete individual steps in a flow. The steps appear on the screen in entry order until you set dependencies.
- Add steps as described in step 5 of To create an approval flow.
- When a step has been saved and is written to the Approval Flows Setup window, you can further customize it by clicking the More (kebab) menu and selecting from the pull-down menu:
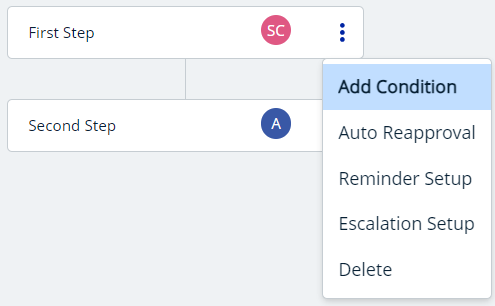
- Add Condition: This applies conditional logic to a step. For example, require this step if permission if an opportunity exceeds a certain threshold; else skip to next step.
- Auto-Reapproval: If the assigned reviewer has approved this step once at the present value, their reapproval is assumed and the approval continues. For example, if a sales rep has approved a 50% discount in the past, their approval of a 40% discount on reapproval can be assumed for the current reapproval cycle.
- Reminder Setup: This sets an email reminder at a given point in the approval cycle.
- Escalation Setup: Sets an escalation path and timing. For example, if a sales manager fails to approve a deal after 5 days, escalate to the VP of Sales.
- Delete: This deletes the step only.
To delete an approval flow
- Find an approval flow from the Approval Flows window and click the More (kebab) icon.
- Select Delete from the pull-down menu.
- Click Delete from the confirmation popup.