Download PDF
Download page Adding Lines Manually to System-Generated Invoices.
Adding Lines Manually to System-Generated Invoices
It is often necessary to add lines manually to a system-generated invoice to accommodate the following business requirements:
- To invoice customers for additional costs incurred at the end of each month.
- To bill customers for miscellaneous charges based on a pre-existing contract and incurred from time to time.
- To accommodate customer requests for adjustments to the invoice amount.
The benefit of adding the manual lines is two-fold, first, you have a single invoice to cater for all the charges incurred in a particular time period and secondly, you do not have to create a quote or order line to accommodate any miscellaneous charges.
Prerequisites
- The custom setting, Add Manual Lines To An Invoice is set to
True. - The invoice is in Draft status. For approved invoices, revert the status to Draft.
- The invoice type is either Standard, Ad Hoc or Credit.
To Add Lines to an Invoice
- Open the invoice to which you want to add lines manually.
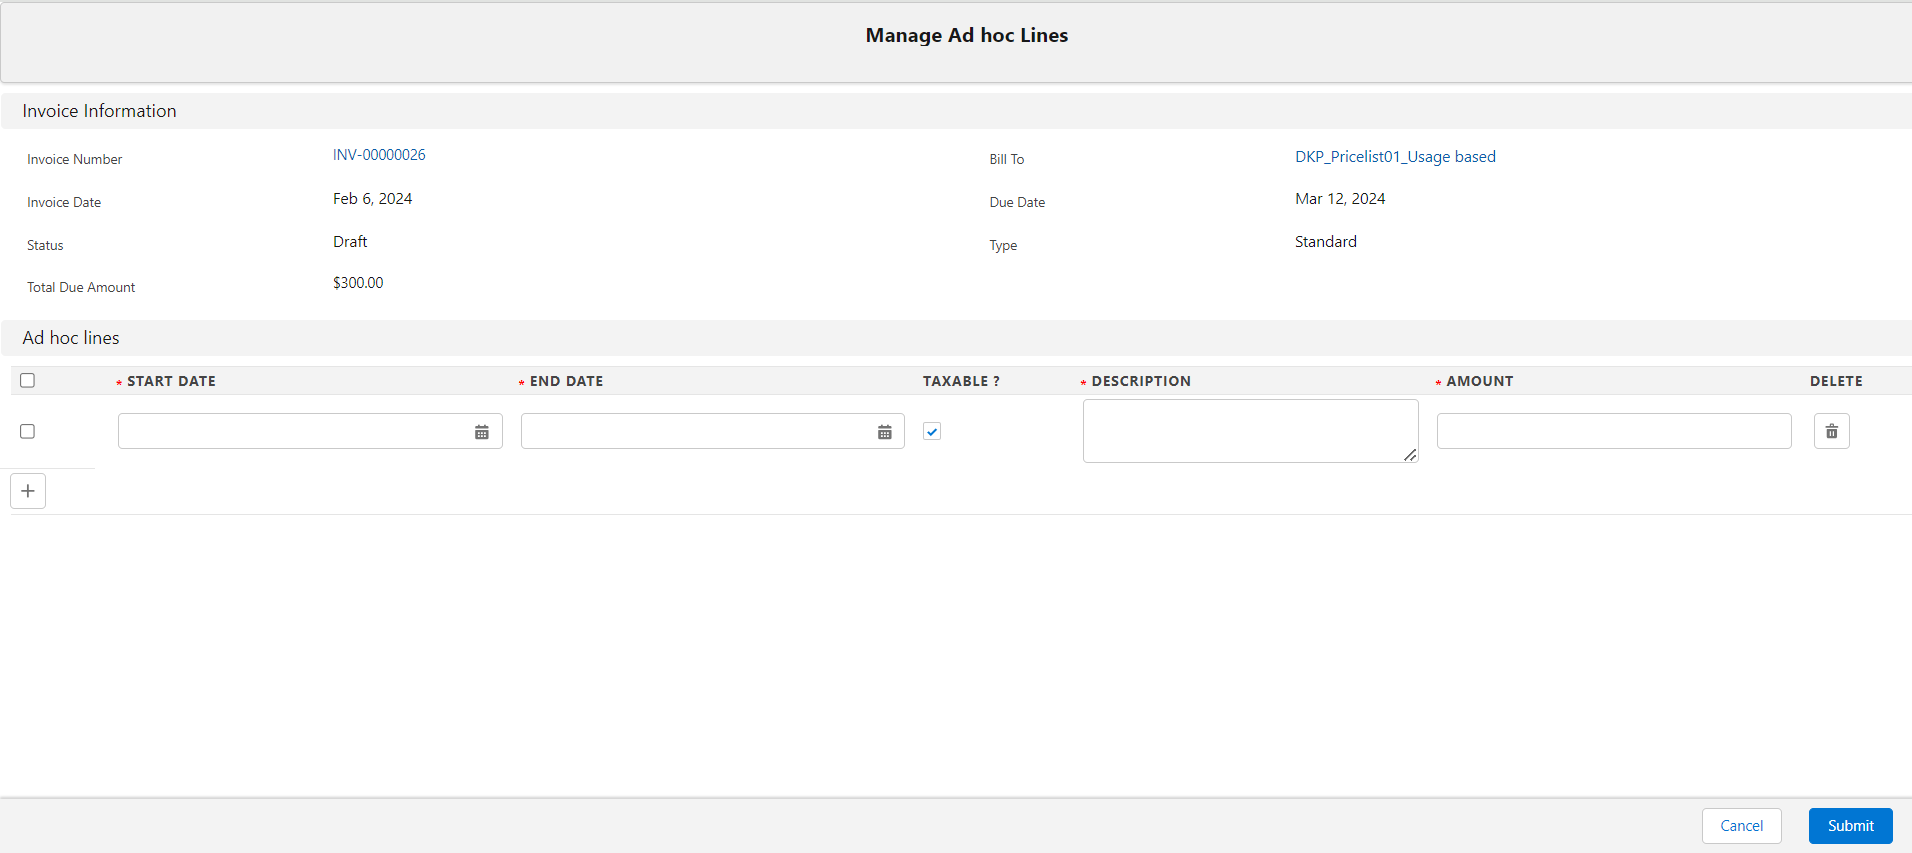
- Click the Manage Ad Hoc Lines button. The Manage Ad hoc Lines page opens showing the Invoice Information and Ad hoc Lines tabs.
- Click the Plus icon (
 ) to create a manual invoice line item entry.
- Enter the line level information.
- Select the start date. The start date must be in the range of the start date and end date of the system-generated invoice line item(s). The date range is inclusive of both, the minimum start date and maximum end date of the contracted invoice line item of that invoice.
- Select the end date. The end date must be in the range of the start date and end date of the system-generated invoice line item(s). The date range is inclusive of both, the minimum start date and maximum end date of the contracted invoice line item of that invoice.
- Enter a description (e.g., "Miscellaneous charges", "Additional installation charges", etc.) for the ad hoc invoice line item entry.
Enter the fee amount to be charged in the "Amount" field.
The Taxable? checkbox is selected by default. You can clear it if no tax callback is defined or the additional charges are non-taxable.
If required, click the Plus icon (
 ) again to create the second manual line and enter the information. The second row is added below the previous row. You must complete the information for all required fields of the first manual line before proceeding to create the second manual line.
- You can delete a row by clicking the Delete icon (
 ) at the end of that row.
To delete multiple rows, select the checkbox adjacent to the rows and click the Delete icon on top of the table. This icon is visible after you select a row. - The delete icon deletes the entry from the page memory but not from the database. Clicking the Submit button deletes the line item from the database.
- You can delete a row by clicking the Delete icon (
After you have entered the manual invoice line items, click Submit.
You are returned to the invoice record where you can see the manually entered invoice line item(s) is(are) created as an invoice line item(s) but the 'Type' field will have a value "Additional Fee" thus differentiating the manual lines from the system generated invoice lines.A progressive loading technique is implemented on the UI instead of pagination, as you keep scrolling, more data loads.
The fee amounts of the manual lines are added to the Total Fee Amount after the invoice is approved and are shown under the Total Additional Fee Amount in the Summary section of the invoice. It is also reflected in the A/R transactions list.
To make changes to the manual lines
You can do all the intended operations (add, edit, or delete an existing line) simultaneously if the invoice is in draft status. If the invoice is approved, you must revert the status to Draft.
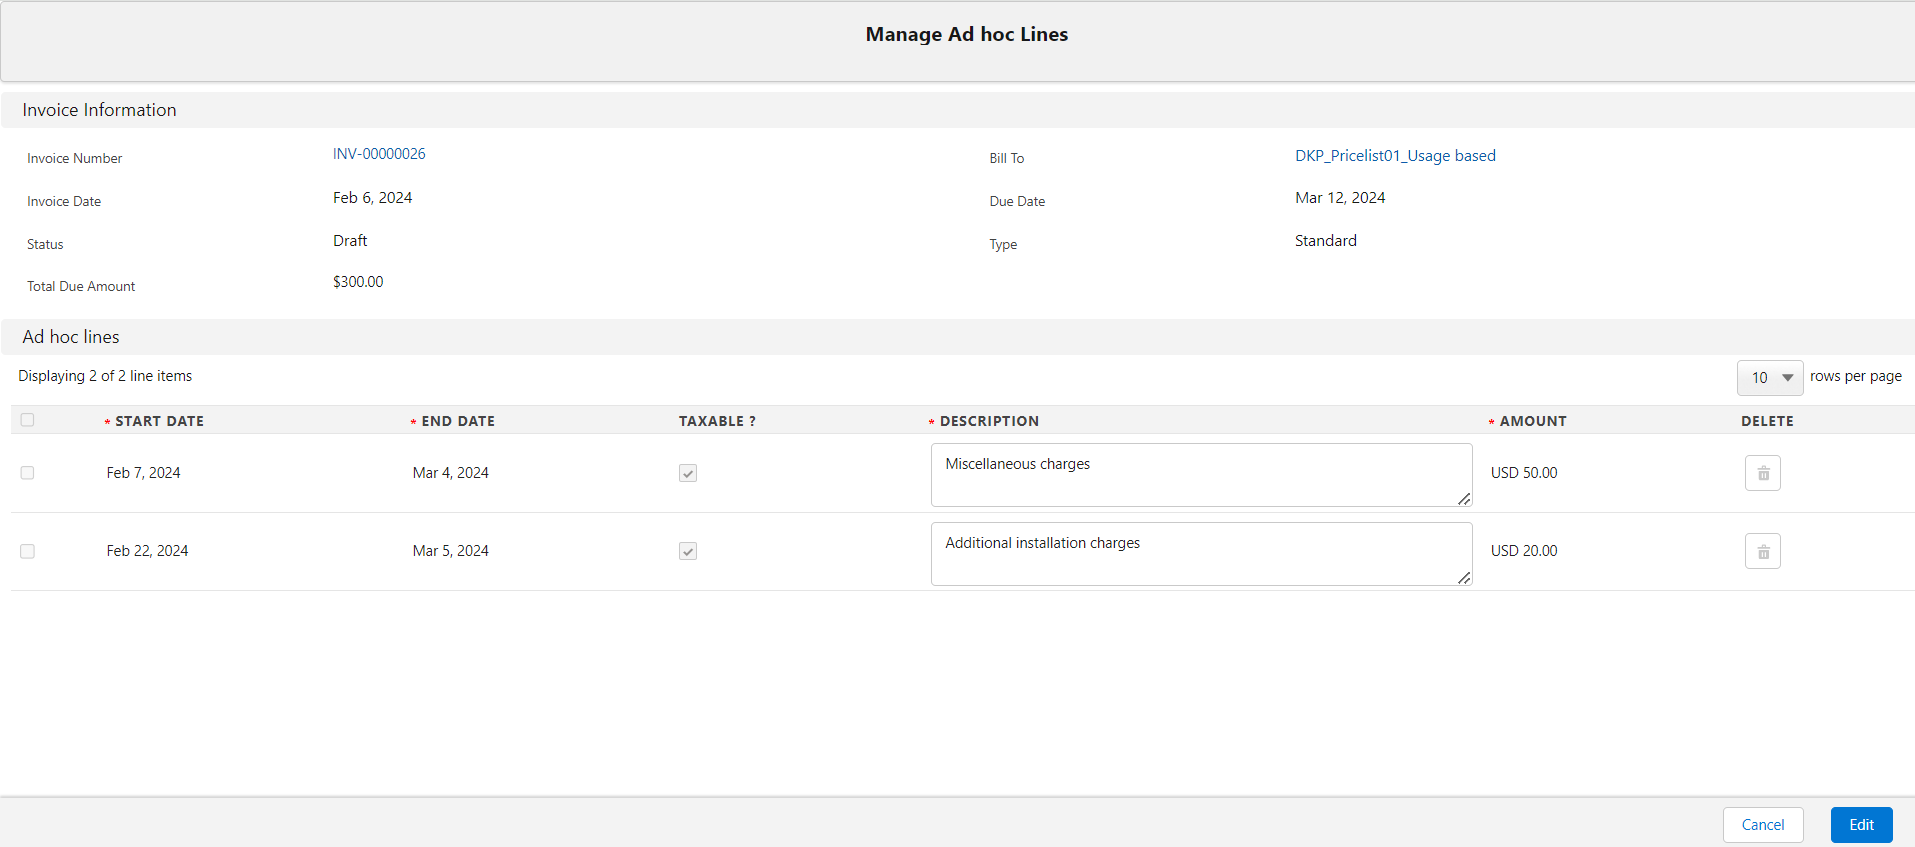
If the invoice is not in Draft status, you can still see the existing ad hoc line items in read-only mode.
- Open the Manage Ad hoc Lines page and click Edit.

- Perform any or all of the following editing operations:
- Click the Plus icon (
 ) to add lines. The new row is added at the start of the table.
 - Edit the data in the existing lines.
Click the Delete icon (
 ) to remove existing lines.
 The delete icon deletes the entry from the page memory but not from the database. Clicking the Submit Changes button deletes the line item from the database.
- Click the Plus icon (
- After you have made your changes, click Submit Changes. The Submit Ad hoc Lines pop-up appears.

- Click OK to proceed to the invoice record page to see your changes; otherwise, click Cancel and make changes to the manual lines.
The changes made to the manual lines are updated on the invoice record after the invoice is approved. The Total Fee Amount field on the invoice now includes the fee amount resulting from the changes you have made during the 'Edit' operation.
To generate invoice summary
After adding the lines manually to the invoice, you can generate a summary of all the lines based on criteria such as start date, charge type, price type, ship-to, location, etc. When you generate a summary, the fee amount from the manual lines is included in the summary so that the total amount from the summary matches with the fee from the contracted and additional fee invoice lines. For more information on how to generate a summary based on some criteria, see Creating an Invoice Summary Line.
When the manual lines have summary criteria matching with the regular lines then the manual lines are summarized along with the regular lines so that the summary includes these lines under that summary criterion. For example, if you generate the summary for Start Date as a criterion and the manual lines and the regular invoice has the same start date then a single line with consolidated information is generated under the invoice summary column.
When the manual lines do not have matching summary criteria, then the manual lines are summarized into a single line and are shown as a separate line entry in the Invoice Lines Summary related list. For example, if you generate the summary with filter criteria as Type, then the Invoice Line Summary related list has two line records. One record shows the consolidated fee amount of contracted lines and the other one shows the consolidated fee amount of the manual lines.

When the Taxable? checkbox is selected then the Tax callback makes a Get Tax call to the tax system and gets the estimated tax for the applicable lines. The tax amount is calculated and summarized under the Tax Amount field of the Invoice Lines Summary related list.
To add lines to an invoice by calling an API
To know how to add lines to an invoice by calling an API, refer to Adding Manual Lines to an Invoice.