Customers have business information associated with a contract. They want this business information created as separate objects in the CLM application and its record linked to a contract.
Administrators can define the relationship between objects that signify how the parent object is connected to a related child object. Accordingly, the related objects are displayed on the parent object's contract details page.
Custom objects can be associated with a contract. Administrators must create custom objects as separate objects in the CLM application and link each record to a contract by creating a reference field.. For more information on creating a custom object and reference field, see Creating and Managing Objects and Creating and Managing Fields..
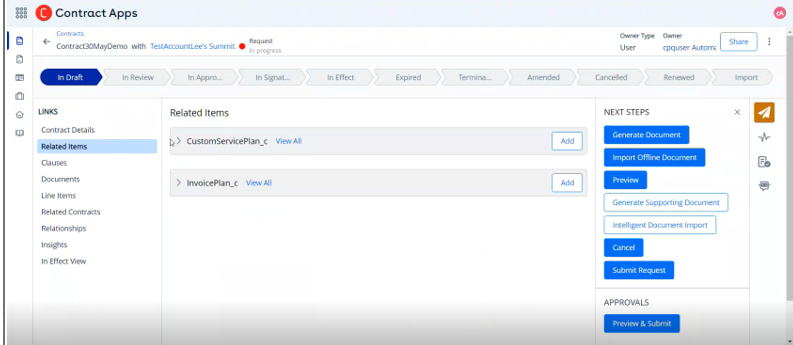
The Related Items tab on the contract details page displays a list of records from custom objects related to the record.
This use case describes how users can associate custom objects. In this case, the administrator creates custom objects, for example, Service Plan and Invoice, and associates them with a contract by creating a reference field.
The user wants to create and view one or more service plans associated with a contract. For this, an administrator must create a custom “Service Plan” object and link it to an account so that every account record captures invoice details.
Prerequisite: The administrator has created a Service Plan custom object.
After the administrator has created the custom objects, users can view the custom objects in the contract details page.
To access Related Items
- Click the App Launcher icon (
 ) and select Contract Apps.
 - Select a record to open the contract details page.
- Go to the Related Items tab. This page displays the custom objects related to the contract.
To add a record to the custom object
- Click the Add button available for the custom object.
- Complete the fields in the Information section.
- Click Save.
Click View All to sort and search the records.
To edit a custom record
- Click the More icon (
 ) to edit a record.
 - Select Edit and update the required fields.
- Click Save.
To delete a custom record
- Click the More icon () and select Delete.
- In the Delete <custom object name> window, click Confirm.
Result
Users can view the custom objects in the Related Items tab and they can add, edit, or delete a record associated with the custom object.