Download PDF
Download page Running a Wizard.
Running a Wizard
You can use the Wizards tab to run Wizards from the existing Wizard Designs.
To run a Wizard
- From the Salesforce application menu, choose Apttus Contract Wizard. The application displays the Home tab and the Wizards tab (you will see additional tabs if you have permissions to create Wizards).
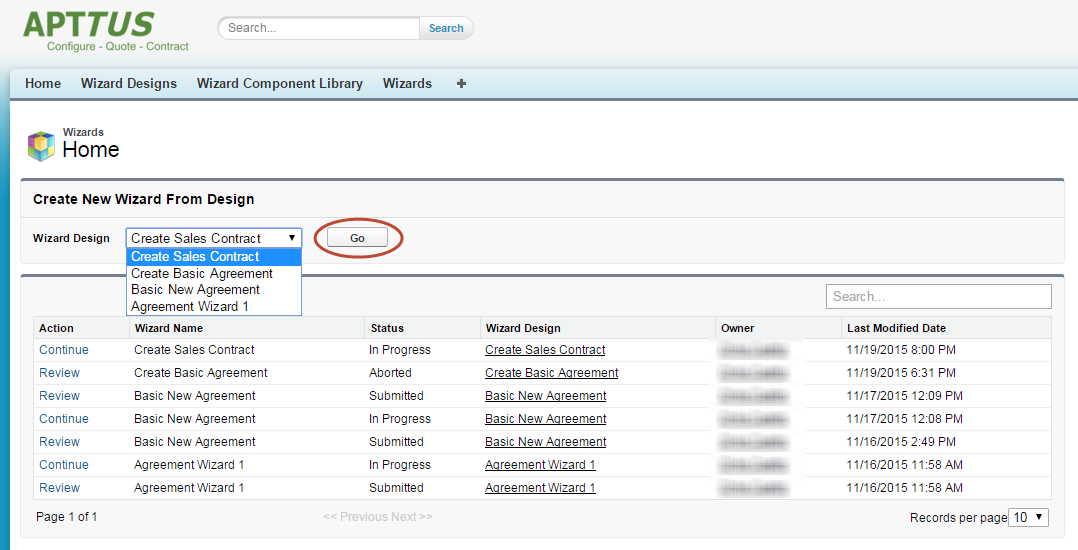
Choose a Wizard to run from the drop-down list of designs and click Go. Note: Wizards associated with deactivated or retired Wizard designs will not be available in this list.

Ensure that you have not blocked pop-ups in your browser because new Wizards are always launched in a separate tab.
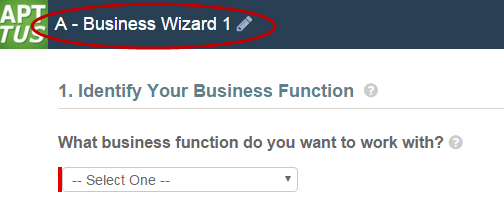
- (Optional) Click the pencil icon in the banner to give your Wizard a unique name, so you can differentiate it from other Wizards you run using the same Wizard design.
The new name for your Wizard is shown in the list of In Progress and Submitted Wizards on the Wizards tab.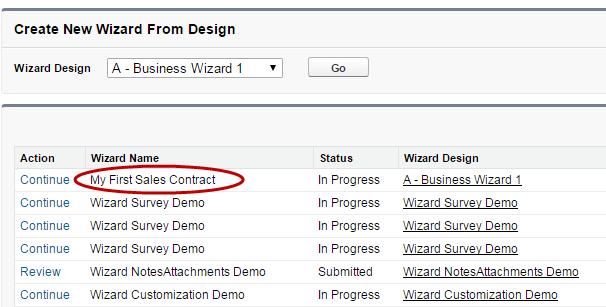
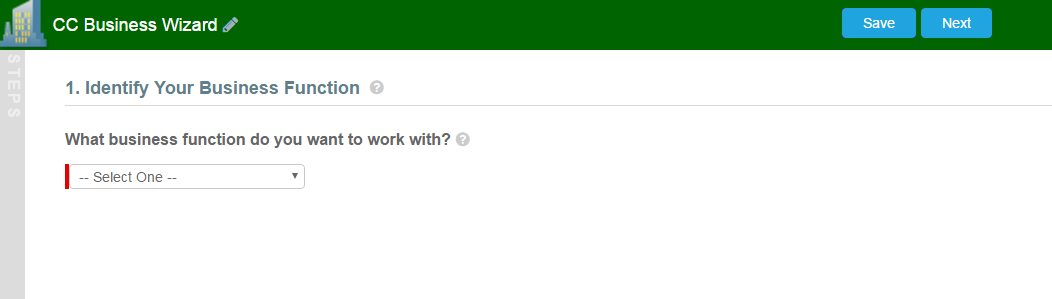
Move through the steps of the Wizard, choosing values for the fields in each step. Click Next when you are finished with a step to move to the next step. Click Back to return to the previous step. Click Save to save the data on the current wizard page.
Note
You must fill in all the required fields on the current wizard page before clicking Save; otherwise, the Wizard will throw a validation error.
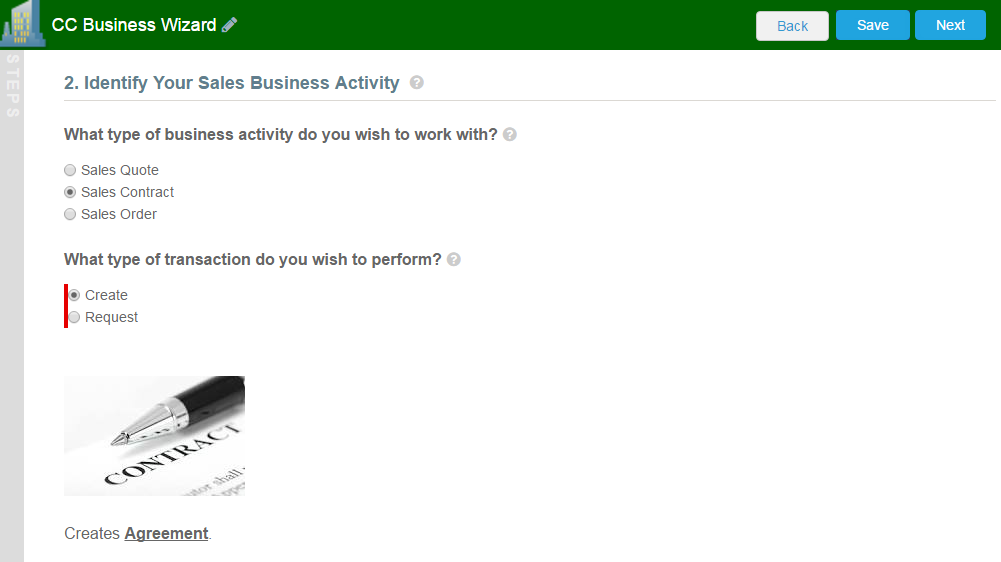
When you choose options (or a combination of options) that result in the creation of an object record, the Object name or Record Type will be displayed immediately upon choosing the option(s). For example, in the following step, when you choose "Sales Contract" as the business activity and "Create" as the transaction type, the Wizard evaluates a condition that determines that an Agreement record will be created when the Wizard is submitted.
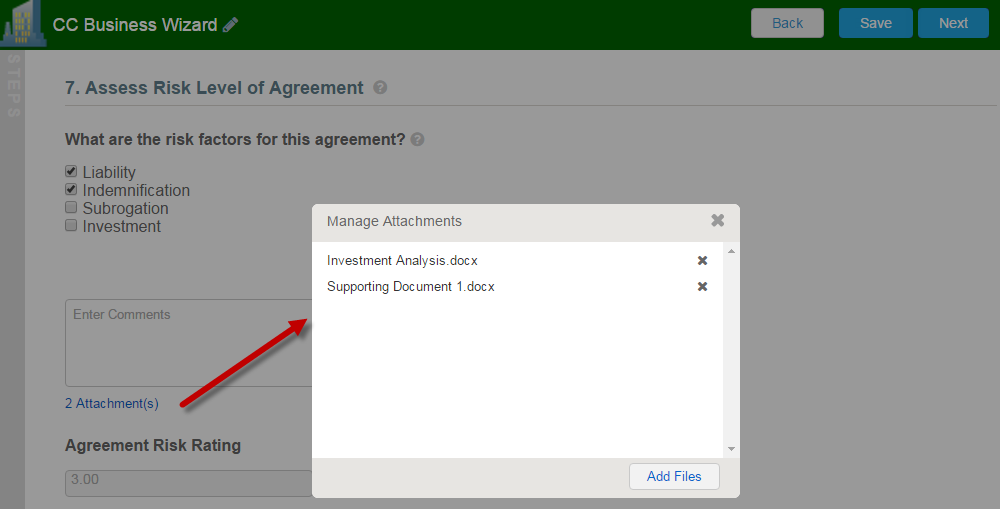
- Some Wizard steps may include the option to add comments and/or attachments in addition to providing traditional responses. You can add comments in the text area provided (500 character limit), click Attach Files to attach files to the Wizard step. When you use the Wizard to create a record, the attached files are added to the Notes & Attachments Related List of the new record along with the recorded comments. To add an attachment:
- Click the Attachment(s) link below the Comments box. The Manage Attachments window is displayed.
- Click Add Files. Browse for a file on your machine and add it as an attachment. The attachment uploads to the Wizard and displays in the Manage Attachments window.
Repeat the previous step for each attachment you want to add. Close the window when you are finished adding attachments.|
If you have an ‘Import Offline Document’ field in the Wizard and you use it to upload a document, the Document Type is marked as Agreement Document. If you have an ‘Import Supporting Document’ field in the Wizard and you use it to upload a document, the Document Type is marked as Supporting Document.
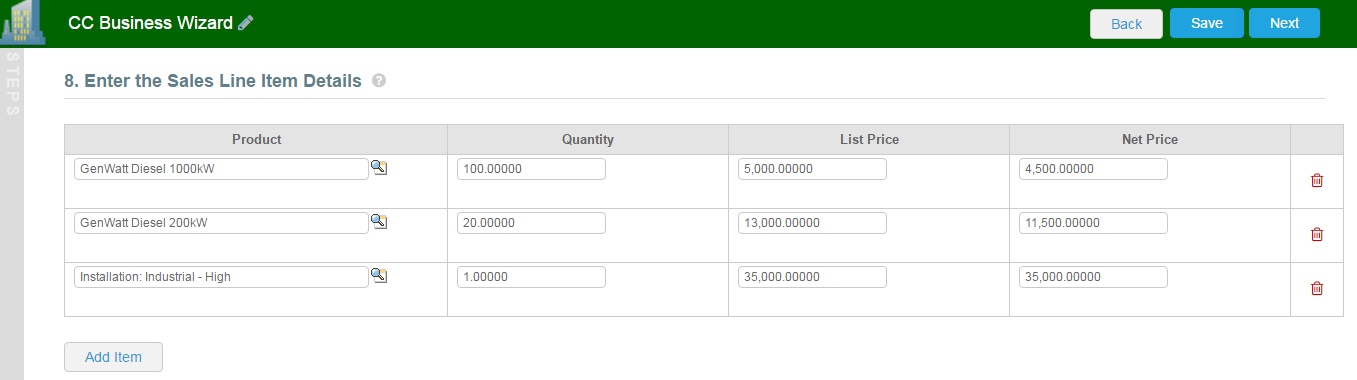
- Click Add Item when there is a repeatable field in the Wizard. These fields are used when you need to enter multiple values as certain responses—for example when you are adding multiple business addresses, or product line items and prices to a Sales Contract, as shown in the example below.
- Closing the Wizard automatically saves your progress in the Wizard up to the current step. You can continue where you left off from the Wizards tab (see Using the Wizards Tab).
- When you have answered the final question in the Wizard and clicked Next, the page will display a Review of all steps you have completed.

- Click Edit to change your answers for any steps in the Wizard. A dialog warns that you may have to repeat steps of the Wizard that you previously completed depending on edits you make.
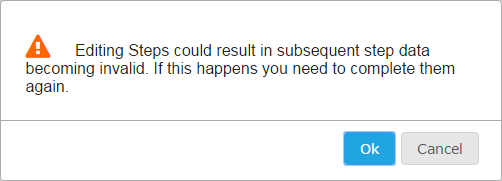
- Click OK to edit the step or Cancel to return to the Review page.
- When you are satisfied with your responses, click Submit.
Depending on the design of the Wizard, one or more of the following will occur:- A record of the type determined by your inputs within the Wizard will be created (e.g., a Sales Agreement record).
- You will be redirected to the record details page of the record just created by the Wizard.
- You will be redirected to another page in Salesforce.
- You will remain on the Review page and the Wizard will be shown as Submitted (in this case data from the Wizard has been submitted for purposes other than creating a record).

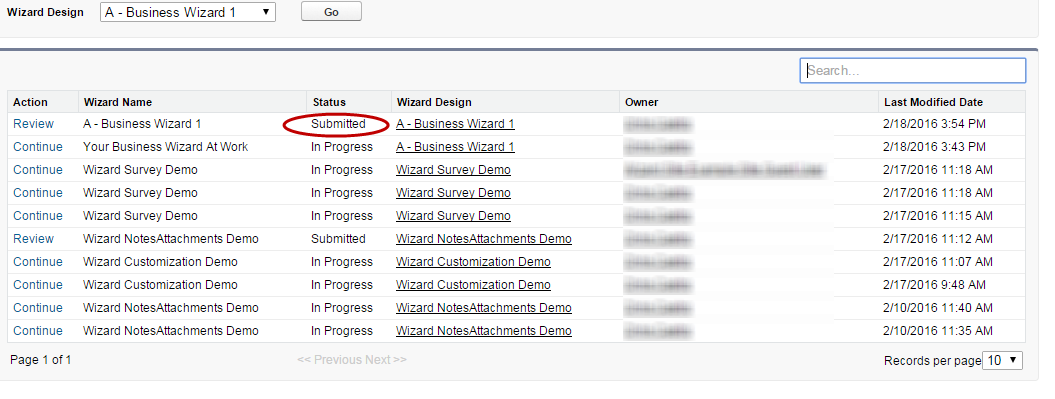
- Return to the Wizards tab. The Wizard you created and executed now shows its Status as Submitted in the list of Wizards.