Download PDF
Download page Configuring Users for your Community.
Configuring Users for your Community
In order for users to have access to both your community and Wizards, you must complete the following steps:
- Create a user profile for your community OR modify an existing user profile
- Add custom object permissions to the profile(s) for Wizard-related objects
- Add field-level security permissions to the profile(s) for Wizard-related objects
- Create customer/partner users as contacts and enable as community users
- Add members to your Community
The following sections use a Customer Community profile as an example, but you can also create a Partner Community profile. The only major differences are the type of license chosen when creating the profile and any users created for the profile must be associated with partner accounts.
Creating a User Profile
The following section provides instructions for creating a user profile for use with your Community specifically for the use of running Wizards. If you decide you want to clone and/or modify an existing user profile for use with your Community, you can skip this step, but make sure the user profile you have chosen is assigned a Partner or Community license.
- Go to Setup > Manage Users > Profiles.
- Click New Profile. The Clone Profile page is displayed.
- Choose an Existing Profile enabled for Salesforce Communities: Customer Community User or Partner Community User (Customer Community User is used in the examples on this page).
- Enter the name for the user profile you want to create and click Save.
Adding Custom Object Permissions for Wizard-Related Objects
- Go to Setup > Manage Users > Profiles and click on the profile you just created.
- Click Edit on the Profile Details page.
- Under Custom Tab Settings, change the Wizards tab to Default On.

- Under Custom Object Permissions grant Read, Create and Edit permissions to the following objects: Wizards, Wizard Input Controls, Wizard Runtime Inputs, and Wizard Steps.

- Click Save to return to the Profile Details page.
Adding Field-Level Security for Wizard-related Objects
- Go to Setup > Manage Users > Profiles and click on the profile you just created.
- Under Field-Level Security > Custom Field-Level Security click the View link for the Wizard object.

- Click on each checkbox under the Visible column to enable visibility for all fields in the list.

- Click Save to return to the Profile Details page.
- Repeat Steps 2 – 4 for the following objects: Wizard Input Control, Wizard Runtime Input, Wizard Step.
Creating Community Users from Contacts
Assuming the customers or partners who will be using Self-Service wizards are customers of your organization, you must create or use existing contacts in your org and enable them as customer or partner users. Follow these step-by-step instructions to create a new user for your community and assign it a Community profile.
- Create a new business contact and assign it an account or go to Contacts and choose an existing contact.
Click on Manage External User and choose Enable Customer User.
The New User form is displayed.
You can choose the enable the contact as a Partner User only if the account assigned to the contact has been enabled as a Partner Account. Also keep in mind that when you assign a profile to the user it must use be a Partner profile (using a Partner Community license) instead of a Customer profile.
- Enter all required information for your new Community user, including:
- Email– the actual email of the user who will logging in to your community (if you have not yet activated the community, choose an email address controlled by your organization–see below)
- Username – the Username for this user will be what they use to log in to your Community portal (e.g., "wwizard@wizarduser.com").
- User License – the "Customer Community" user license (or "Partner Community" if you are creating a Partner User).
- Profile – he User Profile you created in the previous section.

- Click Save to create the new user. An email notification is sent to the email address provided in the New User form to complete registration for their account.

During initial setup of your community before it is activated, it is recommended to create a user password from an email address controlled by you or your administrator. After the community has been activated, any new users created in this way can complete the registration process from their own email address.
- Return to the detail page for your contact. Click on Manage External User and choose View Customer User.
- Scroll to the Managed Packages section and click on Assign Licenses.

- Under Unassigned Packages select the checkbox next to Apttus Contract Management package and click Add to assign a license for that package to the user (this is required of every customer/partner user).
Adding Members to Your Community
Now that you have created/modified user profiles and created users to access your Community, you must add those user profiles to the Community itself to allow access. To add members to your community:
- Go to Setup > Customize > Communities > All Communities.
- Click Manage next to your Community.
- Go to Administration > Members.

- Search for and select the user profile(s) to add to the Community. In the example below, the user profile Test Customer Community User is added to the Community. All users with this profile can log in to your community with the proper credentials.
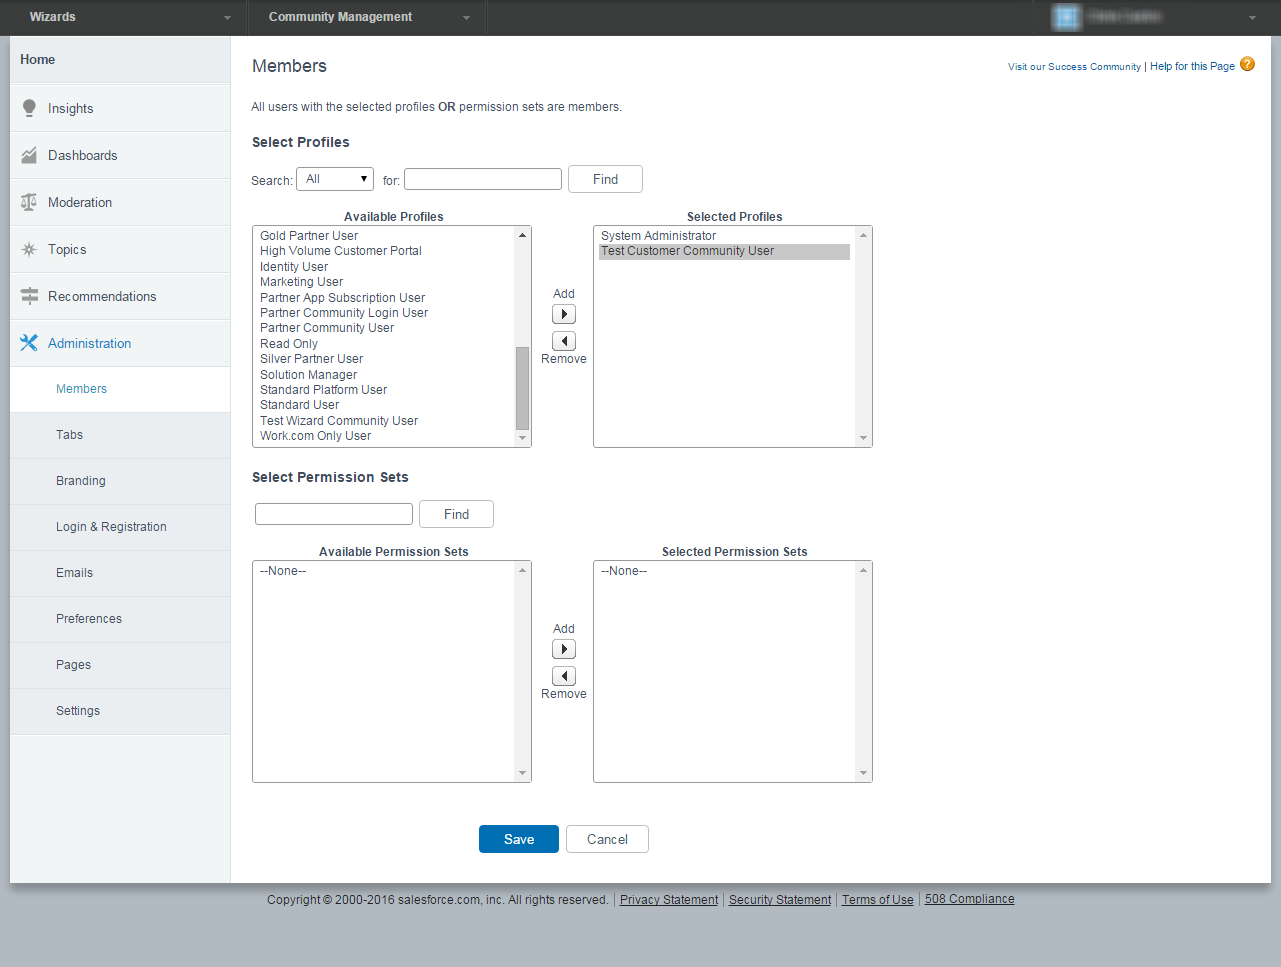
- Click Save. Users with the selected profile(s) can now access your community.