Download PDF
Download page Accessing Conga Co-Pilot.
Accessing Conga Co-Pilot
Conga Co-Pilot is an AI-powered virtual chat assistant that can both summarize agreements and answer users' questions about them.
To access Conga Co-Pilot
Before you can access Conga Co-Pilot through your Salesforce org, an administrator must configure both the Salesforce org and the Conga Platform. An administrator may take on one of several personas, including a customer administrator, partner administrator, or any other administrator tasked with setting up the Salesforce org with the Conga Platform. This individual is responsible for completing the entire setup process with support from the Conga CloudOps team.
| Order | Task | Owner |
|---|---|---|
| 1 | This task is the responsibility of the administrator and the Cloud Ops team.
| |
| 2 | Administrator | |
| 3 | Administrator |
Tenant Onboarding
Follow these steps to onboard a Salesforce tenant onto the Conga Platform. This process involves collaboration between the Conga CloudOps team and the administrator.
Prerequisites
You have provided the following information to your Conga support representative.
- Your 18-digit Salesforce org ID
- Administrator's first name and last name
- Administrator email ID
- Your Salesforce org domain name. To view the domain details of your Salesforce org, go to Setup, enter
my domainin the Quick Find box and click My Domain.
To onboard a tenant
A Conga support representative logs a tenant onboarding request with the following details.
- Salesforce org ID
- Admin user's first name and last name
- Admin user's email ID
On successful onboarding, the admin user receives a confirmation email containing Conga org details, Conga identity provider (IdP) login credentials, and a one-time password.
To change the password
- Click the login URL in the welcome email.
- Enter the username and password.
- Click Sign-in and follow the on-screen instructions to change the password.
To view the onboarded tenant
- Log in to the Conga Platform as an admin user.
- Click the App Launcher (
 ) icon from the top-left corner and go to Admin Console > Organization. You can see that the tenant has been added. For more information about updating an organization's information see Viewing Conga Org Details.
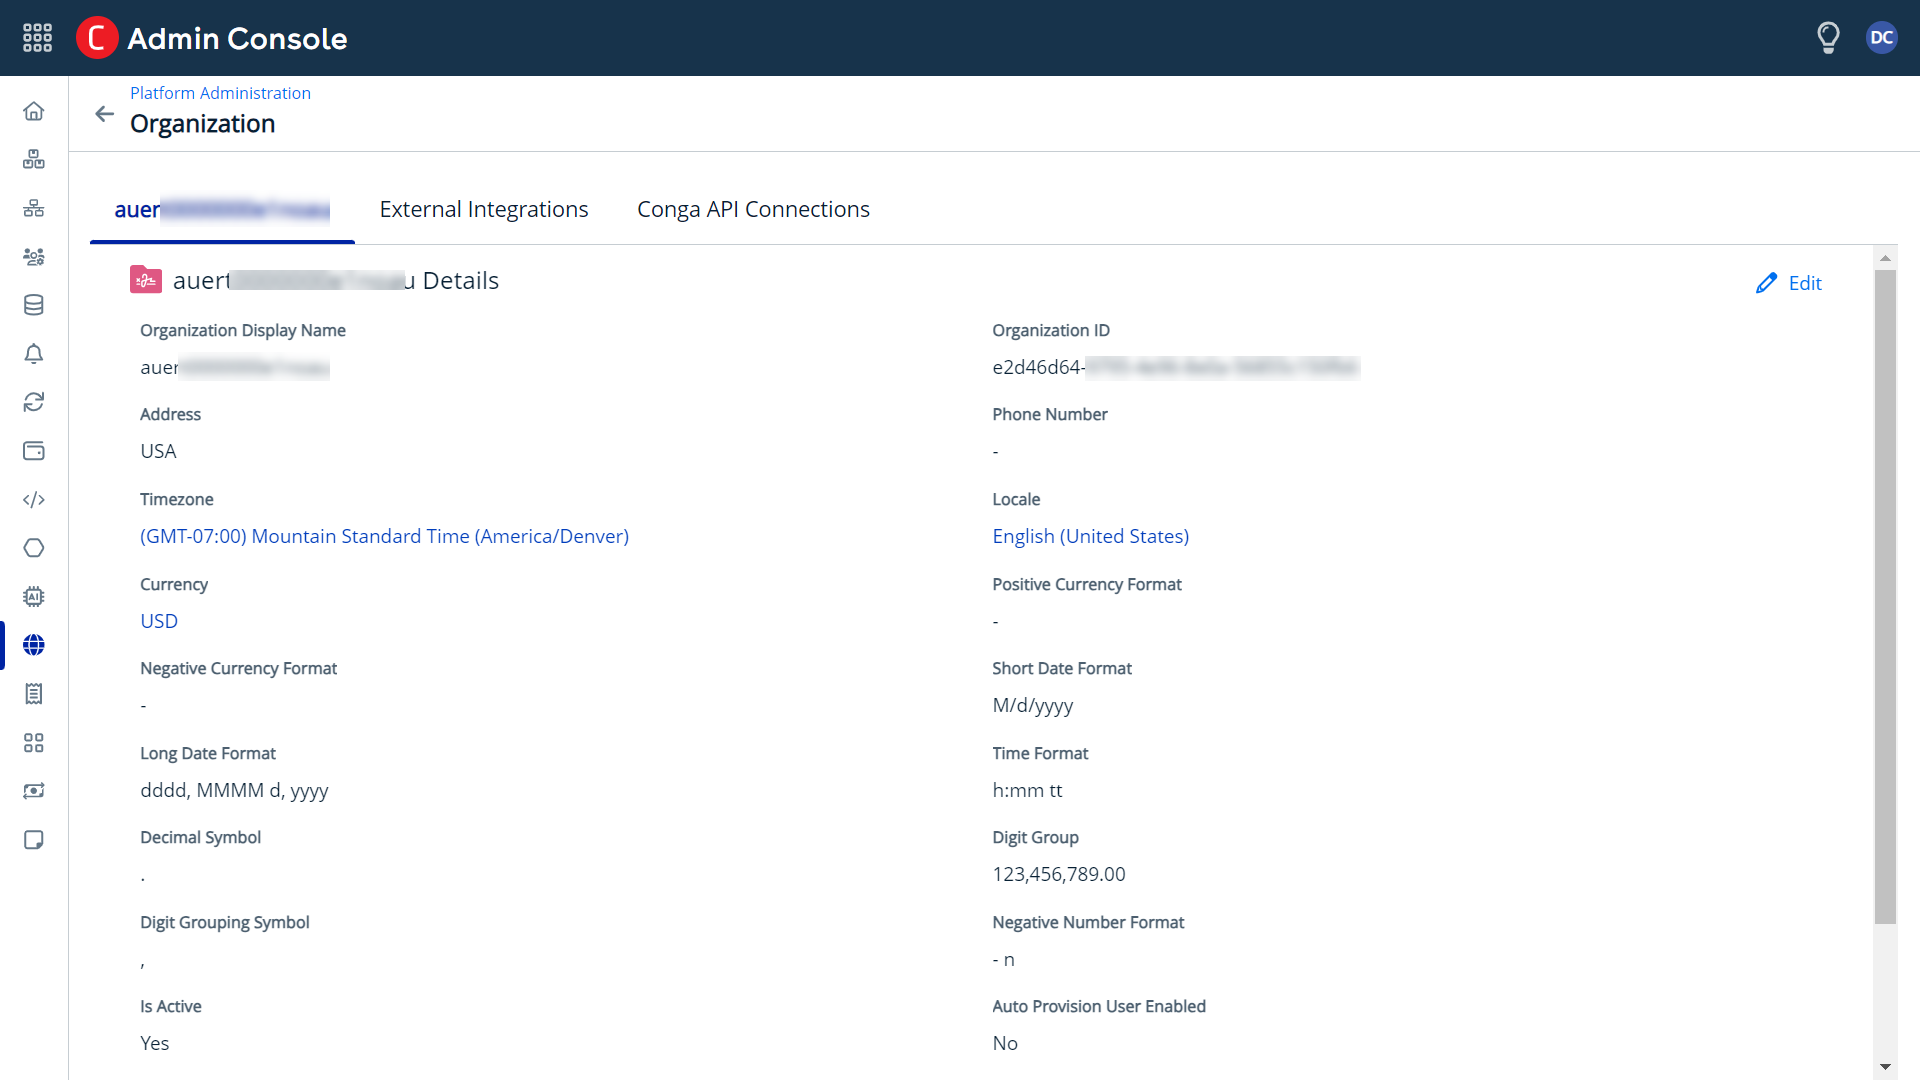
Configuring Conga Platform
Once you have onboarded the tenant, you must configure the Conga Platform.
Prerequisites
- CoPilotPermissiongroup is created.
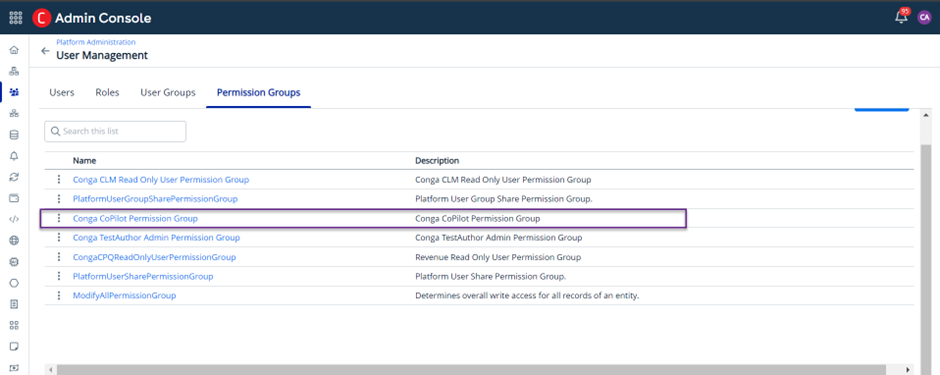
- The following object permissions are added to the
CoPilotPermissiongrouppermission group.- AiPlatformImportedDocument
- AiPlatformRawFile
- AiPlatformJobTracker
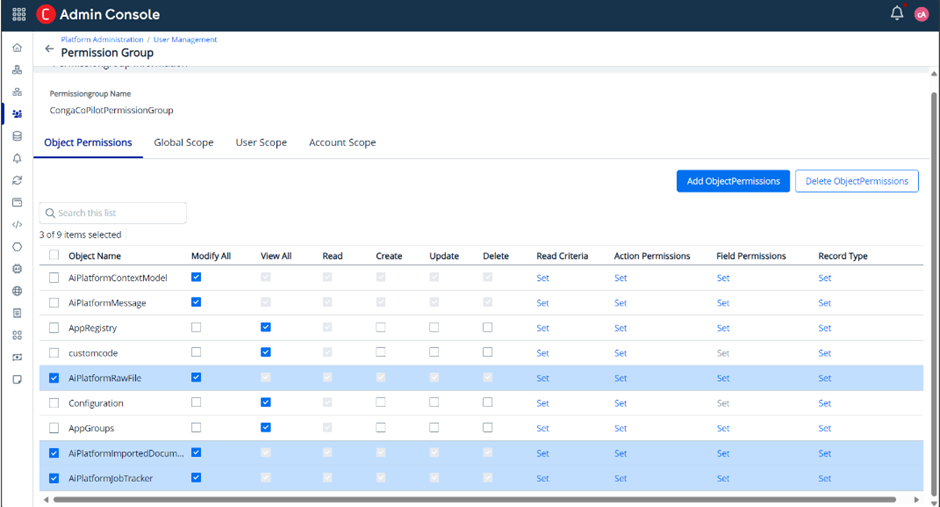
For more information on creating a permission group and assigning object permissions, see Creating Permission Groups.
To configure Conga Platform
Follow these steps to configure Conga Platform.
- Add a new external integration
- Assign permission group to a role
- Add a new user
- Configure a UI-to-API connection
Adding a new external integration
This allows administrators to view and manage users authorized through external organizations. You can add one or more external integrations; however, you can make only one as a default IDP.
To add a new external integration
- Log in to the Conga Platform as an admin user.
- Click the App Launcher () icon from the top-left corner and go to Admin Console > Organization > External Integrations.
- Click Add New, raising the Add New External Integration screen.
- Choose Salesforce or Salesforce Sandbox from the Identity Provider drop-down list and click Authorize to open the selected IDP's login screen.
- Log in with your onboarded Salesforce org credentials.
If you get any access-related prompts during this process, allow full access.
When you log in, the selected identity provider's external identifier auto-populates the External ID field. - Enter the type of this integration in the Type field. It is a free-form text field. You can add types such as Dev, QA, UAT, Prod, and so on.
- Enter the description in the Description field.
- Enable the Default IDP toggle to make it a default external integration IdP.

When the admin user creates new users, they are created with the default IdP. For example, if you have set Salesforce as the default IdP, all new users will be created with Salesforce IdP.
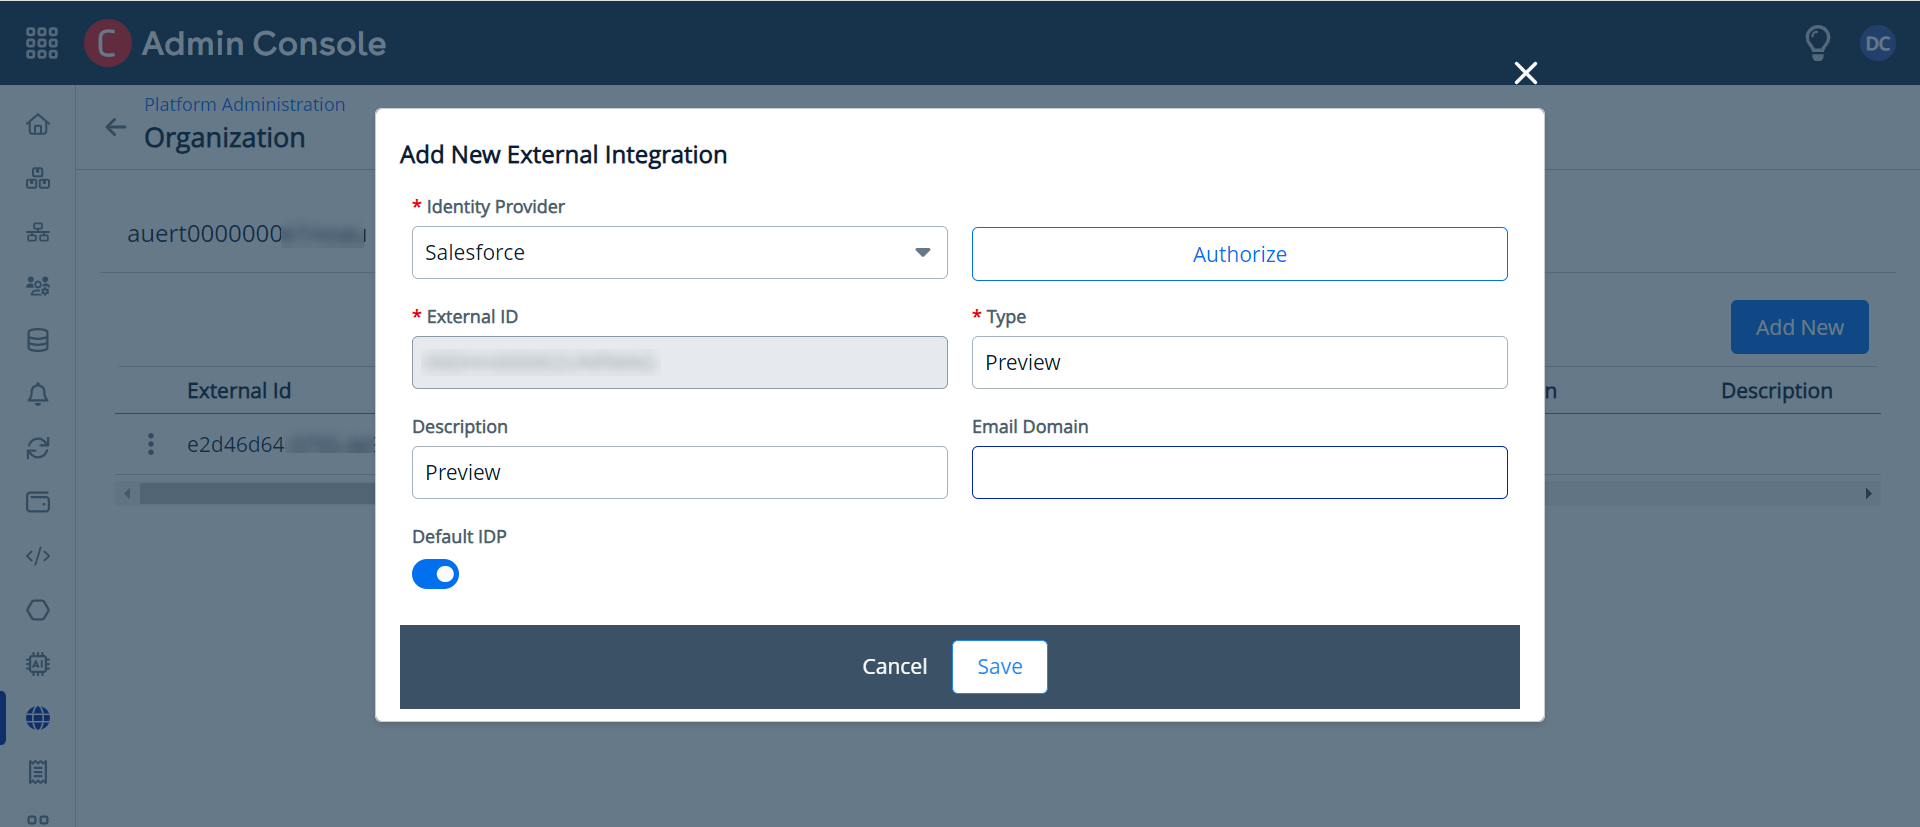
- Click Save. An external integration is added.
For more information, see Managing External Integrations.
Assigning Permission Group to a Role
Roles determine a given user's access to applications, objects, records, and permissions to perform actions on the Conga Platform. A role is assigned to users performing similar tasks and consists of a set of permissions. As an administrator, you can assign roles to the existing users or create a new user and edit the user details to assign roles.
To assign permission group to a role
- Click the App Launcher () icon from the top-left corner and go to Admin Console > Users > Roles.
- Edit the AuthAutoProvisionedUser role and assign the permission group CoPilotPermissiongroup to it.
For more information on assigning the permission group to a role, see Working with Roles.
Adding a new user
You can manage users either manually or automatically through the User Management user interface. The Users tab allows you to:
- Create, update, and manage users.
- Import user information.
- Assign roles to users.
- Set default options for users. For example, locale, time zone, date and time format, and other preferences.
To add a new user
- Click the App Launcher () icon from the top-left corner and go to Admin Console > Users.
A list of users is displayed. Click Add to add a new external user. The User Details screen appears.
- Enter values in the fields and click Save.
For more information on entering information in the fields, see Adding and Activating Users.
There are two ways to onboard users: manually or automatically.
- Manual onboarding:
After onboarding the tenant:- Add external integration and enable default IdP for that Salesforce org.
- Add a new user and enter the 18-digit Salesforce ID for the provided user in the ExternalId field.
After the admin user has added the user, an email is sent to the provider's email ID. - Users can log in to the Conga Platform using their Salesforce credentials.
- Automatic onboarding:
After onboarding the tenant:- Enable the Auto Provision User Enabled toggle in your Organization Details tab.
- Add external integration and authorize the external integration.
- Users from that external integration can log in to the Conga Platform with their credentials, and the user is automatically created on the Conga Platform.
For example, the admin user has integrated Salesforce as an external service and authorized it. In the Salesforce organization, there are 10–15 users. If this toggle is enabled, any of these users can log in to the Conga Platform using their Salesforce credentials. Upon logging in, their account is automatically created on the Conga Platform. However, their role is not set to admin, so they cannot access Conga Co-Pilot. To grant users access to Co-Pilot, the admin user must manually change the user's role to admin.
Configuring a UI-to-API connection
Establish a UI-to-API connection between your Salesforce org and Conga Platform to ensure seamless communication and data exchange between them.
To configure a UI-to-API connection
- Click the App Launcher () icon from the top-left corner and go to Admin Console > Organization.
- Go to the Conga API Connections tab and click Add UI-To-API Connection.
Enter values in the following fields.
Field
Required Action
External Identifier Select the Salesforce org ID for which you want to configure the connection. The external identifier list is populated based on the external integration that you added. Client Name Enter the client's name. Description Enter an appropriate description. Redirect URI Enter the UI callback endpoint, the site to which identification and access tokens are sent.
- For production instance: https://prod-rls10.congacloud.com/static/clm/congacopilot/?q=param
- For preview instance: https://preview-rls09.congacloud.com/static/clm/congacopilot/?q=param
- For staging instance: https://rls-stg.congacloud.io/static/clm/congacopilot/?q=param
Cors Origins Enter the domain name in the callback endpoint. This is the origin server's base URL to enable cross-site requests.
For example, https://business-agility-9613-dev-ed.scratch.my.salesforce.com
- Leave all the other fields blank.
Click Save & Generate Client Secret to generate the Client ID.
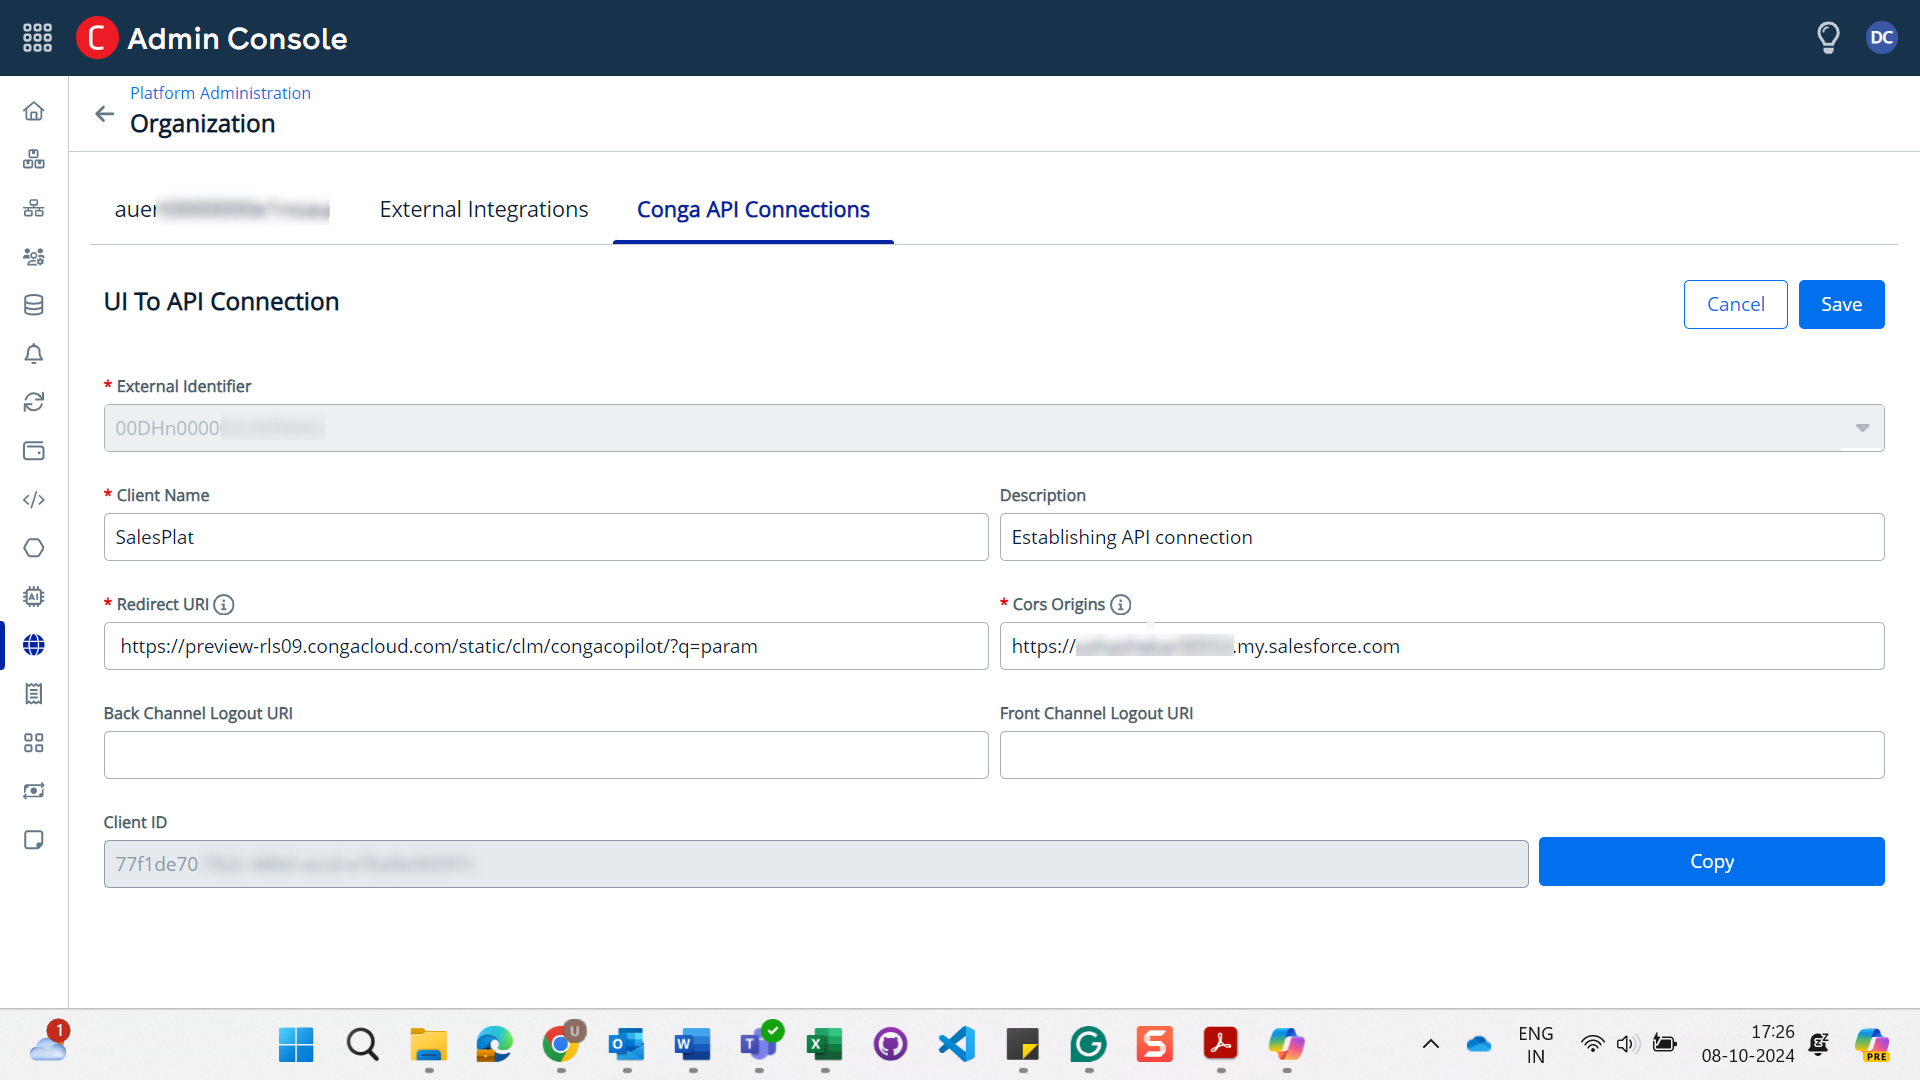
- Click Copy next to the Client ID. Save it as SPAClientId for future use.
The UI to API connection is configured and activated. - Click Save.
You can deactivate or reactivate the API Connections by using the respective hyperlink under the Actions column and edit the configuration by clicking the External Identifier hyperlink on the list page.
Configuring Salesforce Org
Prerequisite
Conga CLM version number 15.770 or later is installed. To know more about upgrading Conga CLM to the latest version, refer to Upgrading Conga CLM.
To configure your Salesforce org
After you have configured the Conga Platform, log into your Salesforce org. to set up the following configurations.
- Activate the Enable Copilot comply user property. For more information, see Comply User Properties.
- Create an admin setting APTS_RLPInstanceSettings and enter the following details specific to Conga Co-Pilot. For more information on creating an admin setting, see Creating an Admin Setting.

If the APTS_RLPInstanceSettings admin setting already exists, you only need to modify SPAClientId, InstanceURL, and Authorization URL in the Code field.
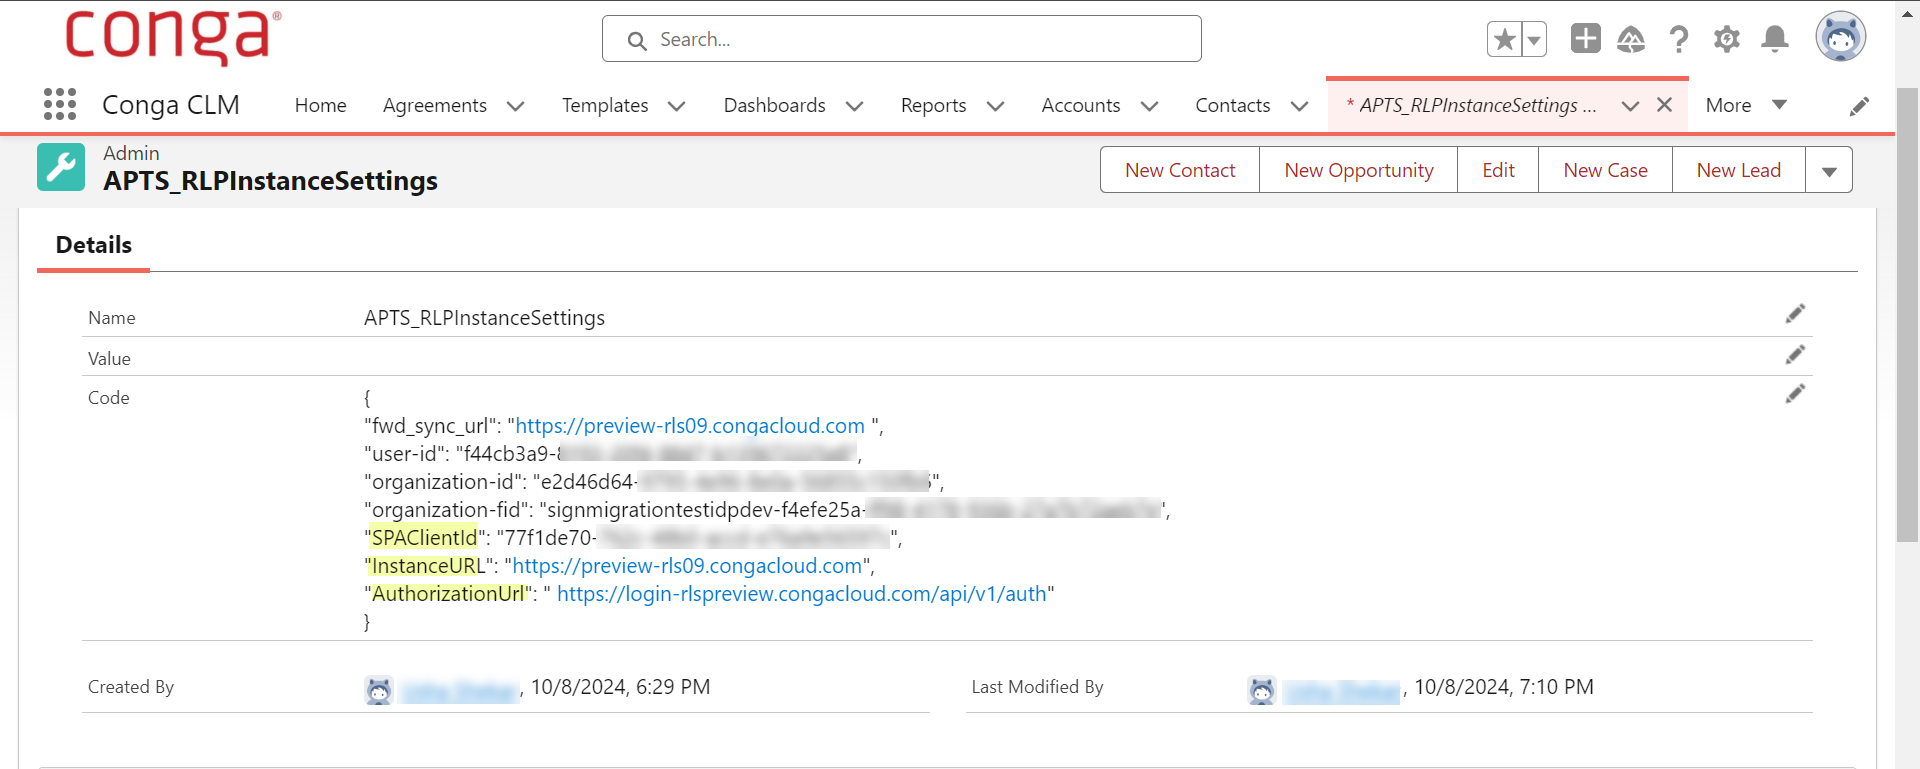
Field Description SPAClientId A single-page application ID. Enter the Client ID that you generated after configuring the UI-to-API configuration in the Conga Platform.
InstanceURL Conga organization instance URL where the application can retrieve user information. Use any of the following URLs per your Conga instance:
- For production instance: https://prod-rls10.congacloud.com/
- For preview instance: https://preview-rls09.congacloud.com/
- For staging instance: https://rls-stg.congacloud.io/
AuthorizationURL URL used for OAuth 2.0 authorization. It directs a user’s browser to the authorization server to grant access to a third-party application.
- For production instance: https://prod-rls10.congacloud.com/api/v1/auth
- For preview instance: https://login-rlspreview.congacloud.com/api/v1/auth
- For staging instance: https://rls-stg.congacloud.io/api/v1/auth/api/v1/auth
After configuring all the above steps, users can access Conga Co-Pilot. For more information, see Working with Conga Co-Pilot.