Download PDF
Download page Creating Inputs from the Wizard Designer.
Creating Inputs from the Wizard Designer
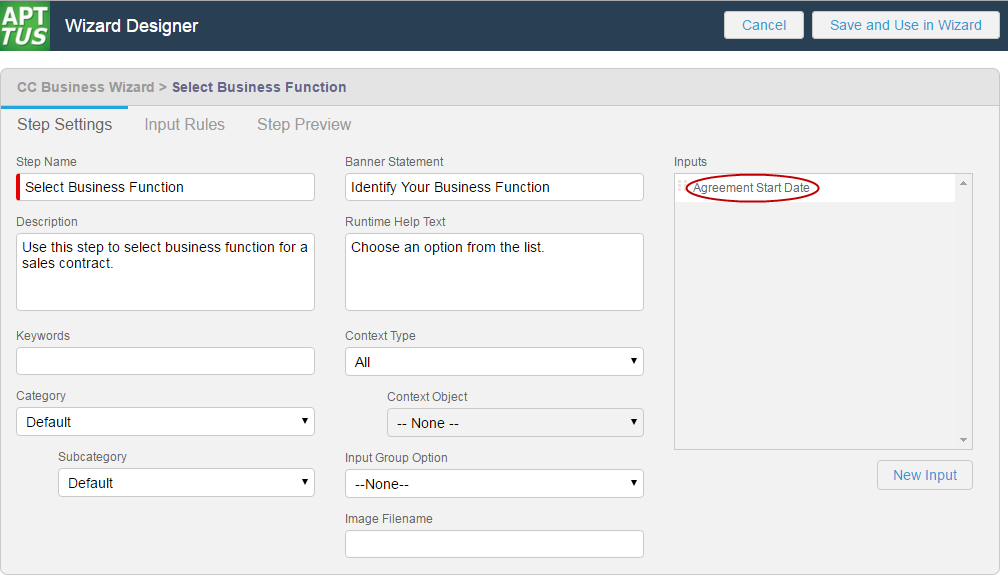
Input controls are the primary components of any wizard. They are the questions and instructions that you provide to the end users of your wizard. For example, you might create an input control that requires users to select picklist options, such as Business Function or Agreement Start and End dates. Input controls are reusable, so you can use them in as many steps as you want to.
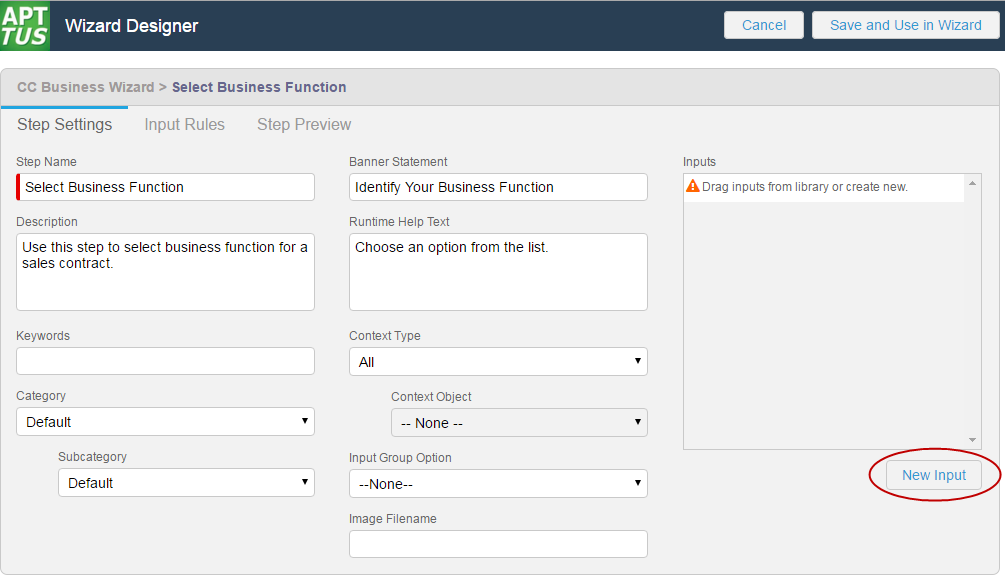
If an Input you want to use in a step does not exist in the Inputs Library, you can create one and use it with your step. Inputs created in this way can be saved for use in the current Wizard design only.
To create a new Input from a Step
From the Step Settings form, click New Input.
The Input Settings page is displayed.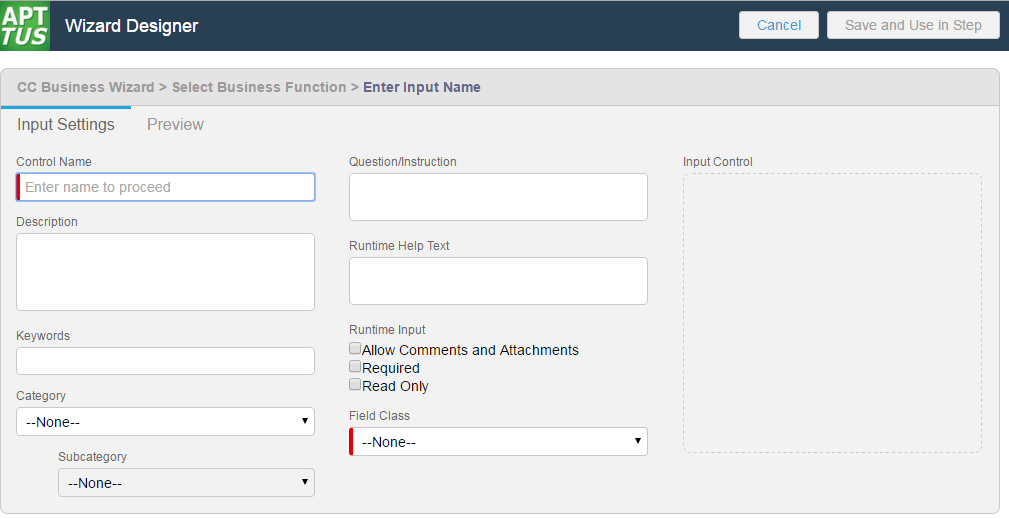

You can mark the Add Attachment field in the Import Offline Document Object as required.
Enter the following properties into the form:
Input Setting Description Control Name Enter a name for your Input. Question/Instruction Enter a question or instruction which the end user will see in the runtime wizard. Description Enter a description for the input which describes its intended use (for example, "Use this Wizard to create MSA Agreements for Acme." Keywords Enter a list of keywords which can be used to search for this Input. Category Choose an option from a drop-down list of pre-defined Input Categories (define picklist values on the Wizard Input Control object). Sub Category Choose an option from a drop-down list of pre-defined Input Sub Categories (define picklist values on the Wizard Input Control object). Runtime Help Text Enter text to display when the user hovers over the help icon next to the question/instruction. Runtime Input Determine how the end user can interact with this Input at wizard runtime: Allow Comments and Attachments – Select this check box to enable the end user to add comments and/or attachments in addition to the input control value. Comments are entered into a text area field and are limited to 500 characters. There is no limit to the number of files a user can attach. For an example of how this looks in the Wizard, see Running Wizards.
How Comments and Attachments are used in the Wizard
For any type of Wizard, all runtime comments and attachments are saved in the Wizard Runtime Input instance record under Notes & Attachments. You can make use of these comments and attachments through your own implementations.
If you design a Wizard to create a record, comments and attachments are copied to the Notes & Attachments list only if the corresponding input uses an Object for the same object created by the record (e.g., Input defined as 'Field Class = Object Field,' 'Object = Agreement' when the Wizard creates as Agreement record). Notes containing comments are named after the Object Field for which they were entered (e.g., "Account Notes," or "Agreement Risk Rating Notes").
Required – Select this check box if a value is required for the input. An end user will not be able to complete the current step without entering a value for this input.
Read Only – Select this check box if you plan to have the input value set by Step Input rules in all cases. The end user will not be able to change the value of this input.
Field Class The Field Class defines the type of response you expect for the input. - Wizard Input Field – Use this field class when you want the response to indirectly set other Wizard values. Wizard input fields values are only used to affect the value or state of other input controls using Step Input Rules. When you choose this field class, you must specify one of the following data types:
- Checkbox
- Date
- Number
- Picklist
- Picklist Radio Button
- Multi Picklist
- Text
- Text Area
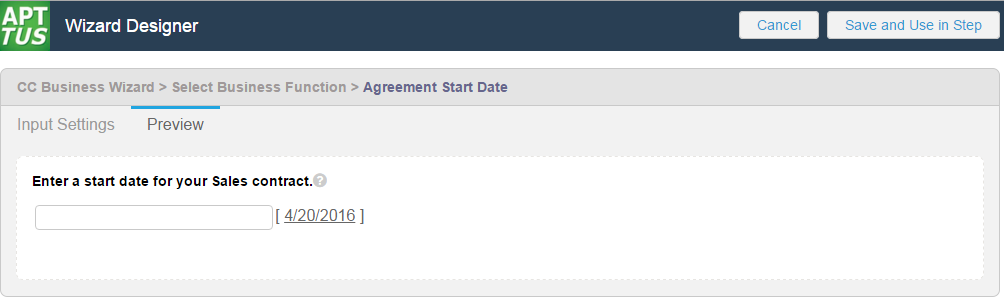
- Object Field – Use this field class when you want the response to directly set a field value on the Salesforce object which is created from the Wizard (e.g., the "Agreement Start Date" field on the Agreement object). Use the drop-down list under Input Control to choose the Object Name, then choose the Field Name based on the object chosen.
- Wizard Input Field – Use this field class when you want the response to indirectly set other Wizard values. Wizard input fields values are only used to affect the value or state of other input controls using Step Input Rules. When you choose this field class, you must specify one of the following data types:
- When you are finished creating your Input, click on the Preview tab to show how the input will appear at Wizard runtime.
- Click Input Settings to return to the Input form.
- Click Save and Use in Step to save your new Input or Cancel to discard changes and return to the Step Settings form. The new Input is added to the list displayed in the Inputs pane for your step.