Download page Configuring Wizard as a Related Tab.
Configuring Wizard as a Related Tab
You can configure the Wizard as a Related tab in the Account or Opportunity to launch the wizard with pre-populated record information in Lightning.
To configure the Wizard as a Related tab
Navigate to the Account or Opportunity Detail page.
Click the Setup icon and select the Edit Page option. This displays the Account or Opportunity Object page per your selection in the first step.
In the layout, click the Details tab. This displays a tabs component in the right panel.
Click the Add Tab button. This adds another Details tab in the layout.
In the tabs component, select the newly added Details tab.
From the Tab Label, select Custom. This displays the Custom Label text field.
In the Custom Label field, enter Wizard.
In the layout click the Wizard tab.
In the left panel, search for Wizard Create action.
Drag Wizard Create action from the left panel and drop in the Add Component(s) here section.
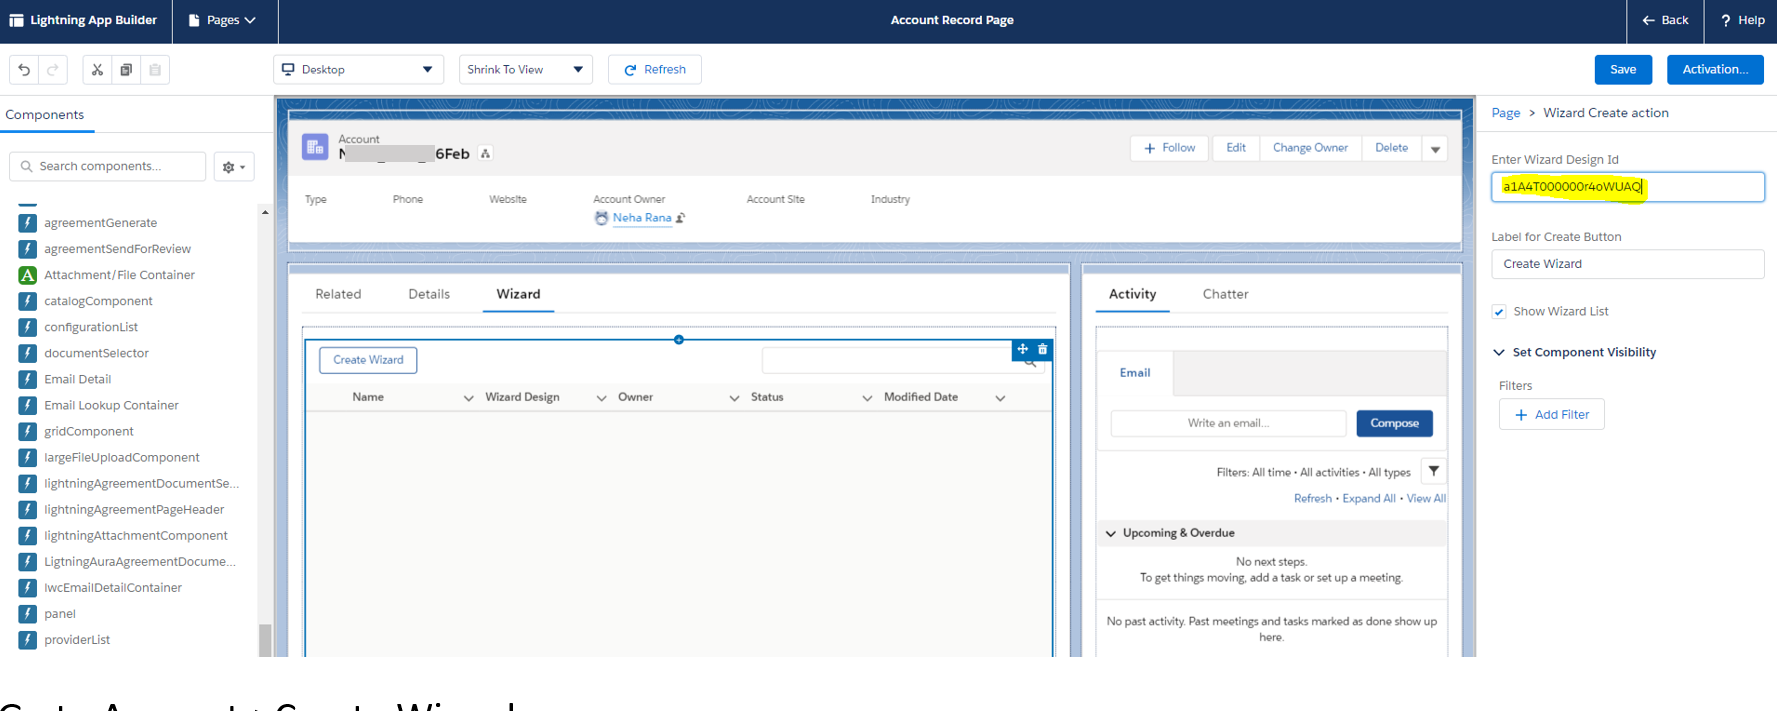
Navigate to the wizard that you need to use to create agreements and copy the Wizard Design Id.
Click the Wizard tab and select the Create Wizard button.
In the right panel, enter the Wizard Design Id.
Click Save. If you are configuring the page layout for the first time in your org, then you need to activate the page. When you navigate to the Account (or Opportunity) Detail page and click Create Wizard, the Account Name (or Opportunity Name) is pre-populated in the wizard.