Download PDF
Download page Migration Path for CQG/CIG to the new Composer Package.
Migration Path for CQG/CIG to the new Composer Package
The following is a list of steps for migrating a Salesforce org that is currently using CQG/CIG package and does not yet have the Conga Composer Package installed.
To begin the migration process and install the Composer Package, you must first uninstall the CIG/CQG package. Before uninstalling, it is important that you collect and store all current Conga Solutions, Conga Queries, and Conga Templates on your local desktop. These will have to be recreated and modified to be used in the newly installed Composer Package. It is also necessary to collect and store all users that are assigned permission sets associated with the CQG/CIG packages, as these permissions sets will also have to be removed from the users for a successful uninstall. They will need to be reassigned to those users once the Composer Package is successfully installed.
Step 1: Export CQG/CIG Templates, Queries and Solutions
- Go to Conga Templates and download your Template documents and files to your local desktop.
Optionally, if you have many templates, you may use the Salesforce Data Export feature to copy your files to your local machine. However, this does not filter your templates - Go to Conga Queries, copy the SOQL statement of each query and save it to a text or word file to your local desktop.
- Go to Conga Solutions, click into each solution and click Export Solution. In the new window, click the Download button and save the files to your local desktop.
Step 2: Remove Permission Sets
- Go to Salesforce Setup > Users > Permission Sets.
- Click the permission set CPQ Additional, click Manage Assignments, then select all users assigned to this permission set and click Remove Assignment.
Step 3: Uninstall CQG/CIG
- Go to Salesforce Setup > Apps > Packaging > Installed Packages. Find the CQG/CIG package and click the Uninstall link.
Example
Conga Invoice Solution to be stored:
/apex/csfb__Conga_Composer?SolMgr=1
&serverUrl={!API.Partner_Server_URL_370}
&userName={!$User.Username}
&Id={!blng__Invoice__c.Id}

&QueryId=[LineItems]a2WHn00000CK4Yf,
[Usages]a2WHn00000CK4Yg,
[CompanyDets]a2WHn00000CK4Yh

&TemplateId=a2eHn0000043Apy

&FP0=1
&AC1=Invoice+Generated
&SC0=1
&SC1=SalesforceFile
&OFN=Invoice+for+{!blng__Invoice__c.blng__Account__c}+-+{!TEXT(TODAY())}
&AC0=1
&TemplateGroup=Invoice
&XDO=CIA
&ContactId={!blng__Invoice__c.blng__BillToContactId__c}
&XDO2=GenerateInvoice
&GEO={!$User.Country}Step 4: Install Composer
Refer to Installing Conga Composer for specifics on the installation process for Composer.
After uninstalling the CIG/CQG package and installing the Composer package successfully, recreate all solutions, queries, and templates in the new package.
Update the namespace for any solutions using the CQG/CIG namespace to the Composer namespace for all solutions leveraging a VisualForce page for launching Composer.
Example
Original Solution:
/apex/csfb__Conga_Composer?SolMgr=1
&serverUrl={!API.Partner_Server_URL_370}
&userName={!$User.Username}
&Id={!blng__Invoice__c.Id}Modified Solution for new package:
/apex/APXTConga4__Conga_Composer?SolMgr=1
&serverUrl={!API.Partner_Server_URL_370}
&userName={!$User.Username}
&Id={!blng__Invoice__c.Id}Using Salesforce Data Loader to Export and Import Templates:
Exporting your Templates
If you have access to Salesforce Data Loader, you may use it to export CQG/CIG Templates. For more details on using Data Loader, refer to Insert Files with Data Loader.
- Open Salesforce Data Loader, click Export All.
- Select Conga Quote Template (APXTCFQ__Conga_Template__c).
- Click Browse and create a File location to export your files to.
- Click Extract.
- Use the Select All Fields button to select all your Template Fields and press Finish.
- On the prompt regarding exporting all records, click Yes.
Import your Templates into your Org.
- In your org, go to Object Manager and search for Conga Template (APXTConga4__Conga_Template__c)
- Go to Fields and Relationships, click New and select Text for the field type. Give it the label "Old ID" and a Length value of 255.
- Determine the Visibility of the field, ensure that at minimum System Administrators have access to the new Old ID field. It does not have to be added to the Page Layout. Click Save.
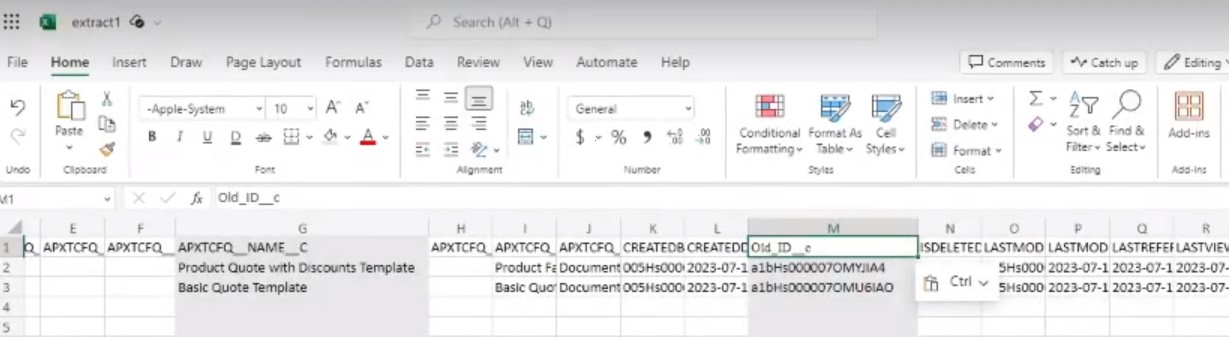
- Copy the API name of the Field (Old_ID__c) and go to your extracted file for your Templates.
- Find the ID field in the document and paste the Old_ID__c value over the ID column header.
Open Salesforce Data Loader, click Insert.

If your template Name field contains a "-" in the label (example: CQT-0004), you may run into problems with Data Loader. To work around this, navigate to Salesforce Data Loader > Settings and confirm that "Read all CSVs with UTF-8 encoding" is enabled, and remove the "-" from the "Other Delimiters for load operations".
It is also recommended to enable "Use Bulk API".- Select the Conga Template (APXTConga4__Conga_Template__c) object, then select your file to import it.
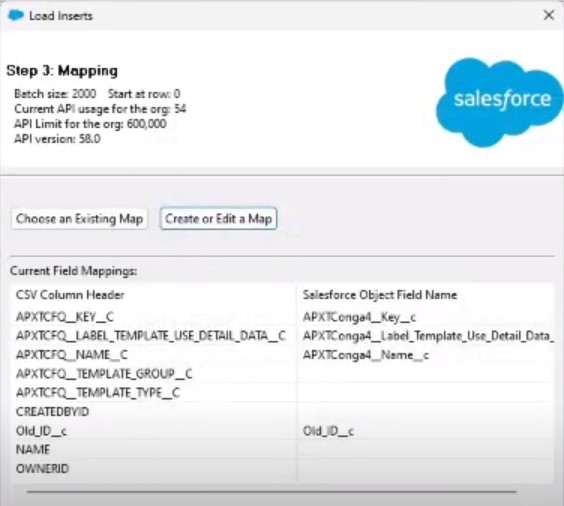
- In the Mapping popup, click the Create a Map button, then drag and drop your fields to map them to the correct column header. Most importantly, map the Old_ID__c field to the Old_ID__c field.
- Save your mapping to your local machine and click Finish.
- On the Finish popup, click Browse to choose where your Results file will appear. Begin the Import.
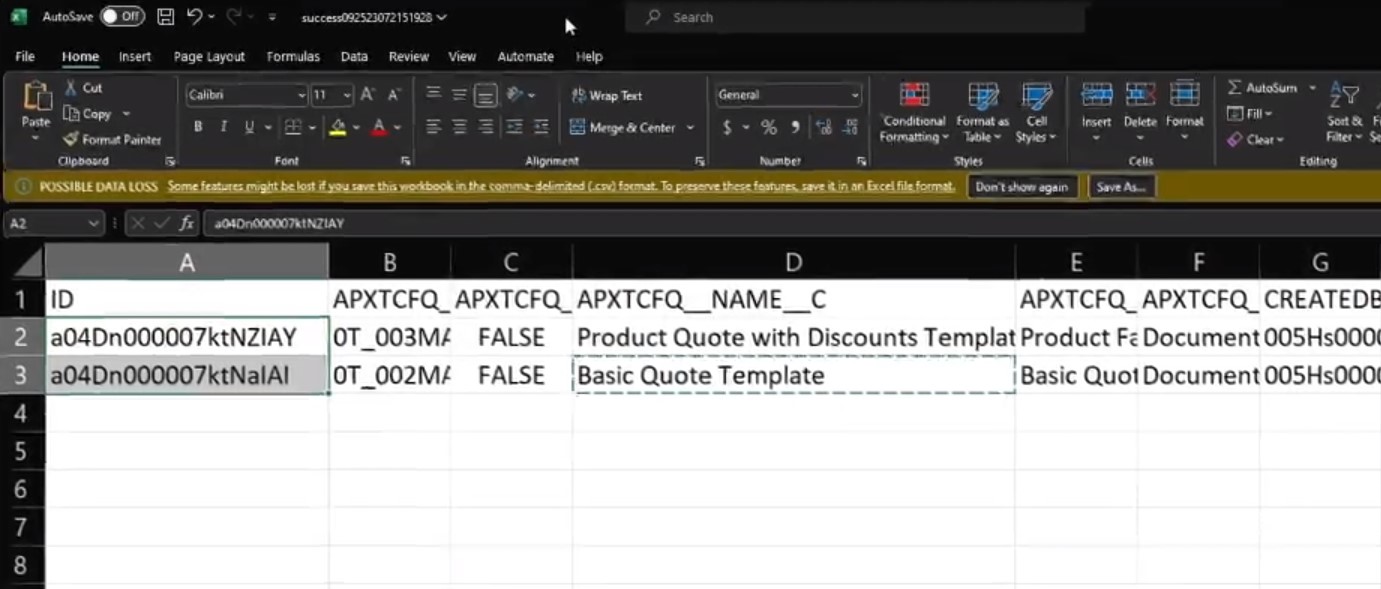
- Once completed, click the View Successes button, then click Open in external program to receive a new Success Export file.
Uploading your Templates
- Create a File Import CSV per the instructions found in Insert Files with Data Loader.
- Ensure that the ID of the Conga Template you want to link your file to in your Success Export File exactly matches the FirstPublishLocationId column of your File Import CSV.
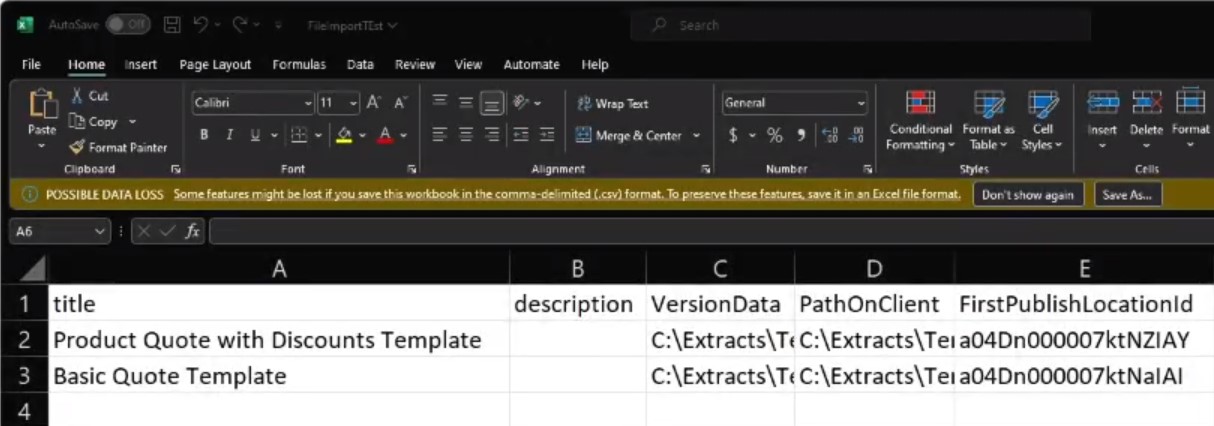
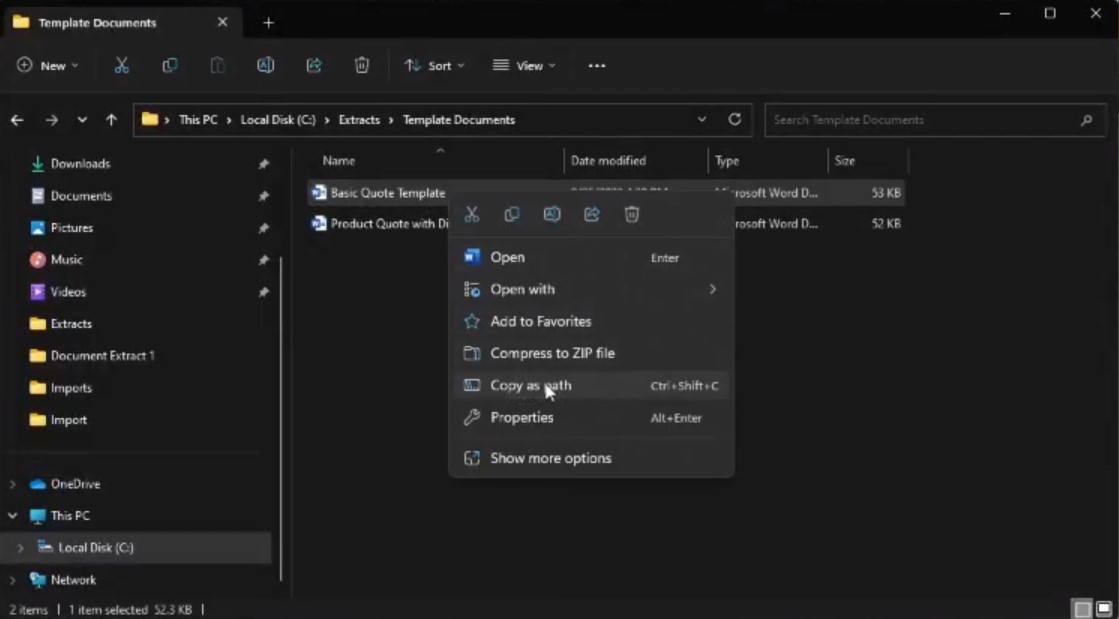
- Ensure that your file path is correct in both the VersionData and PathOnClient fields. To do this, find your Template saved on your local machine, right-click on the document and select "Copy as Path". Paste this value into the correct VersionData/PathOnClient field.
- In Salesforce Data Loader > Settings, set Batch Size to 1 and disable Use Bulk API.
- Click Insert, enable "Show all Salesforce objects" and search for Content Version (ContentVersion).
- Choose your File Import CSV, then complete mapping your fields.
- On the Finish popup, click Browse to choose where your Results file will appear. Begin the Import.
- Once the Import is complete, click OK. Your templates will be recreated in your Salesforce environment.