Download PDF
Download page Update Affected Templates.
Update Affected Templates
After replacing reports with queries and adding them to the Composer solution using aliases, the final step is to update affected templates.
Reports and queries retrieve different values (reports retrieve Field Labels, while queries retrieve the API Name of the field along with the object prefix), which is why you must update any templates that contain merge fields from the reports you replaced with queries. This is as easy as copying the new merge fields from the Template Builder and pasting them into your template.
Follow the steps below to complete this task.
Identify Affected Templates and Locate New Merge Fields
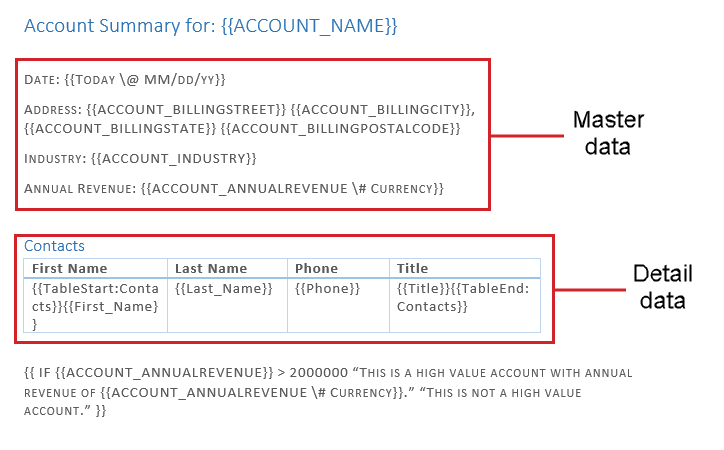
Identify which templates have been affected (i.e. those used with solutions that now use queries instead of reports). Then, identify which merge fields in the template need to be replaced (merge fields from the master dataset are not affected, but merge fields from detail datasets are).
 Merge fields from detail datasets are surrounded by {{TableStart}} and {{TableEnd}} merge fields. Look for these markers to help identify which merge fields need to be replaced.
For example, our Account Summary template has merge fields from the master dataset as well as the Contacts detail dataset, which is the data that came from the report we replaced with a query. These will need to be replaced.
 A quick way to open your template as a local file is to download it from the Composer user interface. It will then appear in your downloads folder. To do so, click the Download icon next to the template you want to update (see below).
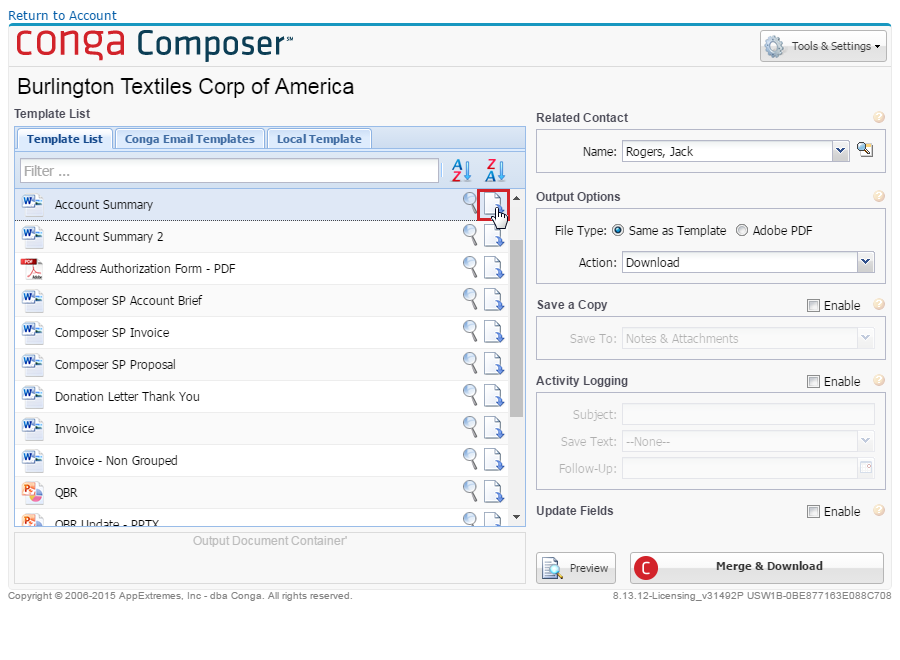
- Next, navigate to a record that has the Composer button on it and launch the button.
- From the Composer user interface that opens, select the Tools & Settings drop-down and select the Template Builder.
- Locate the new query dataset you created for the solution and the new merge fields inside the dataset. These are the fields you will use in your template.
Update Template
There are several options for updating the merge fields in your template. If the data is in a table, as in our example, it might be easiest to replace the entire table using the Template Builder. You can also replace merge fields one at a time if you do not want to re-create the entire table. This is the approach we will take in our example.
To update the template, we will use the same techniques used when building templates with the Template Builder. Follow the steps below.
To copy an individual merge field to your template, select the field and click the Copy Selected Item icon next to the field. This copies the field to your clipboard.
To copy more than one field at a time, double-click each merge field to move it over to the Template Canvas. Then you can copy and paste (or drag and drop) all of the fields from the Template Canvas into your template at once.
- In your template, replace the old merge field with the new one you just copied to your clipboard. Repeat for all the merge fields in your detail dataset.
- Lastly, update the {{TableStart}} and {{TableEnd}} merge fields. For a reminder about how these works, see Using Detail Data in Word.
- When you are done, save your template locally.
- Test your template before completing the next step. To do so, click Back to return to the Composer user interface and then run a test merge by choosing your template from the Local Templates tab. If the new merge fields merge correctly, you can continue to the next step. If not, correct any mistakes before continuing.
Update the Conga Template Record
Finally, upload the new template to the same template record. This will prevent you from having to update the button URL because the &TemplateId parameter can continue to reference the same Id.
Follow the steps below to complete this final task.
Navigate to the template record for the template you just updated.
A quick way to do this is from the Composer user interface. Click the magnifying glass icon next to the template to open the template record in a new tab (see below). The other option is to navigate to the Conga Templates object and find the template record from there.- Click Attach File.
- Click Choose File. Locate the updated template you saved locally.
- Click Attach File.
- Click Done and close the window.
You do not need to delete the old template because Composer will automatically use the newest attachment on the record. However, you can delete it if you like. You have now converted your reports to queries. Run the Composer solution one more time to confirm everything looks correct with the new query and the new template.