Download page Using Send through External Email Services with Conga Composer.
Using Send through External Email Services with Conga Composer
Use the Send through External Email Services functionality with Conga Composer
The actions in this article are only required if Send through External Email Services is enabled in your org. If it is not enabled, no action is required.
Salesforce offers optional functionality to send outbound emails from Gmail and Office 365 with theSend through External Email Servicessettings in Salesforce Setup.
Each Composer user must follow the steps below to authorize external email services and successfully send emails with Conga Composer. If Send through Gmail or Send through Office 365 is enabled and the external email service is not authorized, users see the following error message when sending an email from Composer.
Prerequisite for Authorizing External Email Service
The native Send EmailGlobal Quick Actionis required to authorize the external email service. Ensure that the Send Email Global Quick Action is added to the Opportunity Page Layout.
As an admin, navigate to the Object Manager in Salesforce Setup and clickOpportunity.
ClickPage Layoutsand select the relevant Page Layout.
ClickMobile & Lightning Actions.
Select and dragEmailinto the Salesforce Mobile and Lightning Experience Actions section of the Page Layout.
ClickSave.
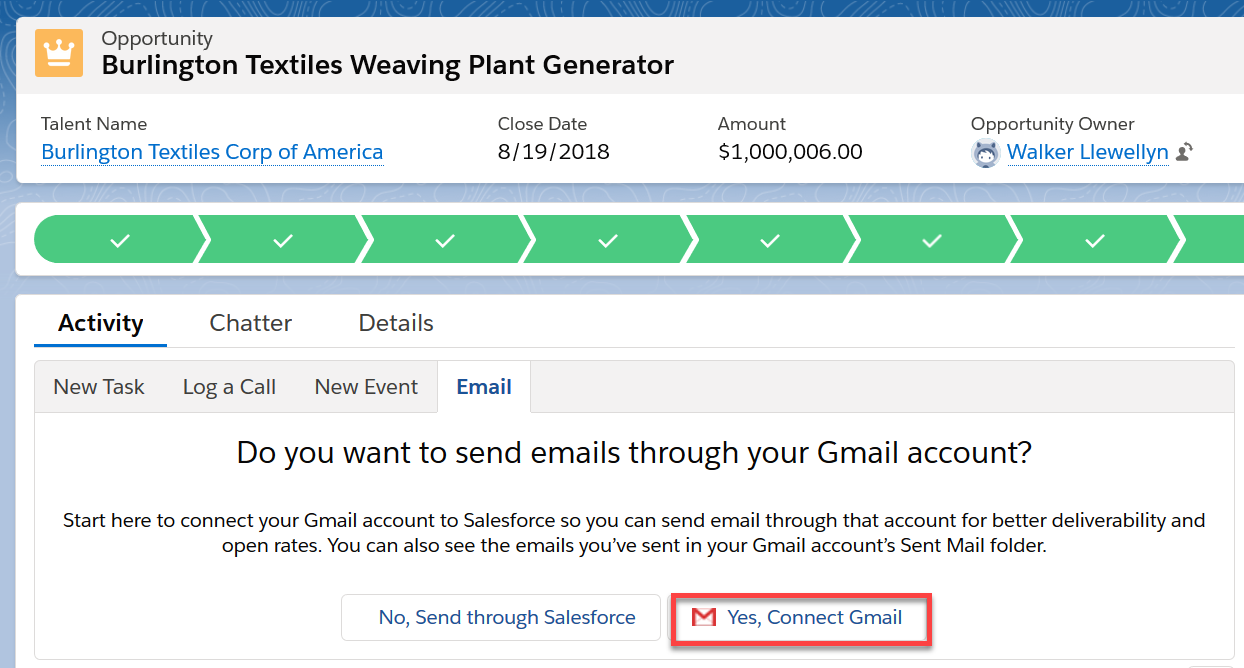
Authorize Send through Gmail
Users must use Salesforce Lightning to authorize the external email service. Each individual user must complete the steps below to authorize the external email service and successfully send emails from Conga Composer.
As a user, navigate to an Opportunity record in Lightning.
Under the Activity tab, clickEmail.
ClickComposeor click in the "Write an email" text box.
ClickYes, Connect Gmail.
Select a Gmail account.
ClickAllow.
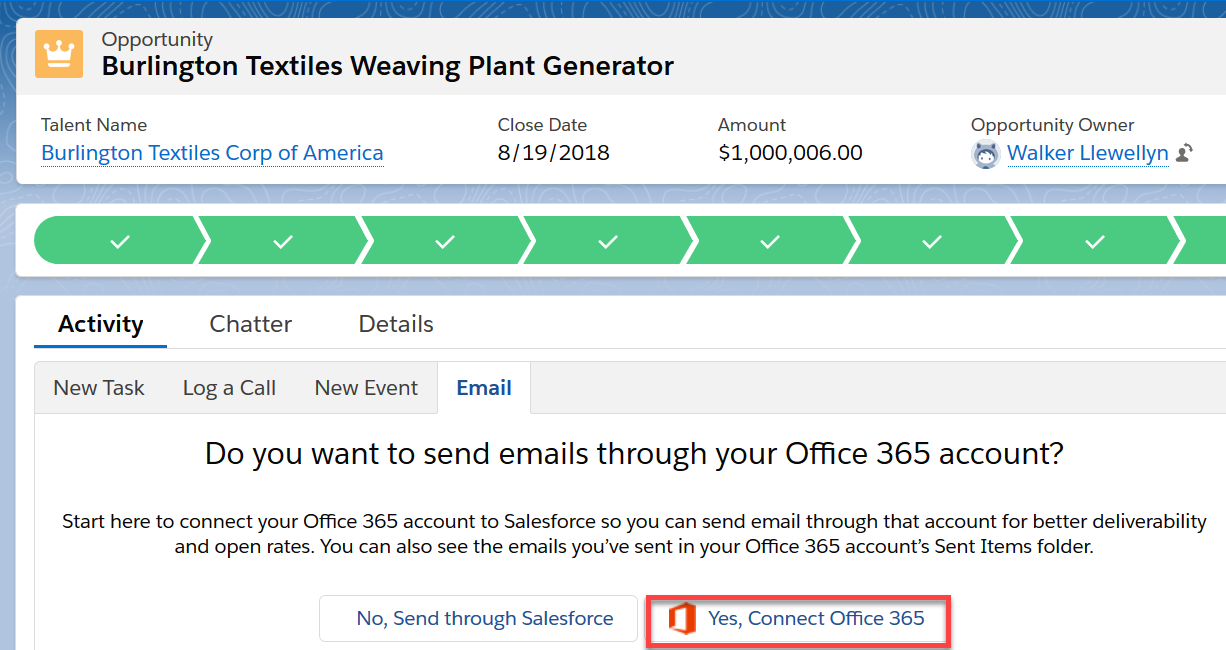
Authorize Send through Office 365
Users must use Salesforce Lightning to authorize the external email service. Each individual user must complete the steps below to authorize the external email service and successfully send emails from Conga Composer.
As a user, navigate to an Opportunity record in Lightning.
Under the Activity tab, clickEmail.
ClickComposeor click in the "Write an email" text box.
ClickYes, Connect Office 365.
Enter your Office 365 email and clickNext.
Follow the remaining prompted directions to complete the authorization.
These directions vary depending on your organization's Office 365 configuration.