Download PDF
Download page Adding Custom Provisions.
Adding Custom Provisions
Provisions are available from built-in libraries. Syncing the Provision Library to the publisher (AI provider) makes these provisions available for data extraction mapping. However, if your specific contract language does not conform to any of these preconfigured provision types, you can name, build, populate, and train the AI on your own custom provision type.
To add a custom provision without generative AI
- From the left navigation bar of the Conga Start window, select the menu icon (
 ) and then pick Admin Apps.
 - Click the AI icon (
 ) in the left nav bar.
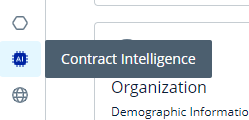 to open the Contract Intelligence admin/management view.
 - Click the CCI Admin Dashboard button to raise the Contract Intelligence Admin Home page.
- From the Admin Dashboard (Admin Home), click the Provision Library tab in the left navigation bar to open the Provision Library.
- Review the existing provisions carefully to ensure that the provision you want isn't already provided. Entering key terms in the Search & Filter field at right is a good way to shorten the list of provisions to review.
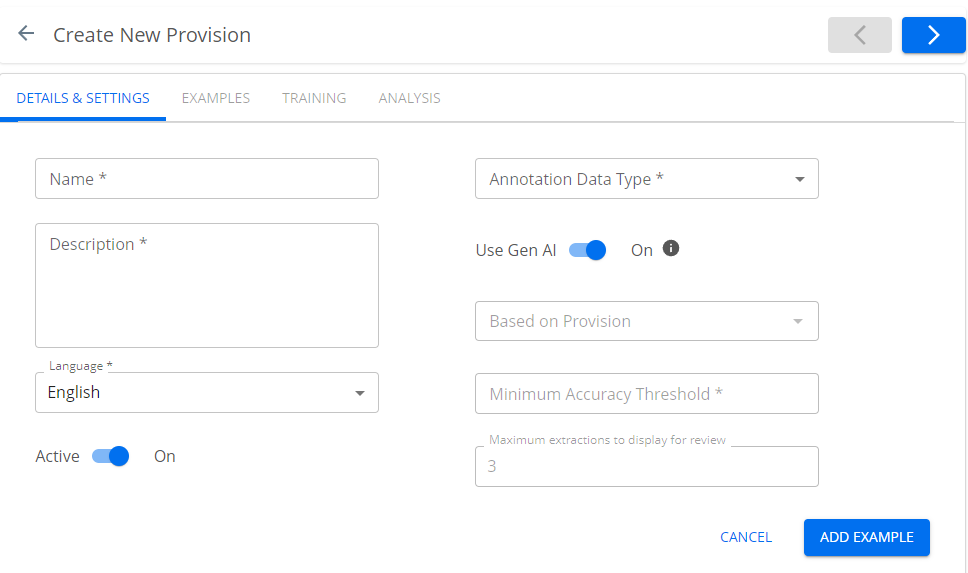
- If the provision you want isn't available, click the NEW button to raise the Create New Provision window. The DETAILS & SETTINGS tab is available and the EXAMPLES, TRAINING, and ANALYSIS tabs are disabled.
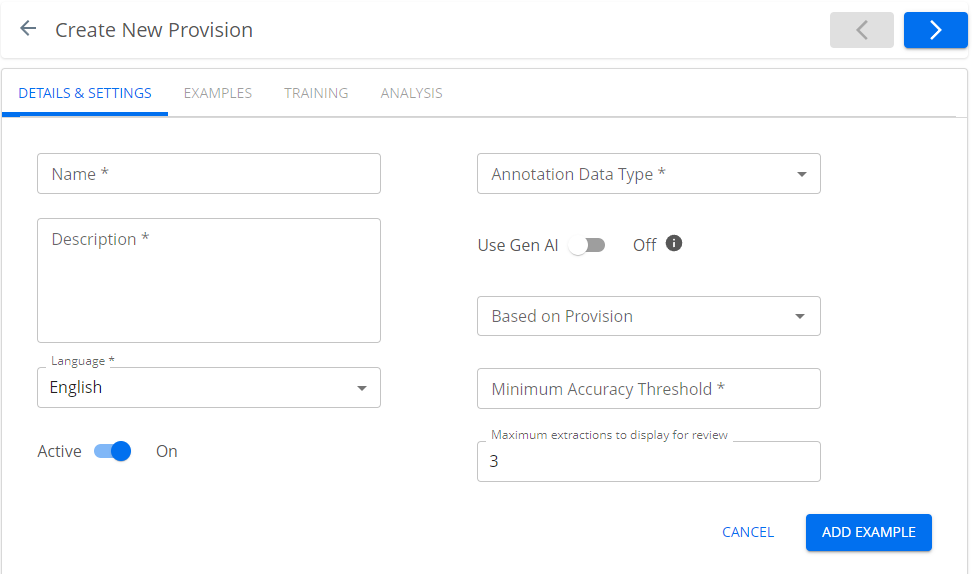
- In the DETAILS & SETTINGS tab:
- Enter a name and a brief description for the new provision (Alphanumeric characters are allowed. Duplicate provision names are also allowed).
- Select a value from the Annotation Data Type list (Date, Company, Currency, Duration, Number, Percent, Picklist, Short Text, Text, or Table).

Caution
Because table extraction requires generative AI, selecting Table puts you in the generative AI flow. Do not select Table unless you want to employ generative AI.
- Set a minimum accuracy threshold (this is expressed as a percentage) and select the language in which the anticipated contracts are written. The minimum accuracy threshold is the AI review's F score, expressed as a percentage. The machine learning model uses this value to determine whether to publish the custom provision and to set its status to Trained when it publishes it. Setting this too low valorizes training speed over precision. Setting it to 100 ensures that the provision can never leave training. Conga recommends setting this value to 65 as the best practice for balancing training efficiency and precision. For more detail, see Theory, below.
Set the value to 80–90%+ for extractions to begin only when the AI model has high confidence.
Set the value to 65–70% for extractions to begin even when some results may be wrong.
- You can speed up training by selecting a provision from the Based on Provision field and thus basing the custom provision on an existing one that is "close" to it. If your custom provision is, for example, an indemnity provision with a specific added third party, you can configure the AI to look for an indemnification clause first, then to search specifically for the peculiar third-party character of your custom provision. This makes it much easier for your users to train the AI, as it puts them "in the ballpark" without forcing them to search for the provision in the contract, and they can highlight the exact passage for training from the section already located by the "based on" provision.
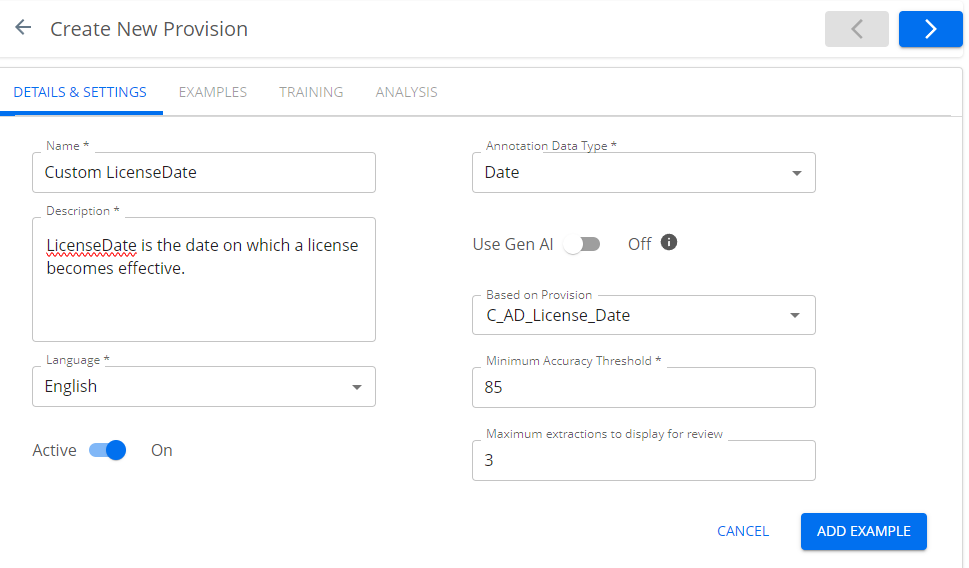
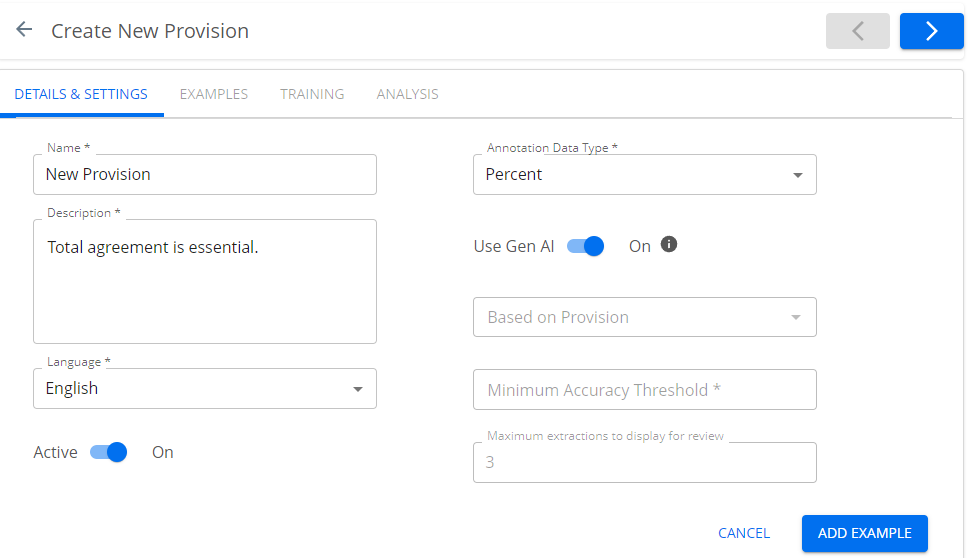
In the following example, the Custom LicenseDate provision is created using the Based on Provision field to use the existing trained provision, C_AD_License_Date.
- The Active toggle is ON by default. To revisit the Details and Settings window before training, slide it off.
- Click ADD EXAMPLE to open the EXAMPLES tab.
- From the EXAMPLES tab, click NEW to raise the "Add example" pop-up.
- In the "Add example" pop-up:
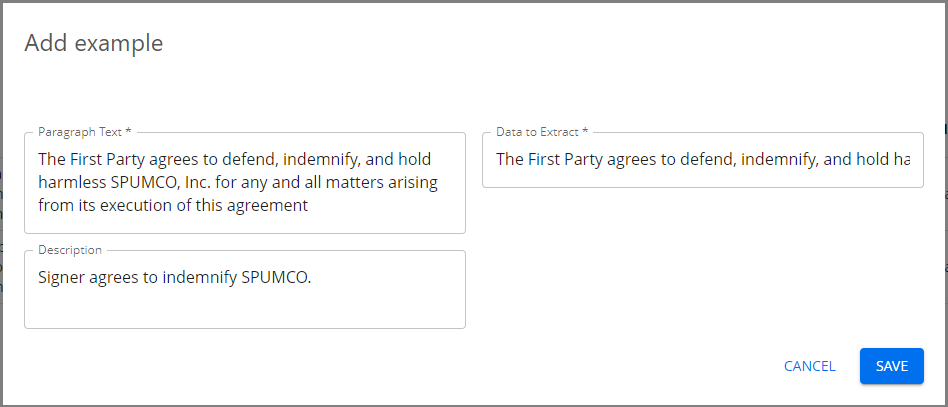
Enter an example of the provision text and an optional description of the provision text. Enter the data to extract. When you are done, click SAVE.
When you activate the provision, it becomes available for inclusion in worksheets. Once the new provision is introduced to an operating worksheet, users can see the provision and train the AI on it.
Training
Each provision must be trained on a body of documents to reach a desirable level of accuracy. This training is performed by users working through a conventional review process.
The Force Training feature shortens the training period to a configurable number, lessening training period overhead.
To force-train a provision
- From the Conga Start page, click Admin Apps.
- Click the Contract Intelligence button in the left nav bar.
- Click the CCI Admin Dashboard button to raise the Contract Intelligence Admin Home page.
- Click the Provision Library tab to open the Provision Library.
- Find the provision for which you will configure training and click the link text to open the provision to the DETAILS & SETTINGS tab.
- Click the TRAINING tab to raise the training window. This window reports the number of documents included and queued for training.

Clicking the FORCE TRAIN button sets the provision to a Trained state. By default, training commences when 30 documents are queued.

Note
It is a best practice to wait for five provisions to have been reviewed before force training. Force training prematurely will compromise accuracy.
- You can set the retraining toggle to stop or continue retraining. This feature feeds training results back to machine learning to enhance accuracy. Once you achieve a desired level of accuracy, you can toggle this off.
To add a custom provision with generative AI
Successive generations of Conga Contract Intelligence have progressively reduced the resources required to train an AI to recognize and extract values from documents. Generative AI reduces the training requirement to zero. The administrator configures the generative AI search with two examples. Once the examples are added and the provision is saved and mapped to a worksheet, no additional user training input is expected: the provision extracts from imported documents automatically.
Warning
There is an issue with custom provisions using generative AI. When the user reviews clauses from an extracted document, the on-screen highlight may not match the information gathered correctly by the AI-generated provision. This issue affects only clauses, not fields. It is scheduled for repair.
Before adding custom provisions with generative AI, alert users to this issue.
- From the left navigation bar of the Conga Start window, select the menu icon () and then pick Admin Apps.
- Click the AI icon () to open the Contract Intelligence admin/management view.
- Click the CCI Admin Dashboard button to raise the Contract Intelligence Admin Home page.
- From the Admin Dashboard (Admin Home), click the Provision Library tab in the left navigation bar to open the Provision Library.
- Review the existing provisions carefully to ensure that the provision you want isn't already provided. Entering key terms in the Search & Filter field at right is a good way to shorten the list of provisions to review.
- If the provision you want isn't available, click the NEW button to raise the Create New Provision window. The DETAILS & SETTINGS tab is available and the EXAMPLES, TRAINING, and ANALYSIS tabs are disabled.
- In the DETAILS & SETTINGS tab:
- Enter a name and description for the new provision (Alphanumeric characters are allowed. Duplicate provision names are also allowed).

Tip
Name
Enter clear, natural, space-separated names in the Name field, which prompts the generative AI model in the background.
Do:
Effective DateDon't:
Effective_Date1E.Date.CustomDescription
The Description field conveys the provision's meaning to the generative AI model. In this field, provide clear phrases that describe what is to be extracted from the document. For example, the description offered to extract the effective date only if it is mentioned might be: “The date on which agreement becomes effective”. If you also consider the contract date as the effective date, the description might be: “The date on which the agreement becomes effective or is entered into.”
- Select a value from the Annotation Data Type list (Date, Company, Currency, Duration, Number, Percent, Picklist, Short Text, Text, or Table).
- Toggle Use Gen AI on. This disables (grays out) the Based on Provision, Minimum Accuracy Threshold, and "Maximum extractions to display for review" fields.
- Click ADD EXAMPLE. If any examples are available, they are displayed in the resulting New Provision window. Otherwise, you must click NEW to add an example.
- In the "Add example" pop-up, enter the paragraph text you will extract and the data you want to extract from it.
Tip
For fields, enter the sentence, paragraph, or clause where the field is usually found in the Paragraph Text field.
For example:
This agreement is entered into on 1/1/2024 by and between ABC Inc., a Delaware company, and XYZ LLC, headquartered in San Jose.In this example, enter
1/1/2024in the Data to Extract field.For clauses, enter a sentence, paragraph, or clause in the Paragraph Text field that is similar to or exactly the clause to be extracted.
For example:
No Party shall be liable or responsible to the other Party, nor be deemed to have defaulted under or breached this Agreement when delay is caused by or results from acts of God.In this example, enter the same clause information in the Data to Extract field, as the extraction involves the entire clause or paragraph.
- Click SAVE.
- Enter a name and description for the new provision (Alphanumeric characters are allowed. Duplicate provision names are also allowed).
- Your entry is now available in the Examples table. Click NEW to add another example (go back to step 7d). You must enter at least two samples for the AI to work.
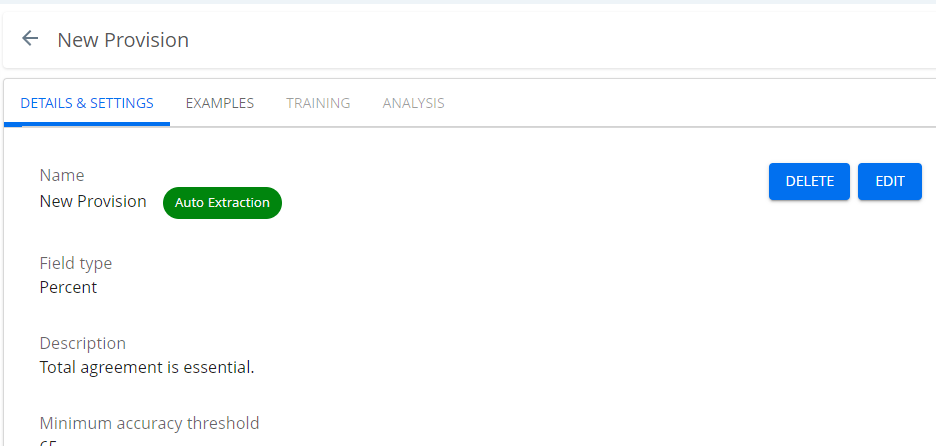
- When you have entered all your examples, click SAVE. You will receive a success message and see a summary of the new provision:
- Your new custom provision is available in the Provision Library and is active by default.
Generative AI provisions do not offer users a training flow. If generative AI is not producing the desired accuracy, add more examples to the provision as described in step 7d, above.
Table Extraction
You can use AI to extract tables from documents. This is especially useful when contracts present such tabular data as bills of materials or delivery schedules. Because table extraction requires generative AI, these extractions do not require training. Users can extract tables as soon as the table extraction is configured and mapped to a worksheet.
Each table must have a vertical columnar structure, with each line reflecting the values named in the heading. Contract Intelligence extracts these values in much the same way it handles fields and clauses, presenting this data in a column-defined line-item format.
Note
Contract Intelligence cannot extract horizontally disposed columns with vertical line items. This functionality is on our roadmap.
To configure a custom provision with table extraction
- Follow the procedures for adding a custom provision with generative AI (above) to step 7b.
- Select Table from the Annotation Data Type dropdown menu. A generative AI warning appears and some screen options (Based on Provision, Minimum Accuracy Threshold, etc.) disappear.
- Select a table by name from the Choose a Table dropdown menu. These tables are defined in CLM. You can set up new tables in CLM by following the instructions for adding contract line items.
- Click ADD COLUMNS to raise the Create New Provision window.
- Click the NEW button to raise the Add Alternate Keywords for Columns pop-up.
- Select a column name from the Choose Column drop-down that you want the AI to extract.
- Click the + symbol to add columns to extract. Add columns in the order you want this information presented. The order you see here is the presentation order of the extraction, irrespective of the order the columns fall in the scanned table. You are not required to select every column.
Note
The order of the columns here controls the order in which they are presented to the reviewer. To change the order, you must delete and add columns until you achieve the desired order. It is therefore a good idea to have the presentation order in mind before you begin.
- You must click the checkbox adjacent to one of the columns to set it as the primary column. This identifies the essential property of the line without which there would be no line. For example, on a line containing the column heads "Deliverable", "Quantity", and "Unit Price", the Deliverable column is the reasonable primary choice, as there is no quantity or price without a deliverable product. Primary selection does not affect the presented order of the columns, but it is the "handle" by which reviewers will access and sign off on the extracted data.
- For each column, enter keywords as comma-separated text in the Add Values for Keywords field approximating likely column headings to enhance the AI's likelihood of accurate extraction. For example, if you know a column normally titled "Description" is occasionally titled "Desc.", you can enter that alias here.
- When you have selected and described all columns desired for extraction, click SAVE to return to the Create New Provision page.
- From the Create New Provision page, you can delete columns, add new ones, and add new keywords to any existing column. When you are satisfied with the columns and their order, click SAVE.
- The new provision appears in the Provision Library.
Minimum Accuracy Threshold: Theory
It is important to have a working understanding of the F score, as this is the final criterion by which you will measure the AI's performance in recognizing your custom provision. As the F score is a factor of accuracy, precision, and recall, it is worthwhile to have a basic understanding of these foundational concepts.
Accuracy
Accuracy describes the ratio of true positive and negative identifications for all samples. The ratio of true positives detected to actual positives is classified as recall. The ratio of true predicted positive results to all (true and false) predicted positives results is called precision. These are combined to form an F score.
Precision
Precision is a measure of the AI's predictive correctness. For example, if the AI is asked to find apples in a mixed basket of fruit, a perfect precision score of 1.00 means every fruit it found was an apple. This does not indicate whether it found all the apples. Expressed mathematically:
precision = true positives / (true positives + false positives)
Recall
Recall is a measure of completeness. For example, if the AI is to find apples in a mixed basket of fruit, a perfect recall score of 1.00 means it found all the apples in the basket. This does not indicate it found only apples: it may have found some oranges too. Expressed mathematically:
recall = true positives / (true positives + false negatives)
Categorizing legal concepts has more variation than picking fruit, especially when the provisions are reviewed by different legal professionals; therefore, recall and precision may differ among annotators (one person’s recall of 0.90 may be someone else's 0.80). Remember this when using built-in provisions and reviewing annotations.
F Score
The F score is the harmonic mean of precision and recall. It provides a more sensitive measure of accuracy than precision or recall alone. Expressed mathematically:
F = 2 * [(precision * recall) / (precision + recall)].
The F score gives equal weight to both precision and recall for measuring a system's overall accuracy. Unlike other accuracy metrics, the total number of observations is not important. The F-score value can provide high-level information about an AI model’s output quality, enabling sensitive tuning to optimize both precision and recall.
When setting up custom provisions, you are asked to enter a desired minimum accuracy threshold. This is an F score, and Conga recommends you set this value to 65, which we have found optimally weights AI precision vs. trainer time.