Download PDF
Download page Smart Search Setup.
Smart Search Setup
You can use the Smart Search feature to search for products in large and complex product catalogs with multiple levels of categories and stricter rules. The smart search typeahead mechanism and faceted search help narrow the search results and still honor product visibility and availability rules.
You must setup remote site before you configure settings for Smart Search.
Setting up Remote Site Settings
Navigate to Setup > Administration Setup > Security Controls > Remote Site Settings and click New Remote Site to create the following records:
| Record number | Remote Site Name | Remote Site URL |
|---|---|---|
1 | SmartSearch | https://<SMART_SEARCH_URL> Smart Search URL can be any of the following:
For any fresh package installation, Azure URL defaults. |
2 | SFDC |
|
| 3 | OauthToken |
|
Creating a Certificate
Navigate to Setup > Administration Setup > Security Controls > Certificate and Key Management and click Create Self-Signed Certificate to create a new certificate with the following details:
- Enter JWT as the label for the certificate. The Unique Name defaults to JWT.
- Select the Exportable Private Key checkbox.
- Choose Key Size as 2048.
- Select the Active checkbox.
- Click Save.
Once you have created a certificate, go to your certificate record and click Download Certificate to store the certificate on your local system. You will need the certificate while creating a connected app.
Creating a Connected App
- Navigate to Setup > App Setup > Create > Apps.
- Scroll down and search for Connected Apps related list. Click New to create a new app.
- Enter the basic information, Connected App Name and API Name as CongaSmartSearch.
- In the API (Enable OAuth Settings) section, select Enable OAuth Settings checkbox.
- In the Callback URL, enter https://<login OR test>.salesforce.com/services/authcallback/<org-id>/CongaSmartSearch
In <login OR test> enter login or test depending on your environment. In <org-id>, enter your org ID. - Select the Use digital signatures check box. Choose the file from generated certificate.
- For Selected OAuth Scopes, select the following:
- Access and manage your data (api)
- Access and manage your Chatter data (chatter_api)
- Perform requests on your behalf at any time (refresh_token, offline_access)
- Access and manage your data (api)
- Click Save.
Approving your Connected App
Before approving your connected app, you must decide which Oauth policy you would like to have. This policy decides which permitted users can work on Smart Search's admin page. Admin approved users are pre-authorized. You can also authorize other users and for such users, the steps mentioned in Approving your Connected App procedure are mandatory.
Step 1: Managing Profiles for Connected App
- Navigate to Setup > Administration setup > Manage Apps > Connected Apps.

- Next to the CongaSmartSearch connected app record, click Edit.
- Under the OAuth Policies section, in Permitted Users drop-down list, choose Admin Approved Users are Preauthorized and click Save.
- Scroll down and search for Profiles section. Click Manage Profiles and select the profiles that you want to give access to the Smart Search App.

- Click Save.
Step 2: Approving your Connected App
- Navigate to Setup > App Setup > Create > Apps.
- Scroll down and search for Connected Apps related list.
Click your CongaSmartSearch record and save the values of the Consumer Key, Consumer Secret, and Callback URL fields in a text file. You will need these keys to set up the last step for smart search. - Go to your browser URL, paste the following URL and click Enter:
https://<login OR test>.salesforce.com/services/oauth2/authorize?response_type=code&client_id=<consumer-key>&redirect_uri=<callback-url>
Use the correct domain for <login or test>, enter your consumer key and callback URL which you have fetched in the above step in <consumer-key> and <callback-url>.
Note that<callback-url>needs to be encoded. - Click Allow to give permission to your connected app.
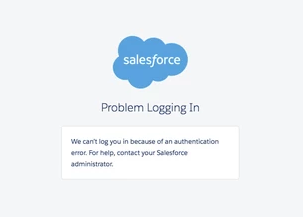
- You will see the following page, which is the expected behavior of the app. You can now close the browser tab.
