Download PDF
Download page Configuring Flows.
Configuring Flows
As an administrator, you can now vary the Catalog, Options, Attributes, Installed Products and Cart pages that an end user interacts with as well as the data and actions within those pages based on the end user profile and other business rules. This is made possible by introducing the concept of Flows. Flows are groups of pages that are assigned to each step in the CPQ process. Earlier the only option to set up the Visualforce pages was through custom settings.
You can now use Flow Settings to assign custom or out-of-the-box pages to each step and configure the fields and actions that are visible within each page. You can then create criteria that would determine the Flow which in turn determines the pages that are displayed when an end user clicks the Configure Products button. These flow settings once setup, override the Visualforce pages setup in custom settings.
To create flows using flow settings
- Do one of the following based on the user interface.
- For Salesforce Lightning, click the App Launcher (
 ) icon and enter Config Settings in the search bar.
 - For Salesforce Classic, navigate to All Tabs (
 ) > Config Settings.
- For Salesforce Lightning, click the App Launcher (
- Click Flow Settings.
- In the Name field, enter a name for the flow. For example: Sample Flow
- Type the Visualforce pages in the following fields. Hover the mouse over the information icon to see valid values for each field.
Field Description Assets Page Enter the name of the VF page for displaying the Installed products or Assets. For example, Apttus_Config2__Cart. Cart Page Enter Apttus_Config2__Cart Visualforce page to access the new Cart page. If you want to view the cart with the new Grid UI, name the cart page as Apttus_Config2__Cart#cartgrid.
Catalog Page Enter Apttus_Config2__Cart Visualforce page to access the new Catalog page. Options Page Enter Apttus_Config2__Cart Visualforce page to access the new Options page. Product Attribute Detail Page Enter Apttus_Config2__Cart Visualforce page to access the new Product Attributes page. - Click Add. An entry is added to the list.
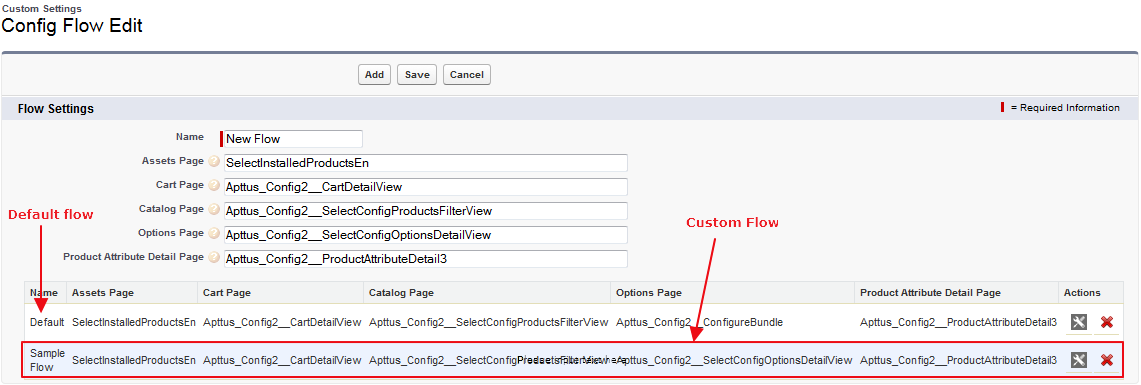
Default - When there is no flow created, the system uses the Default flow.
Custom Flow - In this example, Sample Flow is the custom flow created. - Run the custom settings maintenance job to activate the changes. For more information see, Running Maintenance Jobs.
- Click Save.
Setting up the Configure Products Button
Use the flow you just created as a parameter to pass on for the Configure Products button. The parameter is saved for the Configure Products button. On the Quote or Proposal details page when you click the Configure Products button, all the pages appear as defined in the flow.
You can either edit an existing configuration and add the parameter or you can create a new Configure Products button. To create a new button, see Custom Button.
To set up the configure products button to use the flow
- Do one of the following based on the user interface.
- For Salesforce Lightning:
- Navigate to Setup > Object Manager.
- Scroll down to select the Quote/Proposal object and from the Fields & Relationships related list, select Configure Products.
- For Salesforce Classic:
- Navigate to Setup > App Setup > Create > Objects.
- Scroll down to select the Quote/Proposal object and select Configure Products.
- For Salesforce Lightning:
Review the existing information and click Edit.
Make the required changes and insert the flow name in the Formula Options field as below.
IF ( LEN(Apttus_QPConfig__PriceListId__c ) > 0 , HYPERLINK("/apex/Apttus_QPConfig__ProposalConfiguration?id=" &Id+'&flow=Sample Flow', IMAGE("/resource/Apttus_QPConfig__Button_Configure", "Configure Products"),"_self"), NULL)where flow=<name of the flow you created>CODE- Click Save.
Customizing the Columns and Actions for a flow
You can customize the display columns and actions for the flow you created. The default or system-provided flows cannot be customized.
All the Visualforce pages that you set up in the flow are displayed with the columns and actions set up in the config settings.
If you select Default flow, the system displays the columns and actions set up in the Default flow. Use the Load Default Settings button to override all the columns and action settings to out-of-the-box settings in the Default flow.
To customize the columns and actions for a flow
- Do one of the following based on the user interface.
- For Salesforce Lightning, click the App Launcher () icon and enter Config Settings in the search bar.
- For Salesforce Classic, navigate to All Tabs () > Config Settings.
- For Salesforce Lightning, click the App Launcher (
- For setting up columns or actions or both for the custom flow, do one or more of the following:
- For columns, click Display Column Settings.
- For Actions, click Display Action Settings.
- Select a Display Type and from Flow, select the flow you created.
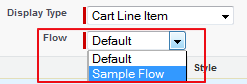
- Make the required changes in the table and click Save.