Creating a Cybersource Account with the Secure Acceptance Method
To integrate the Cybersource payment gateway, you must create a Cybersource account and create your own profile under a secure acceptance setting.
Prerequisite
You must subscribe for a Cybersource subscription account using the https://ebc2.cybersource.com/ebc2/registration/external link.
Creating Profiles Under Secure Acceptance Setting
Perform the following steps to create profiles under secure acceptance setting:
- Log in to your Cybersource account using https://ubctest.cybersource.com/ebc2 link.
- From the Dashboard, under Payment Configuration, select Secure Acceptance Setting.
- From the Secure Acceptance Setting page, click New Profile. The Create Profile panel appears.
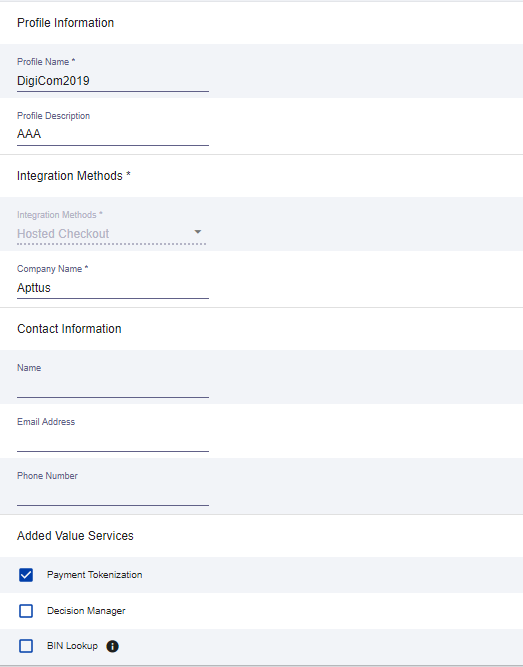
Enter the profile name and description, the company name, the integration method used to process notifications and the contact to whom they will be sent, and any additional services. This information is available in the General Information tab after you create the profile.
The integration method cannot be changed later.
Click Submit. The Create Profile panel closes and the Edit Profile page appears.
The profile is created as “Inactive.” You can complete profile values to promote it using the steps in Editing Secure Acceptance Profiles at any time.
Editing a Secure Acceptance Profile
You must make changes to an inactive profile, then promote the changes to the active profile.
Defining Payment Methods
After creating a profile, perform the following steps to configure payment methods.
From the Edit Profile page, go to the Payment Settings tab.
Click Add Card Types to add cards of your choice.
If you want to use Electronic Check (eCheck) or Pay Pal method, you must raise a support ticket first with Cybersource. Cybersource implements your requirement, post which eCheck and Pay Pal options are displayed. You can also select account types as per your requirement.
- Select the 3DS1 option under the Payment Authentication 3DS Version section.
- Select both the options (Fails AVS Check and Fails CVN Check) under the Automatic Authorization Reversal section.
Click the setting icon next to the card type to add supported currencies and required fields. The card setting page appears.
The default currency is US Dollars (USD). To add more currencies, you must raise a support ticket with Cybersource.Select the options of your choice and click Submit.
Creating Access and Security Key
Perform the following steps to create your access key and security key that is needed for transactions:
- From the Edit Profile page, go to the Security tab.
- Click the Create icon.
- Enter a Key Name and click Create.
An access key and security key is generated. You must enter the keys in the APTS_CyberSource_Profile_Details__c Cybersource custom setting.
Configuring Transaction Responses
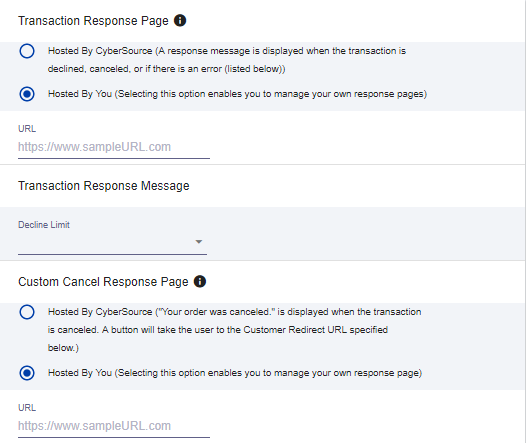
You can configure transaction responses from the Notification tab. You can define whether to receive responses through email or a post on API. Currently, Email notifications are supported.

Configuring Customer Responses
The customer response setting allows you to configure the redirect page after the transaction is completed/canceled.

