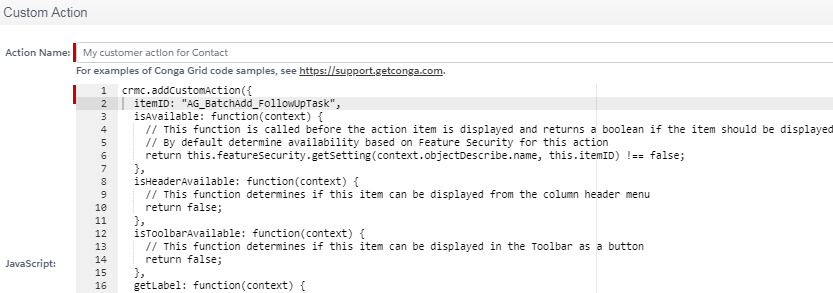
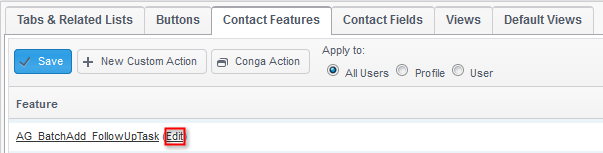
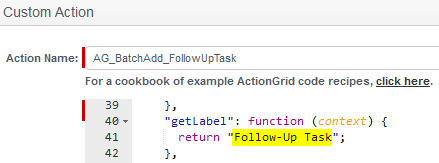
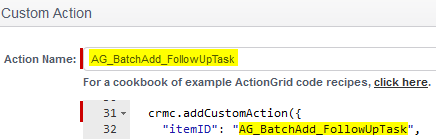
Grid Grid for Users Building Conga Grid Solutions Conga Grid Actions Current: Custom Actions PDF Download PDF Download page Custom Actions. Current page Include child pages All pages Custom Actions See the following sections for examples:Create Custom ActionsDelete Custom ActionsRename Custom Actions Conga Support does not support or troubleshoot custom code which includes Custom Actions. Create Custom ActionsFollow these steps to create your own actions using JavaScript.Click Conga Grid Setup.Select the object for which you want to create a custom action.Click the Object Features tab.Click New Custom Action.Enter an Action Name.Enter the Javascript code to perform custom action. See Code Examples for Custom Actions. Click OK. The custom action is located on the Actions menu.You can also create a button in the Conga Grid toolbar for your custom action:In the JavaScript field of the Custom Action screen, look for the IsToolbarAvailable function.Change the return value to true.Click OK.Click Conga Grid Explorer.Click the Configuration button to open the Configure menu on the right side of the Conga Grid.Click Toolbar.Enable the checkbox for your custom action. A button to invoke the custom action is located on the toolbar.Delete Custom ActionsConga Grid custom actions are stored as Salesforce static resources. You can delete custom actions from the Salesforce Static Resources page:In Salesforce, click Setup.Click Develop and click Static Resources.Click the Del hyperlink next to the resource name. For example:Rename Custom ActionsTo rename a custom action:Click Conga Grid Setup.Select the object associated with the custom action.Click the object Features tab.Click the Edit link next to the name of the custom action. For example: A custom action name has two components:Action Name: The name of the action as it appears under the Actions tab of Conga Grid Setup. The figure in Step 4 shows an example.Label: The name of the action as it appears in the Actions menu in the Conga Grid Explorer.To change the Label, find the getLabel line of code in the Custom Action screen. Then modify the text in the return statement. For example: To change the Action Name, enter the same name in the Action Name field and in the itemID line of code. The names must exactly match.Click OK. The itemID must have the same value throughout the custom action's Javascript code. ×