Follow these instructions to create and use a custom object as a step. Alternatively, use the Custom Object Wizard in Conga Orchestrate Setup to streamline setting up a custom object as a process object and step.
If the custom process object is from a managed package and therefore has a namespace, add the namespace to the Allowed Namespaces field on the Conga Process Setup page.
- Create a custom object or skip this step if your organization already created a custom object.
- Ensure these properties are set on the custom object:
- Allow Reports
- Allow Activities
- Track Field History
- Add Notes & Attachments
- Allow Search
- Create the required fields for Conga Orchestrate to use the custom object as a step.
- (Optional) Create a master page layout to make creating new page layouts easier in the future.
- Clone the master page layout for specific processes.
- (Optional) Create record types and associate them with page layouts for the specific processes. A custom object step can be created without a record type.
- Go to Conga Orchestrate Setup to set the Closed Status values in the Status field.
- Create an Apex trigger for the custom object.
- Create an Apex test class for the custom object.
- Go to Conga Orchestrate Setup to set the Closed Status values in the Status field.
- To assign steps to a queue:
- Add your custom step object to the list of supported objects in the Queue Setup Edit screen.
- Create a Salesforce Flow to notify queue members when a step is created and assigned to the queue.
- For Classic only: To view Checklist Items on a page layout for a custom object configured to use as a step, create a Visualforce page and add it to all applicable page layouts.
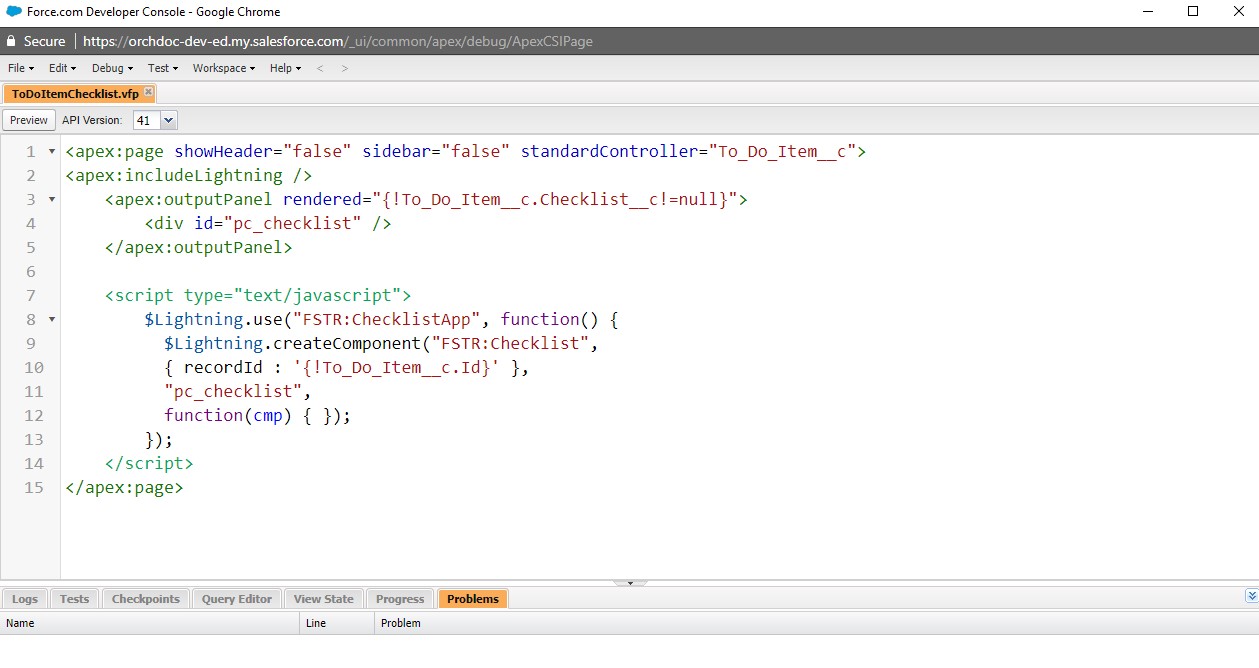
In the Developer Console, create a new Visualforce page. Name it something like CustomObjectNameChecklist.
Copy/paste the following into the new Visualforce Page window:
<apex:page showHeader="false" sidebar="false" standardController="YOUR_CUSTOM_OBJECT__c">
<apex:includeLightning />
<apex:outputPanel rendered="{!YOUR_CUSTOM_OBJECT__c.Checklist__c!=null}">
<div id="pc_checklist" />
</apex:outputPanel>
<script type="text/javascript">
$Lightning.use("FSTR:ChecklistApp", function()
{
$Lightning.createComponent("FSTR:Checklist",
{
recordId : '{!YOUR_CUSTOM_OBJECT__c.Id}'
},
"pc_checklist",
function(cmp) { });
});
</script>
</apex:page>
CODE
Add a new section to the applicable custom object page layouts and add the Visualforce page there.
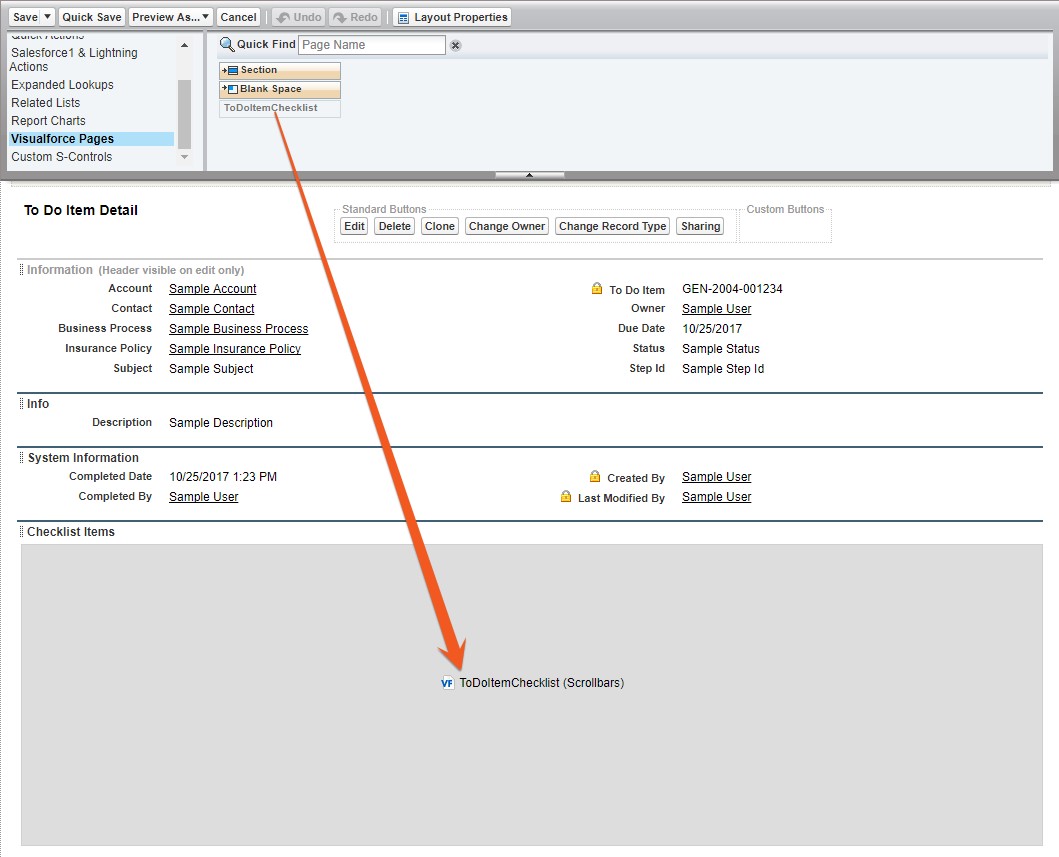
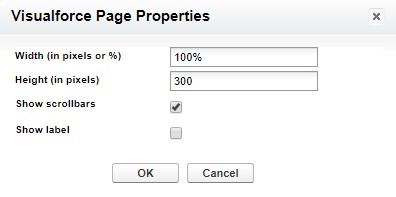
Edit the properties of the Visualforce page in the page layout to set the height (probably 300px or above) and show scrollbars.
You can now create process steps using your custom object. You will see the object in the Object Type when creating a list on Create Record steps.