Download PDF
Download page Working with Search Results.
Working with Search Results
You can enter a Smart Search query from your Salesforce org or from a chat in Slack or Microsoft Teams. You can use natural language searches, keyword searches, or regular expression searches to get results. Smart Search returns the results of your search in an intuitive interface that tells you the number of results, what your search terms were translated to, with help along the way to explain how Smart Search got you the current results and how to get exactly the results you want.
Search Result Features
Item Count
Smart Search returns results with an item count. This number reflects the number of agreements or opportunities ("primary" objects) in which hits were found. Beneath this number are rows or ranks of results that represent individual documents. This number may exceed the number of individual documents because the item referred to is the underlying agreement, not the number of documents it comprises.
Query Explanation
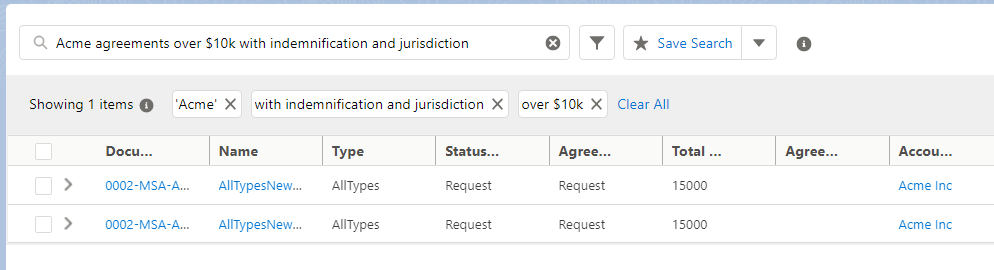
When you enter a search, Smart Search parses the search terms you enter and creates a series of search parameters that it uses to query the back end. These parameters are displayed above your search results. In the following example, the Smart Search has broken the "Acme agreements over $10k with indemnification and jurisdiction" search term into the three parameters, "'Acme'", "with indemnification and jurisdiction", and "over $10k".
You can broaden your search by dismissing these parameters individually or refine your search as described below.
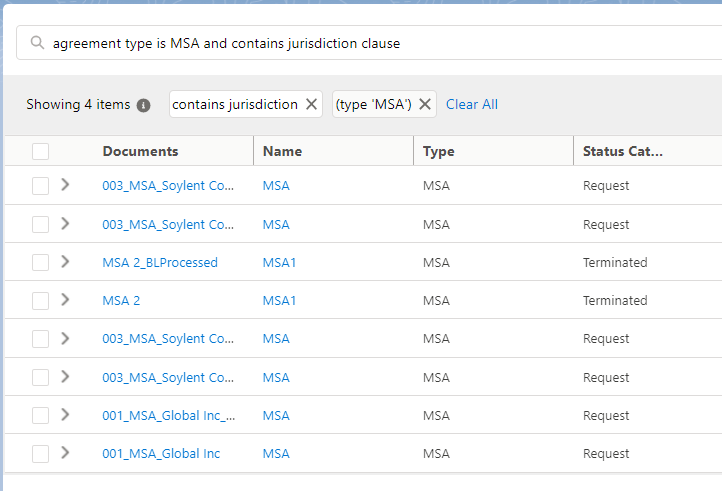
Group View
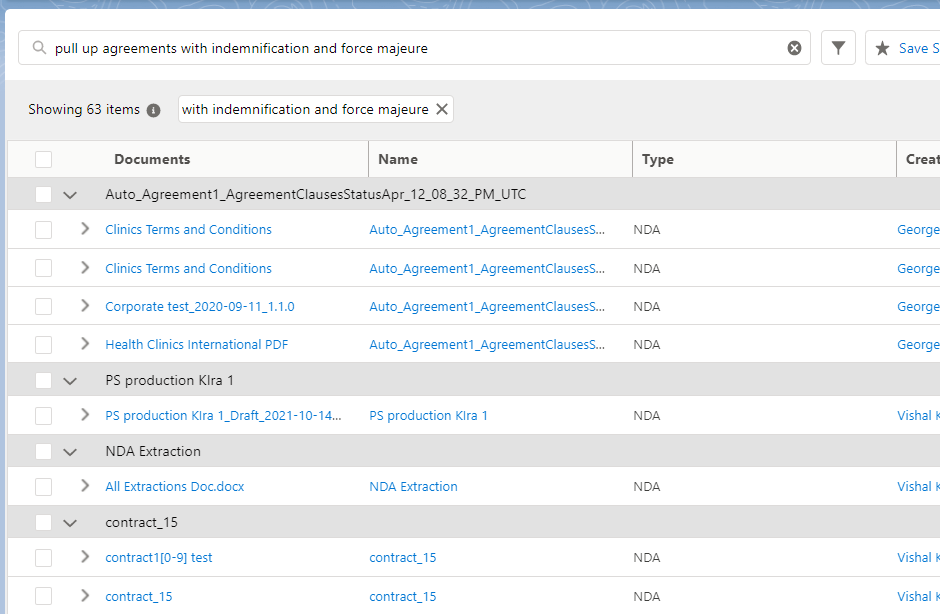
If you have configured Group View on in user preferences, it presents documents as subsidiary artifacts to the main agreement:
If group view is deactivated, results are ordered by ascending or descending column value. You can change this sort order by clicking the up or down arrow icon in the column header of your choice.
About the Search Results
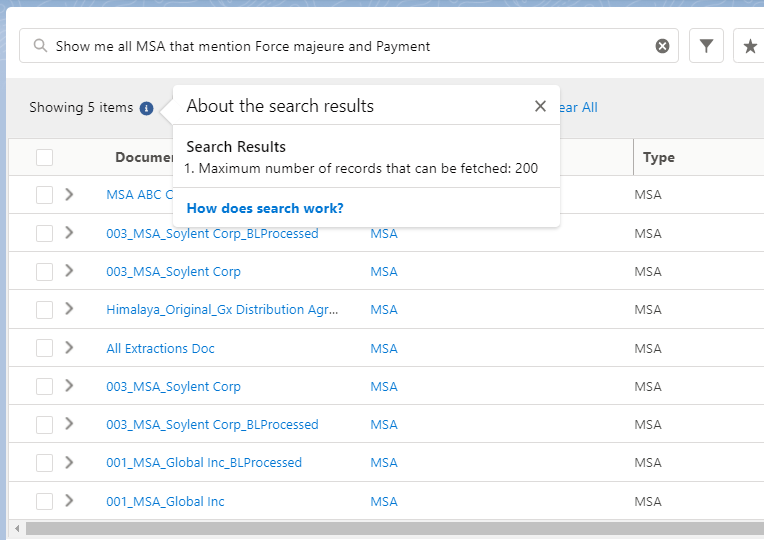
Search results are returned with a button that returns information about your search and how Smart Search interpreted and presented your query.
Hover over the information icon (![]() ) to raise the "About the search results" legend.
) to raise the "About the search results" legend.
Improving Your Results
"Did you mean..." feature
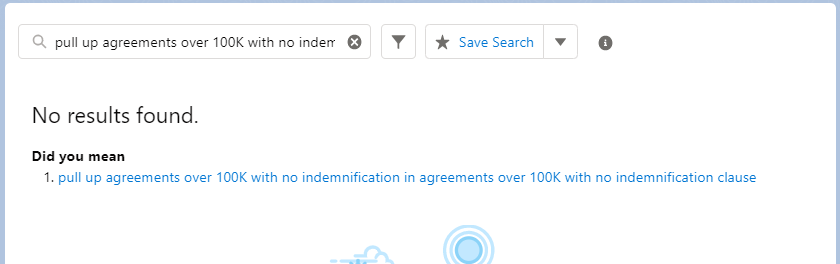
For some searches, Smart Search cannot find documents based on your search term but can make suggestions that might get you closer to the results you want.
Such Smart Search suggestions are presented under the "Did you mean" heading:
To broaden your search
When you enter a natural language search query, Smart Search makes determinations about searchable parameters and extracts these as search terms. These terms are displayed above the results grid in the search ribbon.
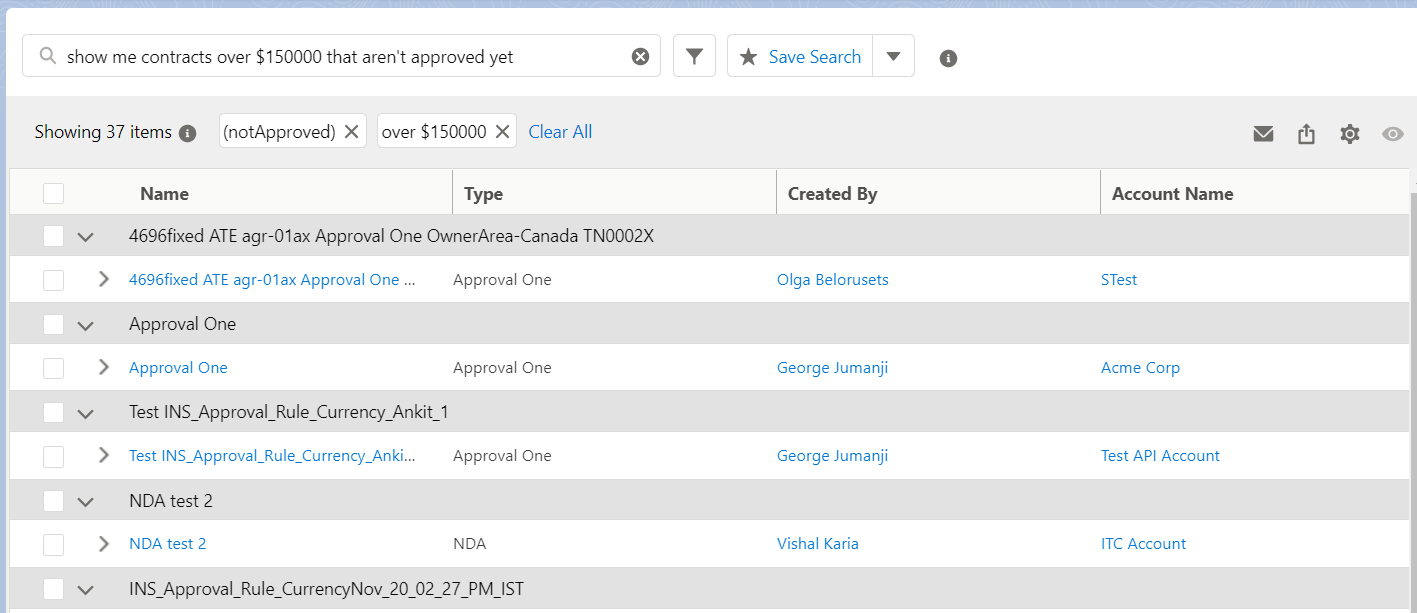
You can click the X in a box to remove the term from your search, or click Clear All to start a new search.
Refining Search Results
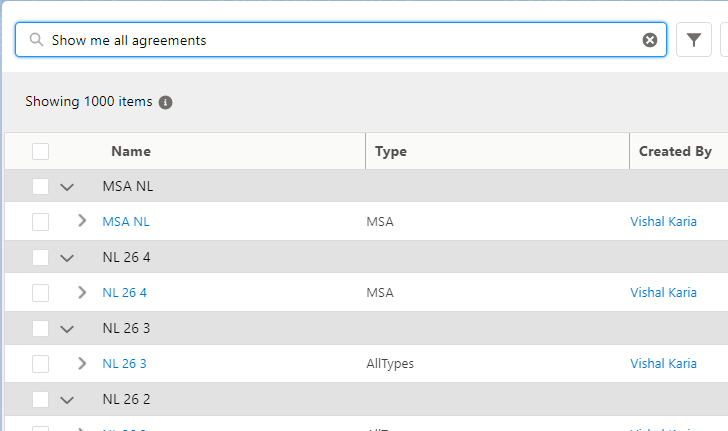
You can adjust the number of matches returned in a given search. Limiting the number of results can make searches faster, but a search will lose results if the number of matches returned exceeds this limit. If you exceed the maximum search result count, you can refine your searches for more specific results. Because the search results may be limited by the Maximum Records setting, the following strategies for search refinement do not refine only the previous search's results. In other words, search refinements are not cumulative: each refinement triggers a new search based only on its own parameters. If, for example, you enter a search for "all agreements" and encounter a limit of 1,000 contracts returned, you can refine your search term.
You can refine your search by entering additional terms in the search bar (for example, by adding "exceeding $50,000" to the natural language search), by clicking the funnel icon to add filters or related objects, or by filtering by column.
However you enter the search refinements, a refined search of "All agreements exceeding $50,000" returns results from all available contracts, not just from the 1,000 contracts returned in the previous search.
To filter search results
You can apply filtering conditions to search results. Once you've created a filter, you can save it.
- Click the filter icon (
 ) to raise the filter popup.
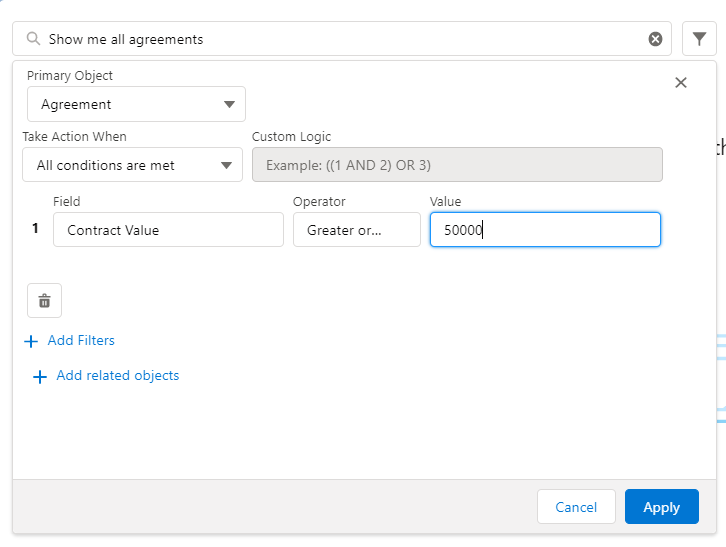
 - Click the Primary Object dropdown and select an object.
Select one of the following options from the Take Action When section:
Option
Description
All conditions are met
If one condition is false, the flow evaluates the next outcome's conditions.
Any condition is met
If one condition is true, the flow immediately takes this outcome's path.
Custom
When you select this option, you can enter up to 1,000 characters of condition logic in the custom logic field. You can use:
- Numbers to refer to each condition
- AND or OR to identify which combination of conditions must be true
- Parentheses to group parts of the string together
Sample expression: ((1 AND 2 AND 3) OR 4)|
- Click Add Filters.
- Select a field and an operator from their respective dropdowns.
- Enter a value for the Value field.
- You can also click Add Related Objects and add conditions and filters as you did for primary objects.
- Click Apply. Review the applied search filters below the search box.
To filter search results by column
You can filter search results by column. This gives improved resolution to searches based on criteria you deem important.
In search results:
- Click the filter icon ( ) at the top of the column you will filter by.
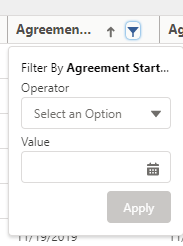
- Select an Operator.

- Select or enter a value. Depending on the column you are filtering by, this value may be a date (the date picker appears), a dollar value, a name from a list, a check box, or an open text field.
- Click Apply.
- Smart Search returns filtered results. The new filter term appears above the results. You can return to the original filtered results by dismissing the new term.
Note: Smart Search only saves the initial filter. If you add column filters to an initial filtration, Smart Search does not save the column filters.
To sort results and view details
- You can sort the results and view more details.
- Enter
show me snippet for #<number>to see the snippet of a search result. Example:show me snippet for #5. - Click Send it to me to share the snippet as an email.
- Verify the email ID and click Yes! Go ahead to send the email.
- (Optional) Click Change recipient to change the recipient's email address.
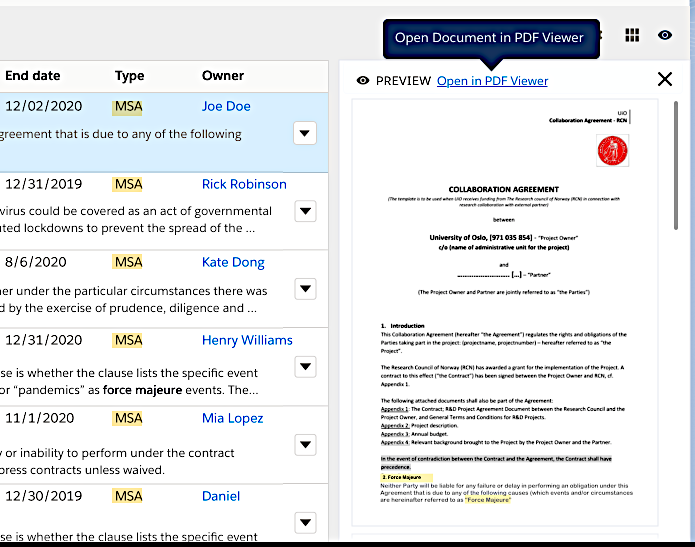
To open a document from search results
Click a result row to preview the document in the right panel.

The preview is not available for documents that are stored in the agreement document. To open the document, click PDF Viewer.
To open the document, click the Open in PDF Viewer hyperlink.

Note
If there is a problem loading the preview screen, an error message is displayed. You can click PDF Viewer in the error message to open the document in the PDF viewer.
The document opens in the Conga-provided PDF viewer.
- Click the download icon (
 ) to download the document. Your browser prompts you to open or save the document.
 - Click Close to close the PDF viewer. and return to the search results page.
Updating Smart Search's Dynamic Library
Contracts, agreements, and other documents may possess custom terminology that is not in Smart Search's standard dictionaries. Consider, for example, a company that offers several service levels, which carry different payment terms: a bronze-level customer must pay on delivery, a silver customer pays net-30, a gold customer can pay on a net-60 basis, and a platinum customer can pay net-90. You can define such custom payments terminology in the Payment Terms field. If you define "silver" in this field, Smart Search will find comparable clauses with such terms as "net_30", "net-30", "Thirty days from delivery", and so forth, and apply this to searches going forward.
To update the dynamic library
- Enter a search. When you see a contract in the results, click its name.
- Find the term to customize. In the present example, this is Payment Term.
- Click the Edit icon (
 ) to make the page editable.
 - Click the X icon to clear the field to edit. With the field in this state, you can search available terms, select a visible term from the drop-down list, or create a new term.

- If the value you want is not represented, click + New Payment Term.
- Enter the payment term's name, the order you want it to appear in the list of custom terms, its label, the value it represents, and a description. To assign this term to a new contract by default, check the Is Default box.
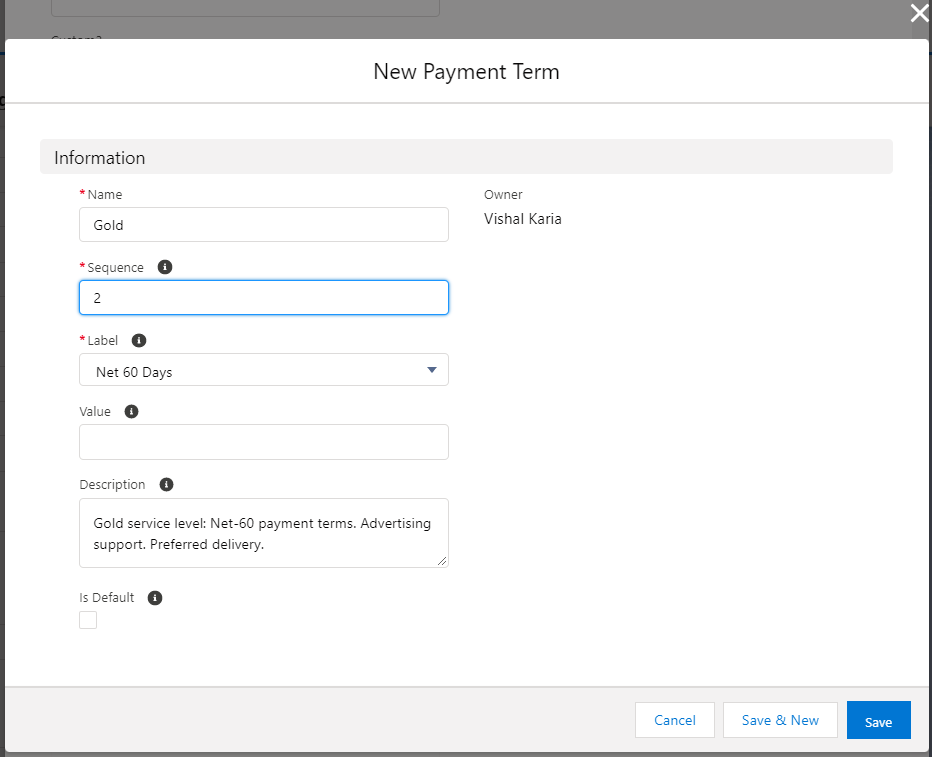
- Click Save. The new term may take up to 24 hours to propagate and become available for use. If you have another term to add, click Save & New to repeat this process.
To share search results
- Click the email header icon (
 ) to raise the Share Search Results popup.
 - Enter the following details:
- From: Select an email address.
- To: Add email addresses of the recipients.
- Beside the To field, click CC to add "carbon copy" recipients.
- (Optional) Subject: A subject based on your search is already added. You can edit and customize this as needed. The email body contains the search results, to which you can add context if you will.
- Select HTML, XLS, CSV, or PDF to specify the output format of the report to be transmitted. Multi-file results are saved to your choice of an encrypted or unencrypted Zip-format file.
Click Share.
Note
You can navigate to the Agreement Detail page by clicking the agreement name hyperlink in the exported document. You can use the org-wide email address while sending an email. For more information, see Setting Up Organization-Wide Email Address. You can share multiple documents displayed in the search result as a downloadable link with a Salesforce Contact or any recipient. For more information, see Emailing Multiple Agreement Documents.
To export search results
- Select one or several files from your search results.
- Click the export header icon (
 ) to raise the Export Selected Files popup.
 - Select the format you want. Options are PDF and XLS. If you have selected multiple files, the export will be compiled into a Zip file.
- Enter a file name and click Export.