Download PDF
Download page Adding Objects to your App.
Adding Objects to your App
Hint
Click on an image on this page to enlarge the view.
Before you can add objects to your app, you need to create the app file. Refer to Designing Apps for instructions to create your app.
Every app you design uses objects and fields. Complete the tasks on this page to add objects to your app and define which fields from those objects you want to work with.
Object Behavior
All objects used in an app are assigned a behavior that determines their availability in maps and actions. There are two behaviors:
- Individual: Work with an individual record at a time for that object.
- List: Work with more than one record for that object.
Object Combinations
- Any number of objects can be selected.
- The same object can be selected multiple times in different hierarchies if it needs to be used in different ways.
- A combination of related and unrelated objects can be selected.
To add objects and fields
From the X-Author Designer ribbon, click the object selection dialog. Depending on your environment, the object selection button is displayed.
For Salesforce, click

For Microsoft Dynamics and Apttus Omni, click

From the left pane under Select Objects, choose an object or drill down to other objects by clicking the + next to the object name.
Type the first letter of the Object you want to add and X-Author will jump to the first matching object in the list.
- To select a top-level (header level) object, click Add Parent Object to move the object to Selected Objects.
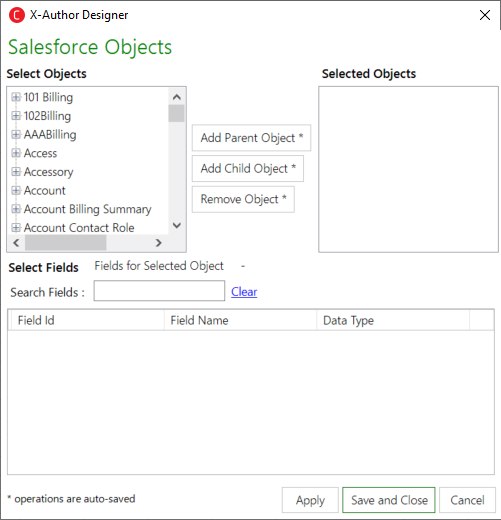
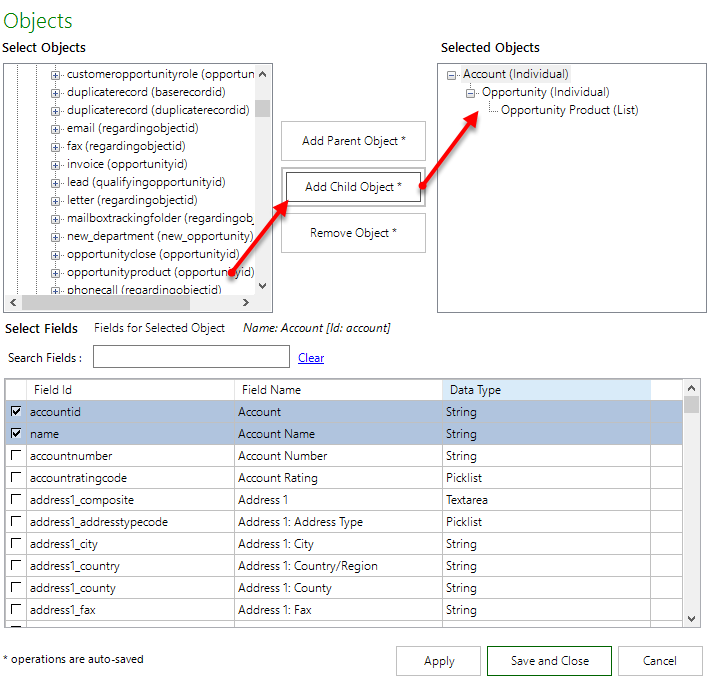
If you need to add one or more child objects, drill down from the Parent object one or more levels, select the child object and click Add Child Objects to add objects in the hierarchy (from child up to parent) to Selected Objects.
Changing Object Behavior
By default, when objects are added in a parent-child relationship, parent objects adopt the "Individual" behavior and the bottom child object in the hierarchy adopts the "List" behavior.
You can manually change the behavior of any object by right-clicking on the object name and choosing either option from the drop-down that is displayed (for example, if you want two objects to have a many-to-many relationship, make both objects "List").

Caution: Be careful when changing object behavior. If you have already created other parts of the app, changing object behavior may not make sense in some circumstances.
Click Remove Object to remove a selected object from the list.
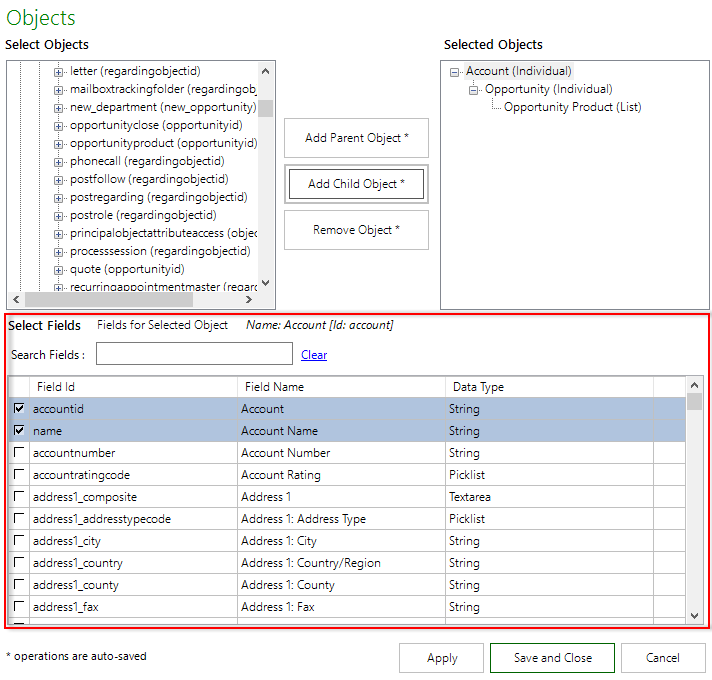
From Select Fields, scroll through the list of fields for the object and select the check box next to one or more fields to add them to the app. You can also type the name of the field into the Search Fields dialog to narrow the list of displayed fields.
Note
Click on the heading for any column in the fields table to sort fields by that category.
When a picklist field is selected, all picklist values will automatically be retrieved during runtime. Regular, dependent, and multi-select picklists are supported.
The following fields are automatically selected for each object and cannot be deselected.
- ID
- Name, if there is a Name field
- Look-up for a parent object that is selected as part of the object hierarchy (for example, "AccountId" for Opportunity).
Click Apply after you have finished adding fields for an object. You must click Apply as you move between objects or your selections will not be saved.
- When you finished adding objects and fields to your app, click Save and Close.
Best Practices for adding Objects
Be careful when removing objects if your app already contains Display Maps or other components. Removing an object will invalidate any maps and actions in the app. You must remove those links manually before you remove the object. Generally, if you have selected the incorrect objects and have already created maps and actions, you should start over. If it is just unrelated objects that need to be changed, then you can remove that object after you correct the maps and actions. Then you can add in a new object.
Use Case: Adding objects for a Sales Pipeline app
Danny Designer needs to create an app that will be used to manage Opportunity data for a Sales Pipeline.
He decides that his app is going to need date from the Account, Opportunity, and User objects. Opportunity will be added as a child object of Account, and Account and User will be added separately as List objects.
Danny takes the following steps to add objects to his app:
- He goes to Apps > New and creates a new app named "Pipeline CC."
- Danny clicks the object selection button.
- He finds the Opportunity child object under the Account object and clicks Add Child Object.
- Next, he clicks Add Parent Object for User and Account.
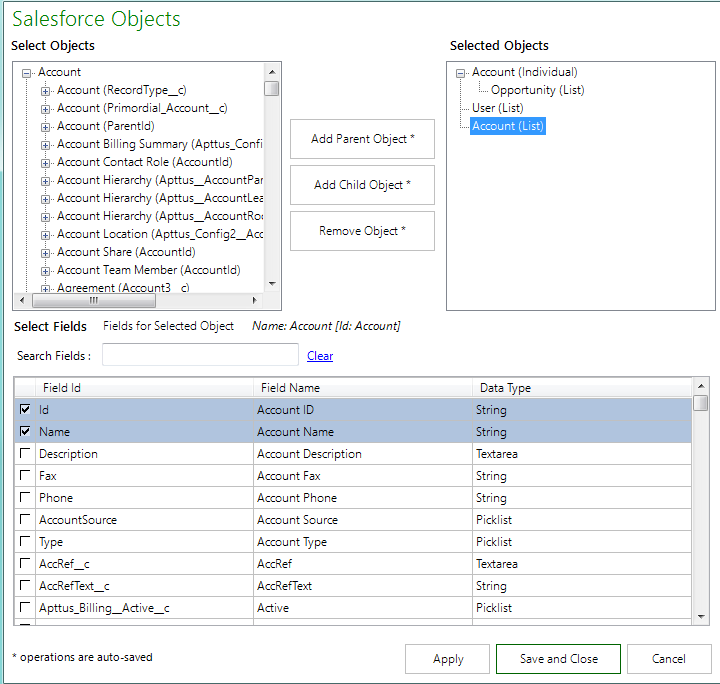
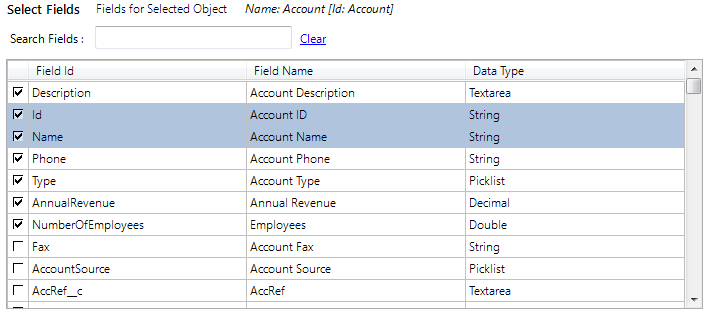
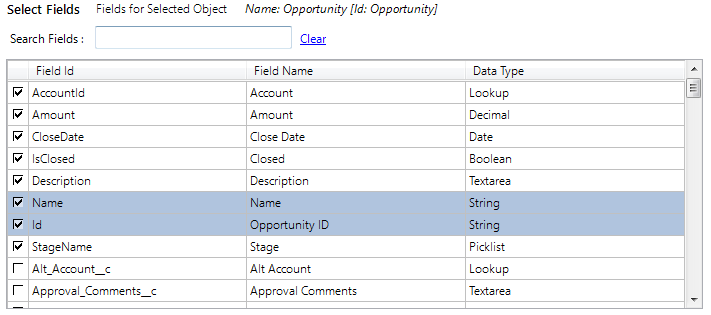
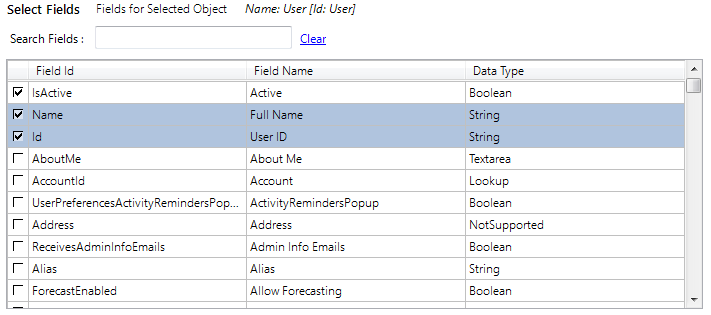
- Danny selects fields for each object. After selecting fields for any object, he clicks Apply to save his selections.
- For Account (Individual) and Account (List): Account Description, Account Phone, Account Type, Annual Revenue, Number of Employees (Account Name and Account Id are added by default)
- For Opportunity (List): Amount, Description, Stage Name, Is Closed, Close Date, Owner Id (Account (Lookup), Opportunity Id, and Opportunity Name are added by default)
- For User (List): Active (User Id and Full Name are added by default)
- For Account (Individual) and Account (List): Account Description, Account Phone, Account Type, Annual Revenue, Number of Employees (Account Name and Account Id are added by default)
- Danny clicks Save and Close to save his objects and fields to the app.
- Finally, he clicks the Save App button in the X-Author Designer ribbon to update the app file in his environment.