Download PDF
Download page Launching an X-Author for Excel App from Microsoft Dynamics.
Launching an X-Author for Excel App from Microsoft Dynamics
You can now launch an X-Author app directly from Dynamics CRM. After clicking a button from a Dynamics record, the app opens in Microsoft Excel and automatically executes based on one or more defined action flows.
Prerequisites
Before you can open an app in Excel from Dynamics, the associated record must be configured with a custom button. An administrator must complete the following tasks in Dynamics:
- Import the Ribbon Workbench solution into your Dynamics org.
- Make a note of the App Unique Id to reference in the script that invokes Excel.
- Create a new unmanaged solution for all applications or a given entity in your Dynamics org and load it into the Ribbon Workbench.
- Add and define your custom button to the ribbon, including custom button images.
Using the Ribbon Workbench
Follow the instructions on this page to import the Ribbon Workbench and create a new unmanaged solution to store the button that users will click to open and run the app in Excel.
You will also need to find the Unique Id of the app that will be executed and add another Web Resource when creating the solution—this is JavaScript code to invoke Excel from Dynamics.
To find the App Id
- Go to Marketing > Apps to display the X-Author view in Dynamics that lists all the X-Author apps stored in your org.
- Click on the Application Name to view its details.
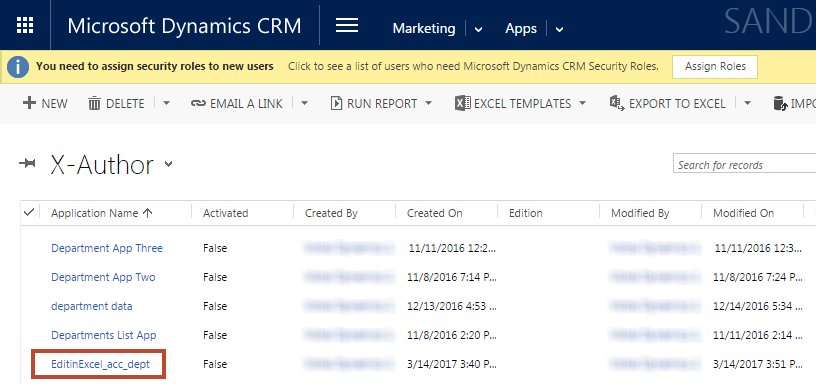
- Make a note of the Unique Id displayed in the App information screen. You will use this App Id in the next task.

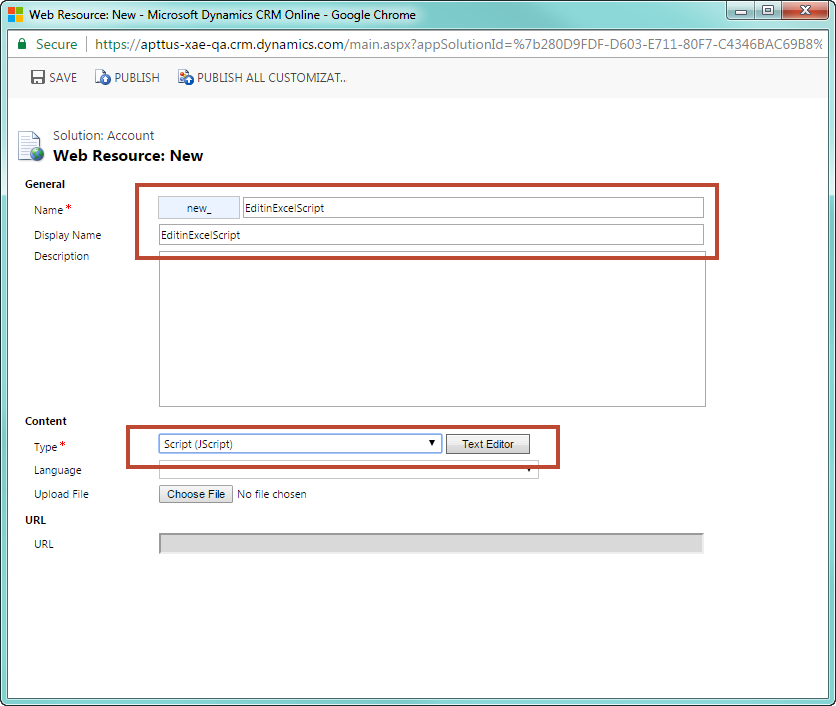
To add the JavaScript code to your solution
- From the Solution you created, select the Web Resources component and click New.
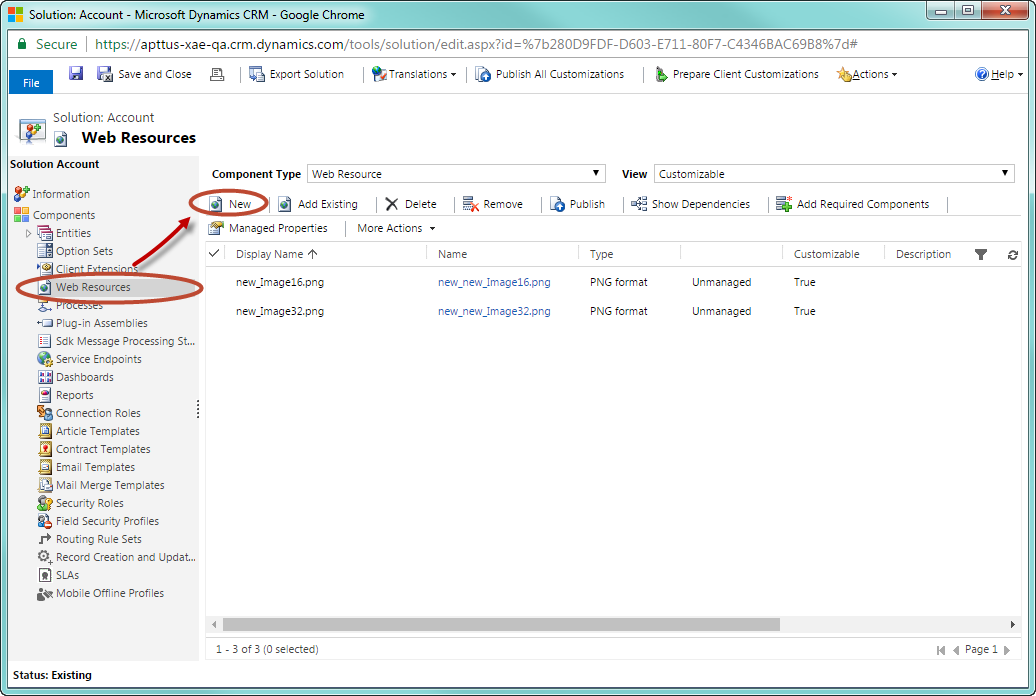
- Give your Web Resource a name, e.g., "EditinExcelScript." Enter the same value in the Display Name field.
- Select Script (JScript) from the Type picklist and click the Text Editor button.
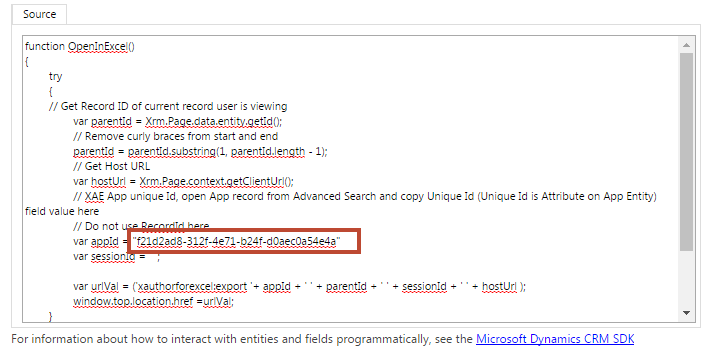
Copy the following code into the Web Resource content Source dialog.
function OpenInExcel(){ try { // Get Record ID of current record user is viewing var parentId = Xrm.Page.data.entity.getId(); // Remove curly braces from start and end parentId = parentId.substring(1, parentId.length - 1); // Get Host URL var hostUrl = Xrm.Page.context.getClientUrl(); // XAE App unique Id, open App record from Advanced Search and copy Unique Id (Unique Id is Attribute on App Entity) field value here // Do not use RecordId here var appId = "17776ae9-dec3-4781-9111-5c0f0c472ebb" var sessionId = ""; var urlVal = ('xauthorforexcel:export '+ appId + ' ' + parentId + ' ' + sessionId + ' ' + hostUrl ); window.top.location.href =urlVal; } catch(err) { alert(err.message); } }CODE- Replace the App Unique Id in the code with the Unique Id you saved in the previous task.
- Click OK to exit the text editor, then click Save to save the Web Resource.
Defining the Open in Excel Button
Continue to follow the instructions on the Ribbon Workbench help page to create your button and define your button command.
Where should I put the Edit in Excel button
You create the button by clicking on it in the Toolbox and dragging it to Form tab in the Ribbon Workbench.
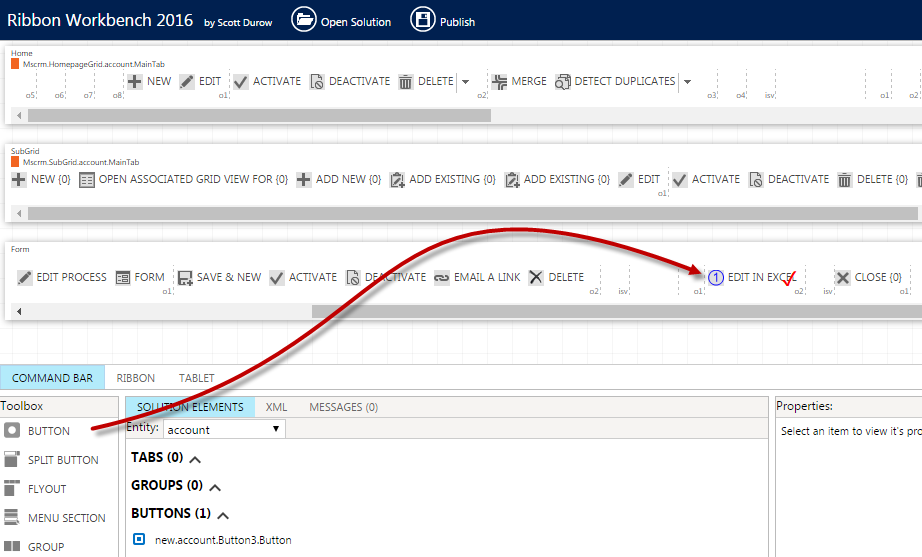
After the button is created, make sure to specify a Label and a 16x16 and 32x32 image. The button Label also automatically defines the button Command name.
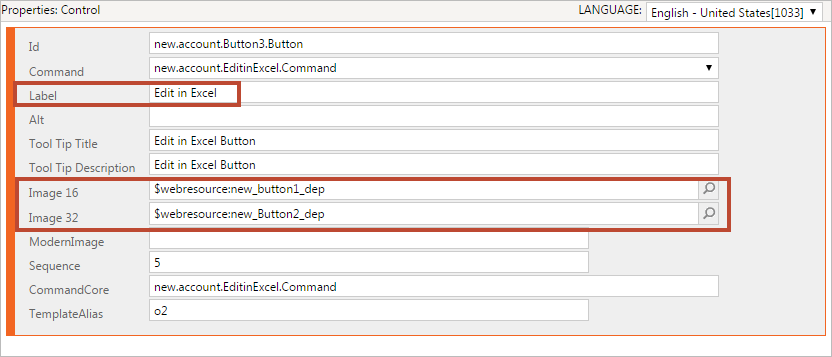
Because the button uses a JavaScript action to invoke Excel, you will need to specify the following in the Command Properties.
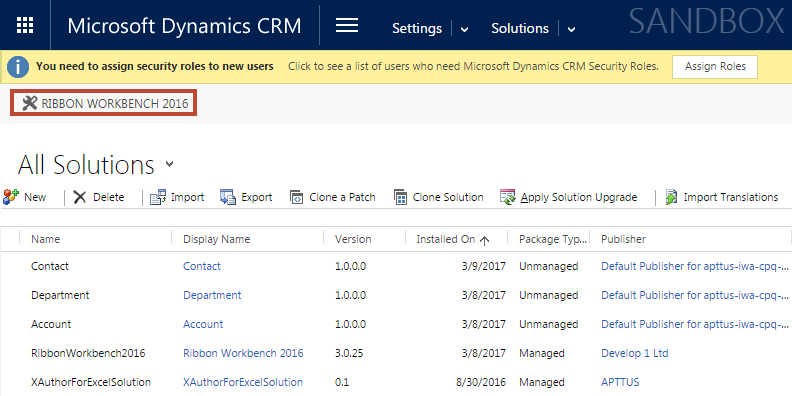
- From the Solutions page, click on the Ribbon Workbench.
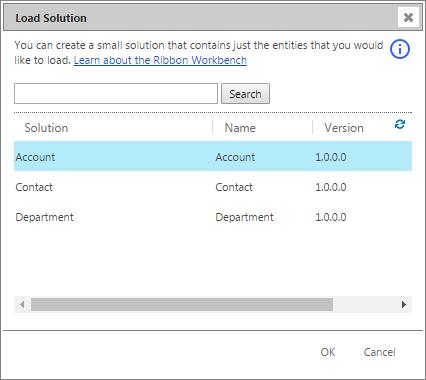
- From the Load Solution pop-up, select the unmanaged solution you created for the button and click OK. This may take several moments to load.
- From the Solution Elements pane of the Command Bar, click on the Entity picklist and select the entity where you created the button.

- Expand the commands section and click on the command you defined for the button.

- From the Command Properties pane, click Add Action and choose Javascript Action from the picklist.

- Click the
 icon to find the Web Resource you created that represents the JavaScript code in the solution.
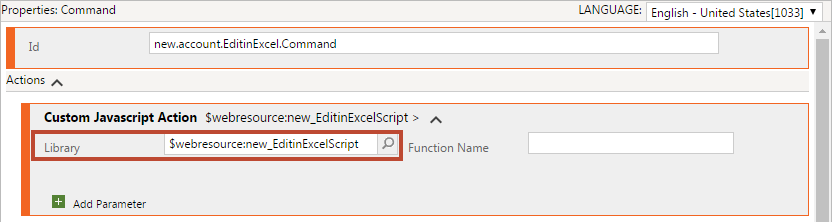
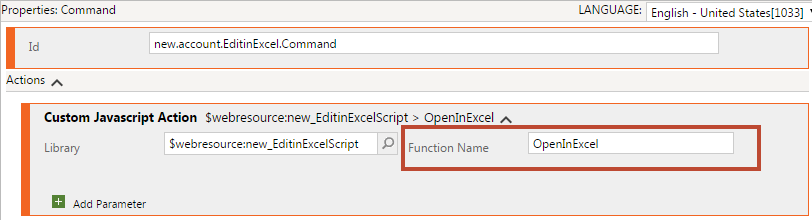
- Finally, you need to add the Function Name from the script to the action. Enter "OpenInExcel" as the function name.
- From the top of the Ribbon Workbench, click Publish.
The button is now ready to use from any record for the defined entity.
Making the App Launch Ready
There are two main differences with an app that can be launched from Dynamics CRM:
- action flow to auto-execute upon launch from CRM must be flagged in the app
- when the app has a parent-child relationship (e.g., Opportunities by Account), an External ID filter is required on the query action to identify the parent entity.
Follow these steps to make your app launch ready:
- Open Excel and connect X-Author for Excel Designer.
- Open the app that must be executed from Dynamics. The app should already be fully designed and include at least one action flow and one query.
- From the X-Author Designer ribbon select Action Flow.
- In the Action Flow pop-up, enable the Auto Execute (Launch from CRM) check box for the action flow that you want to auto-execute.
Click Cancel to exit the Action Flow list. - From the X-Author ribbon, select Actions.
- Select the correct query from the list of actions and click Edit.
- Create a filter with the Entity ID as the chosen field and the expression System Variables equals ExportRecordId.
- Click Save.
Click Save App to save your changes to the app.

Remember that the query filter is only required in parent-child apps and only for the top-level entity. For example, if your app is simply retrieving a list of opportunities, create the query as normal, applying filters to refine the data retrieved.
Launching the App from Dynamics
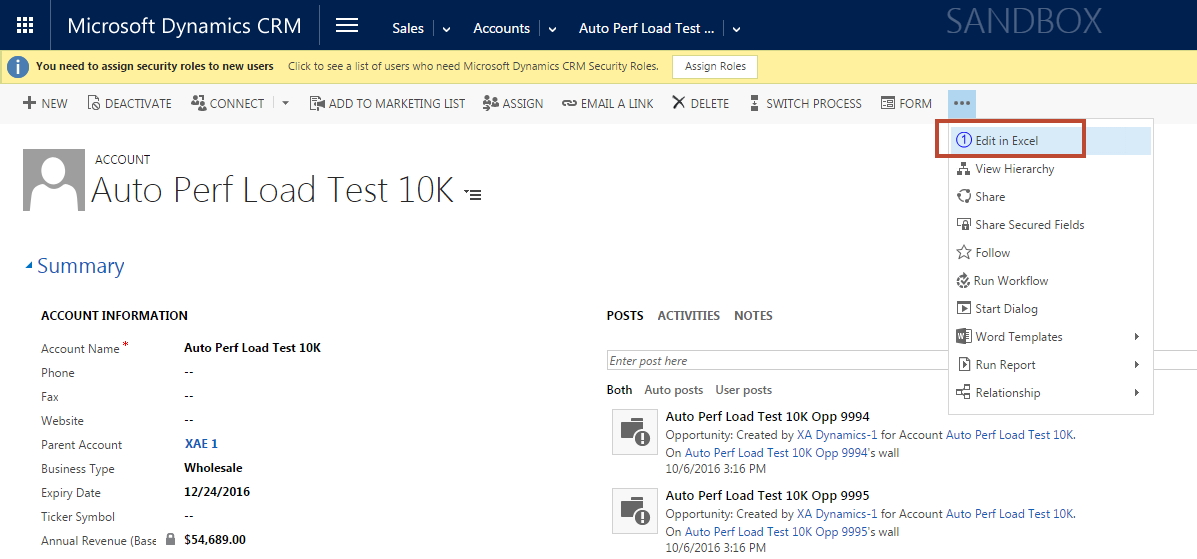
After the button is created and your app is properly configured, you can find it under Forms on the page for the record you are viewing.
To launch your app:
From the ribbon at the top of the record page, click on the drop down and select your button.
Depending on privacy settings in your browser, you may be prompted to open the URL to launch Excel. Click Open to continue.
- Microsoft Excel opens and present you with a login screen. Log in to your Dynamics org to continue.
The app opens and auto-executes the action flow identified in the app design.