The clause library enables you to store, create, retrieve, and re-use clauses. You can easily reference these clauses when drafting contracts, ensuring standardization across contracts and teams.
Topics allow you to group different variations of a clause. For example, if the topic is "indemnification," you can create different indemnification clauses for customer contracts, partnership agreements, and other agreements.
Creating a Clause
You can add a clause to the Clause Library by placing it directly in the Clause Library or by excerpting it from the contract view.
To add a clause directly to the Clause Library
- Copy to your clipboard a clause that you will add to the Clause Library.
- Click the Clause Library button on the left menu to open the Clause Library.
- Click the CREATE CLAUSE button.
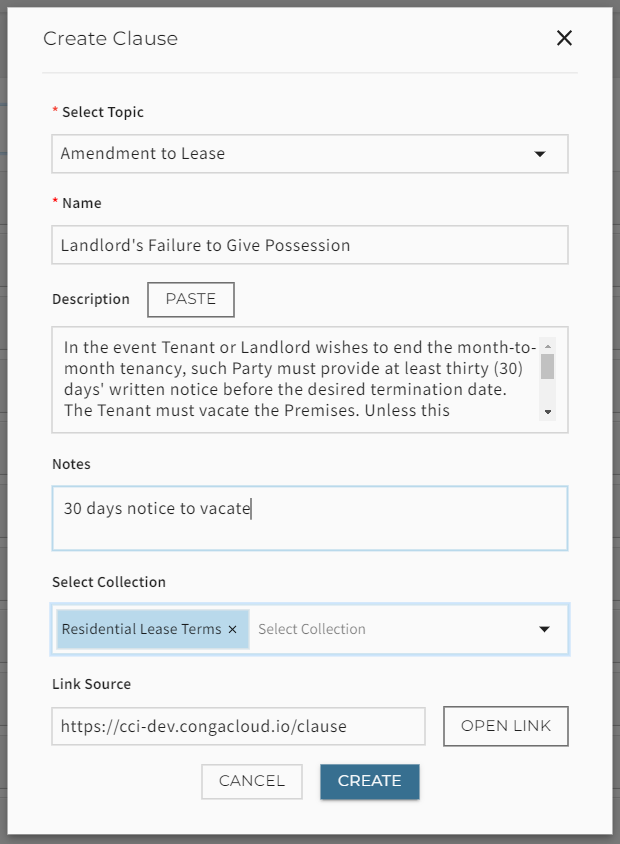
- Paste the body of the clause into the Description field.
- Assign the clause to a topic by selecting it from the Select topic dropdown or scroll to the bottom and select NEW TOPIC.
- Name the clause.
- You may add relevant notes (such as instructions) to the clause for everyone in your team to see.
- You may assign the clause to one or more collections. You can create as many collections as you want for labeling your clauses. For example, you can use collections to label clauses for contract categories such as vendor contracts, customer contracts, partnership contracts, etc.
- You may add an internal or external URL linking to the source of the clause.
- Click CREATE to add the clause to the Clause Library.
To add a clause to the Clause Library from a contract
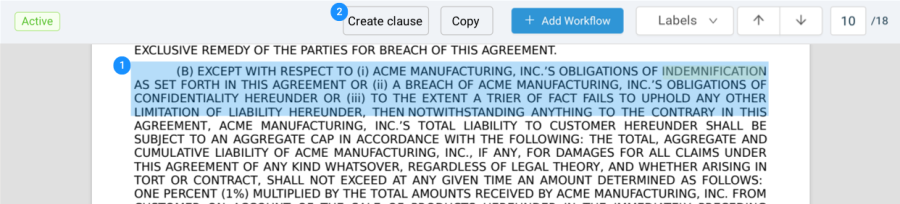
- Open a document for viewing. The document can be extracted or store-only.
- Select text from your document.
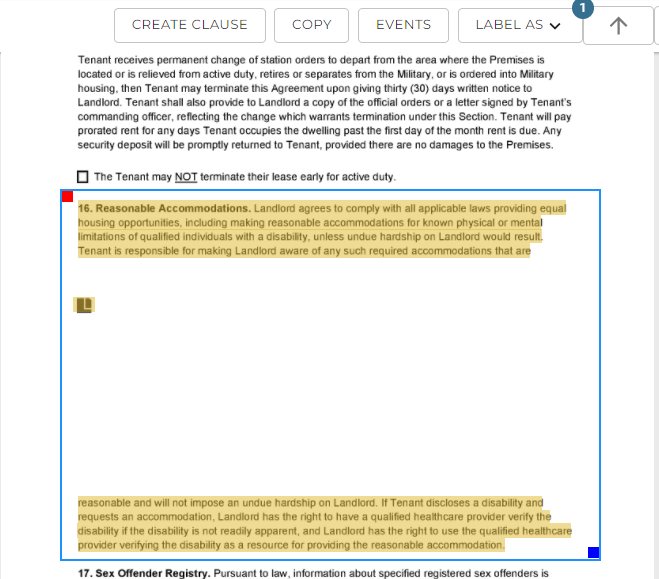
- Copy the selected text to your clipboard.
- Click the CREATE CLAUSE button at the top of the screen. Contract Intelligence automatically populates the body of the clause and includes a link to this document.
- Fill in the other fields as described in To add a clause directly to the Clause Library.
To edit a clause
- Open the Clause Library and select a clause.
- Click the pen button associated with the clause's name to raise the Edit Clause popup.
Note: Do not select a collection of clauses (the top-level object in this hierarchy). If you select the pen button for a collection, you will see a line edit tool for renaming the collection.
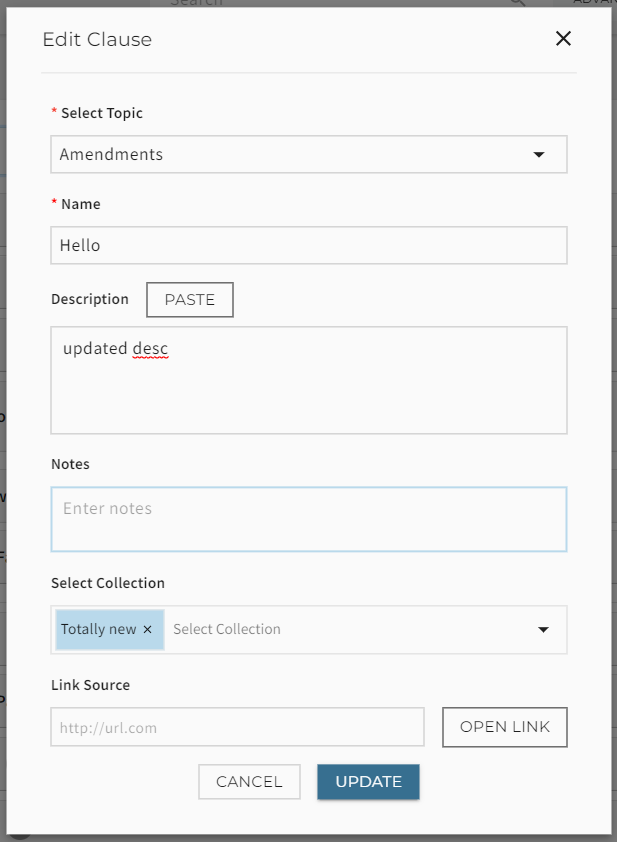
- Edit any or all of the fields.
- Click UPDATE.
To view a clause's history
- Open the Clause Library and select a clause.
- Click the history icon (
 ) to open the History window.
 - The history captures all updates made to the clause: who made changes, what changed, and when.
To archive a clause
You cannot delete a clause. You can, however, archive or soft-delete a clause by creating a topic, or you can completely edit the clause, overwriting the entire clause with a new one.
To move an unwanted clause under a space for archived, void, or deleted clauses:
- Select the clause you will archive.
Click the pen button associated with the clause's name to raise the Edit Clause popup.
- Open the Select Topic dropdown and select NEW TOPIC.
Give the new topic a descriptive title such as "~Archived: Do not use," or "~Trash: Do not use."
Tip
Using "~" at the beginning of the name moves it to the bottom of the list.
- Click CREATE.
- The clause from which you started is associated with the new topic.
- Click UPDATE.