An administrator can expose more fields to the end user on the cart details page using the CPQ Admin console. For detailed information on using the CPQ Admin console, see Configuring Cart Page Settings. The administrator can choose the fields to display, sequence those fields, and set editable fields. For information on the display of cart line item fields on the cart details page, see Configuring Cart Line Item Fields.

Prerequisite

You must at least have one flow named Default.

Cart Lines Columns Tab

You can add a default set of fields for your Default flow from the Cart Lines Columns tab. From the list of fields (metadata) available, you can select the fields (create subset from the metadata) that you wish to display as columns on the cart details page.

Display of Custom Fields

You can select custom fields for a view and the same can be displayed on the cart details page. For this to happen, you must create a custom model, that extends the base model and define the custom fields. For detailed information, see Adding Custom Fields on Object Models.


To add default set of fields

  1. Select a flow and enter the following details:
    • Field Name
    • Is Editable

      Important

      Only three fields are supported as editable by the user - Start Date, End Date, and Quantity. Changing values of these fields by the user triggers pricing immediately. Any other fields, if set as editable may or may not work.

  2. Click Save.

Cart Views tab

You can further define the scope of a flow from the Cart Views tab. You can create views from any flow. Typically, a user always loads with a user view, you should load with the Default flow if available in user view. In case there is no view set up, the system picks up display columns from the Default flow.

Creating Views

You can further narrow down the scope of the cart line item fields (selected on the Cart Lines Columns tab) to be displayed on the cart details page. These can be user specific.

To create views

  1. Select a Flow.
  2. To create a new view, from View, select New
  3. Provide a Name for the view.
  4. Group By is always Product.
  5. To set a default view for the cart page, slide to enable the Default View switch. Only one default view is supported. By design, if you already have a default view and you create a new view, enabling the Default View switch for the newly created view overrides the previous default view.
  6. Enable public view by sliding the Make Public switch. By default, it is Protected.
  7. From User Types, select one of the following:
    • Users - To set a view at the user level, search and select a user from the Available Users.
    • User Roles - To set a view at the role level, search and select a user role from the Available User Roles.
    • User Profiles - To set a view at the profile level, search and select a user profile from the Available User Profiles.

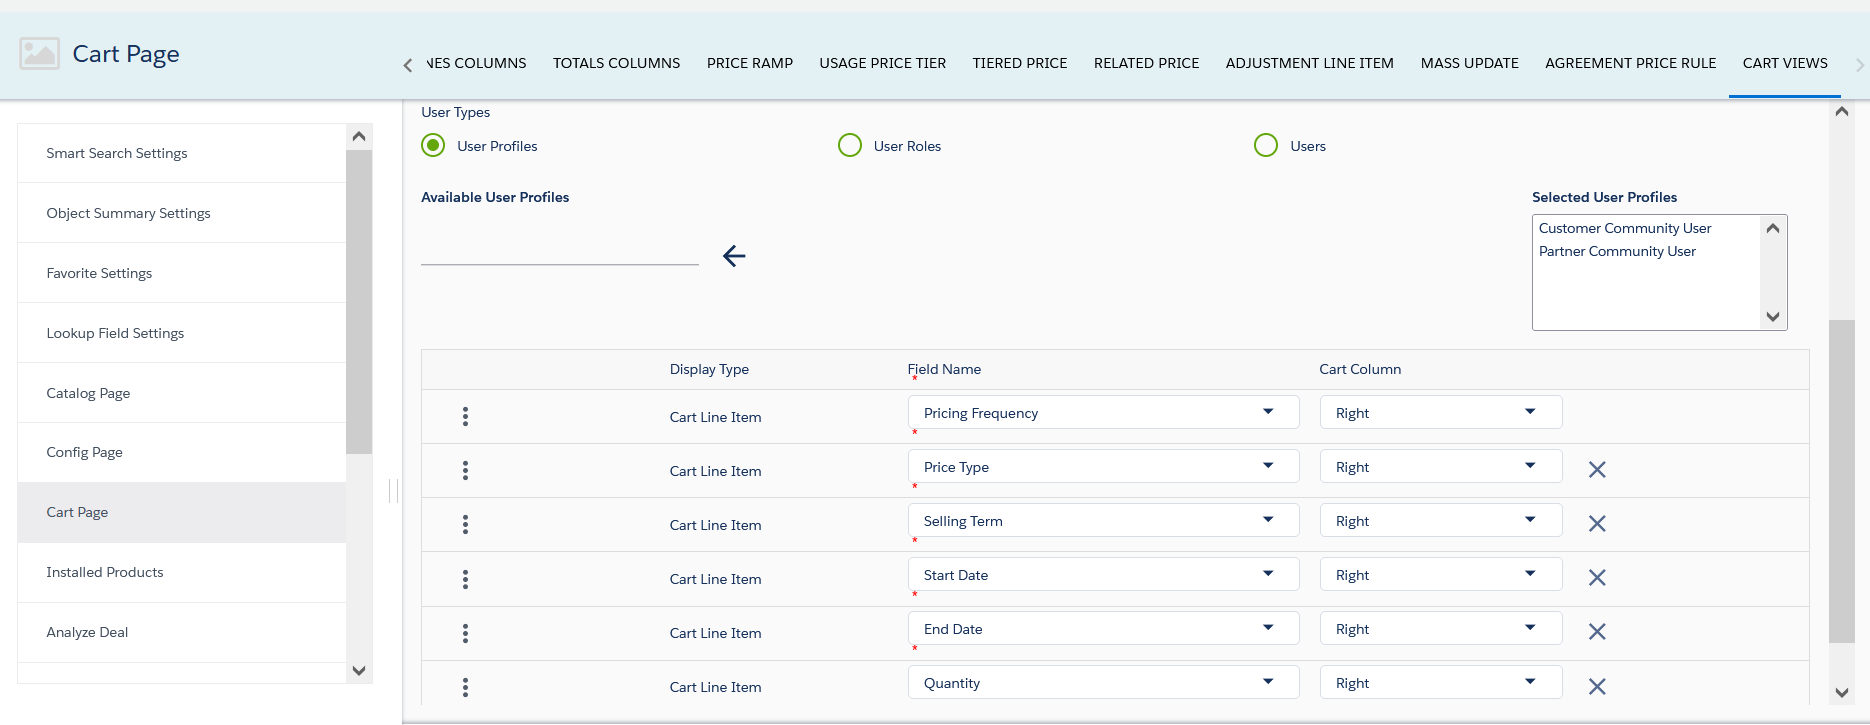
      In case, you have views at all three levels. For each user type there is one default view.

      If the default view is not available at user level, the system checks at Role level, then Profile level, and then Public views accordingly.

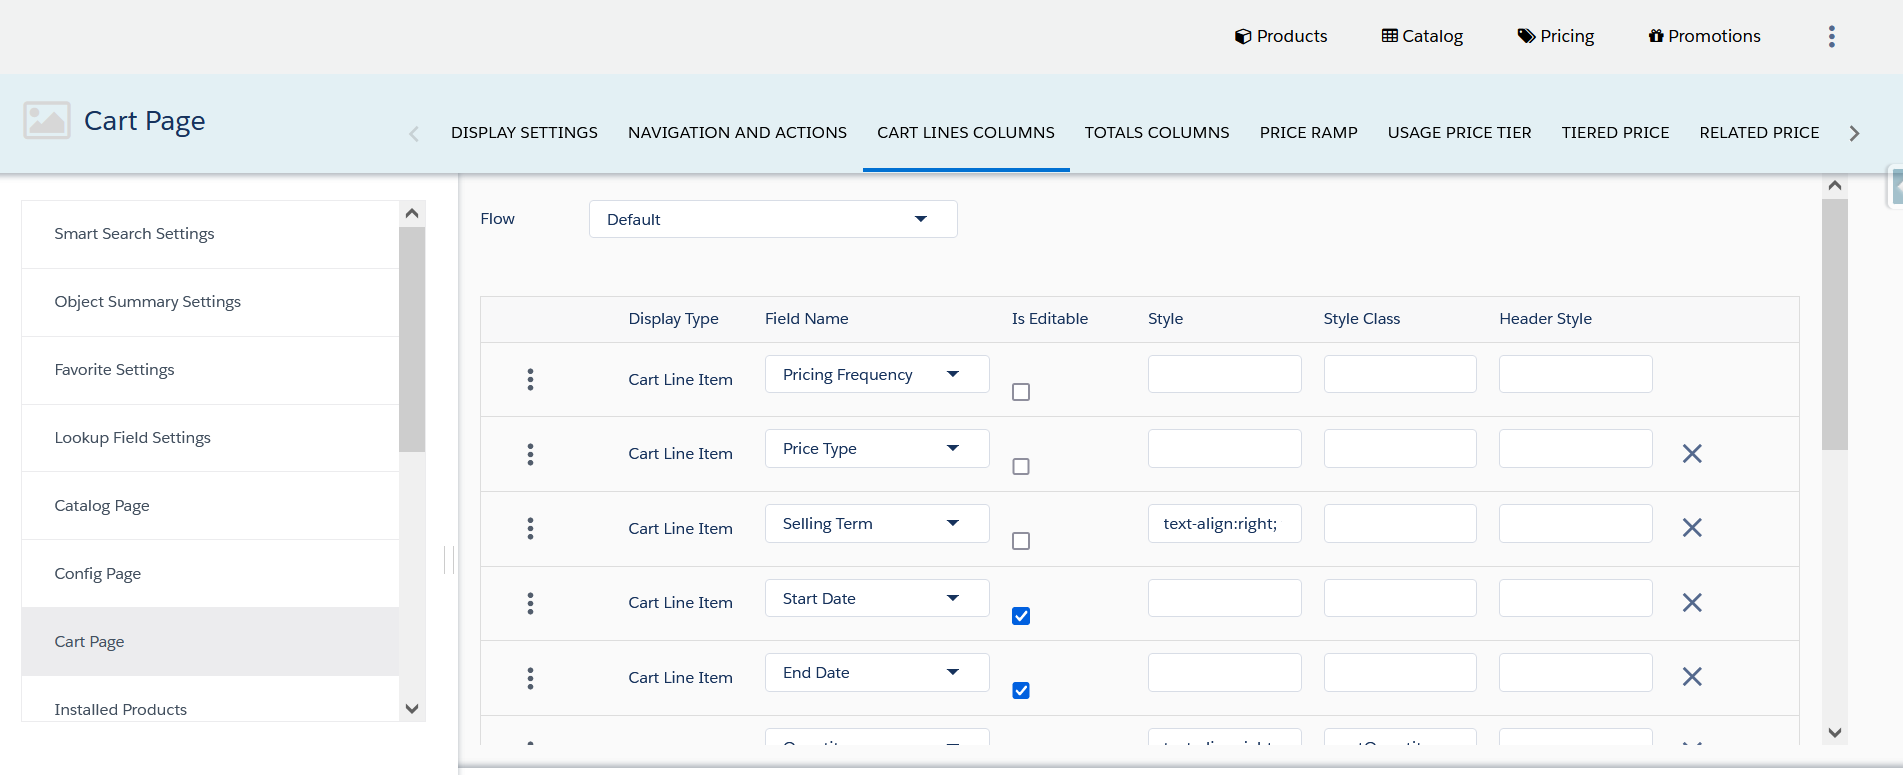
      In case, there is no view set up, the system displays all the fields from the default Flow with no preselected fields. 

  8. Click the + icon to add fields to the flow. The available fields are the one's you selected on the Cart Lines Columns tab.
  9. Click Save.

The view is retained for a user on the cart page. The view saved by you is stored in the browser storage which is lost when storage is invalidated or you explicitly delete the user view from the storage.