A block of text or fields can use the Mark Clause menu to gain a clause boundary and Smartness properties. Upon generating the document, only the clauses marked as Smart will have the clause boundaries.
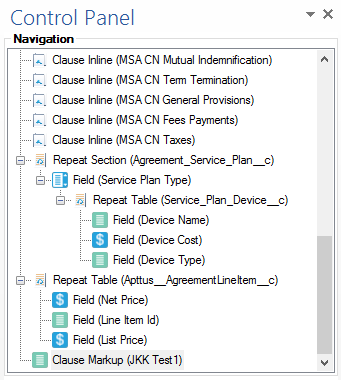
While constructing a template, you may have a block of text that you may not want in the playbook, but in the context of an agreement template (and later a contract), you would like to add smartness property. The Mark Clause menu allows the user to add properties into inline text in the agreement template. After utilizing the Mark Clause functionality, the new clause will be added to the Control Panel corresponding to its location in the document. Any clause formed from the Mark Clause functionality will have, Marked as Smart as True by default. Unless changed, it will be a smart clause in the context of a contract document.
You can mark text as smart by highlighting the desired text within a checked out Template, selecting the Mark Clause menu from the X-Author Templates ribbon tab, and then filling in the appropriate clause details.
While marking a clause, please keep the following points in mind:
- It is recommended to only mark clauses which are not inserted from the Playbook. In other words, you cannot mark a clause as smart inside an existing clause record.
- A template containing Sections, Tables, Images or Reference Merge Fields cannot be marked as smart. Only text-based clauses and clauses containing the Microsoft Word Tables can be marked as a clause.
- After you mark the selected content as a clause, you cannot mark any other part of the same content within the boundary of the Marked clause as a different clause record.
If you have marked the wrong section of the text or you have not captured all of the text that you wanted, you can Unmark a clause. A clause can also be Unmarked by right-clicking the clause in the Control Panel and choosing Unmark. This undo action can only be done in the same session the clause had used the Mark Clause menu functionality, prior to check-in of the template.
To mark a clause in a template
- Open your template and highlight the desired clause.
- After highlighting the clause, click Mark Clause from the X-Author Templates ribbon tab.
- In the Mark Clause dialog box, fill in the appropriate information.
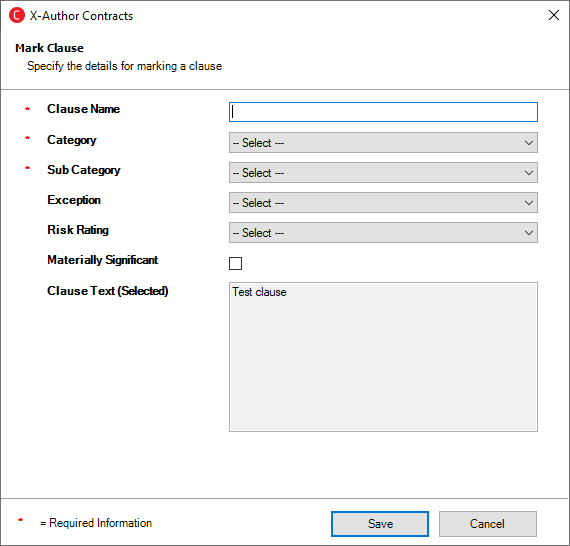
- Click Save.
You'll see success dialog box with the name of the marked clause to confirm that you have marked a clause. The successfully marked clause will be indicated with surrounding border. You can also verify if the clause was marked properly by opening the Control Panel and viewing the marked clause details there. By default, the marked clauses are set as Smart.
Prerequisites
- You must have a clause marked in the same session as you want to unmark a clause.
To unmark a clause in a template
- From the X-Author Templates Ribbon, click Control Panel to open it.
- Click the marked clause from the Navigation Panel.
- Do any one of the following to unmark the selected clause:
- Right click on the selected clause and click Edit markup properties. You will see the message with the clause properties. Click Unmark.
- Place your cursor within any part of the marked clause and click Mark Clause from the X-Author Templates ribbon tab. You will see the message with the clause properties. Click Unmark.
- Click Yes to confirm unmarking of the clause.
You will see a confirmation message with the clause name. Click OK to finish unmarking the clause.