Download PDF
Download page Working with Clauses.
Working with Clauses
Even though you will have standard clauses that you wish to use in every contract, through negotiations, your trading partners will not always agree with them – as you know. Therefore, we provide the concept of template libraries - alternative clauses or sometimes known as fallback provisions. This allows you to select the alternative language with differing degrees of risk and acceptability so that you can replace your current clause with it.
As with contract language templates, clauses can also have embedded merge fields within them that get auto-populated during agreement creation time. Again, please ensure that your markup the clause template documents using Microsoft Word to identify the merge fields similar to the language templates.
Clauses are not supported in headers and footers in templates.
Creating Clauses
Clauses or clause templates are created and maintained the same way as agreement templates. The difference is that clauses are smaller sections of text that can be manually added during the negotiation process or automatically added to an agreement using conditional logic, whereas agreement templates are comprehensive terms and conditions and can be used by the Apttus Merge Server to generate an actual agreement. Open your clause document in Word or create a new one by pasting a pre-existing clause from the clause library into a new blank document.
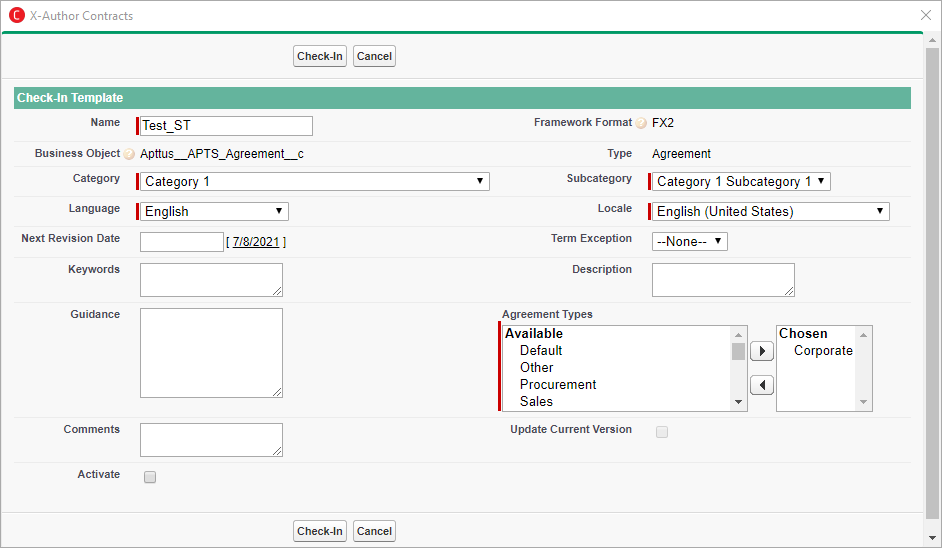
As mentioned before, you can keep the clause the way it was, or you can add merge fields or FX2 fields, conditional text, or change it any way you like. Once you’re sure the clause is the way you want it, select either Check-In or Clone menu to save the clause to Apttus.

Enter appropriate properties for the clause. You can select multiple agreement types this clause applies to or deselect types by clicking while holding the Ctrl key down. When finished, click Save or Clone. A message should appear saying the clause template was created.
Updating Clauses
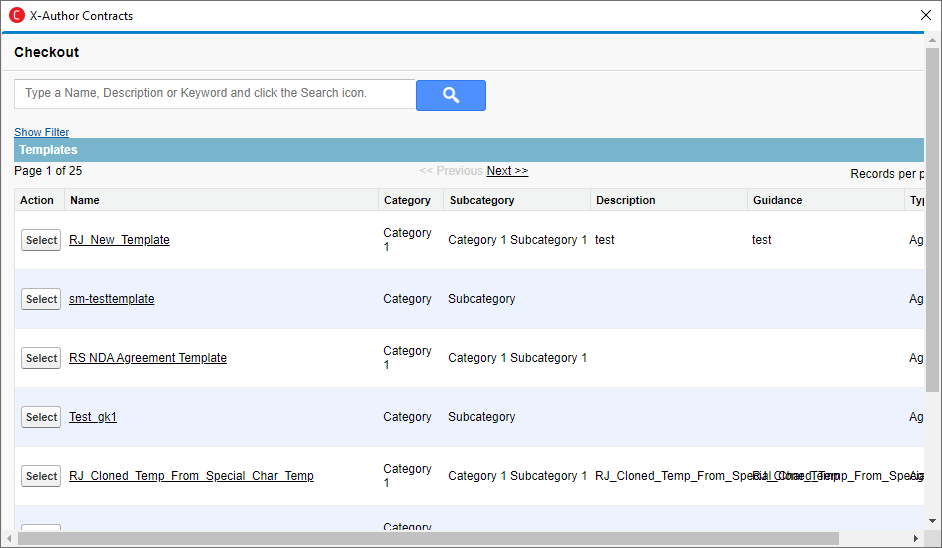
- Open a pre-existing clause using Check-Out. Note that you should select Show Filter and choose Clause from the Type list before you run your search.
- Make the required changes to the clause and click Check-In.

Best Practices on Using Clauses
For best results with your templates, follow the best practices described as under:
- When you insert a clause that contains a Microsoft Word table, you must add a single line space before and after the table.
- Do not start or end a clause with a smart field. Instead, the clause must have an empty line or some text at the start and the end of the clause.
- Do not start or end a clause with a repeat table. You must add an empty line or some text before and after a table.
- Two clauses must not be side by side without space.
- You must insert a blank line (not a new line) between two consecutive clauses.
- Avoid using a repeat table or Microsoft Word table inside a clause, as it may result in unexpected behavior.
- Using Refresh Clause on a clause containing a Microsoft Word table may result in an incomplete update of the table cell values.
- When you check in a template with a clause containing the last element like a table object/smart field in a clause, the template crashes, to avoid this issue, add whitespace just after the table and before the new line.
- While inserting clauses in an agreement template under a numbered/sub-numbered list, ensure the following:
Any clause ending with numbering, sub-numbering, and bullets should have one line space at the end of clause.
All other clauses apart from the above condition must not end with an empty line.
A nested clause is not supported beyond two levels (any clause template can have multiple child clauses (A -> B, C), but a clause template clause A cannot have child clause B which already has another child clause. (A->B->C)
For custom styles it is recommended that all clause templates and agreements use the same custom style so that inserting a clause from playbook does not disrupt the overall template formatting.