Download PDF
Download page Executing Actions.
Executing Actions
An Action Flow is a sequential set of Actions that is executed when you click a Designer configured user menu button in runtime. Each Action in an Action Flow can, and in some cases must, take inputs from prior actions and provide outputs to subsequent actions.
To create an Action Flow
- Click the Action Flow button on the X-Author Designer ribbon.
- Click Create.
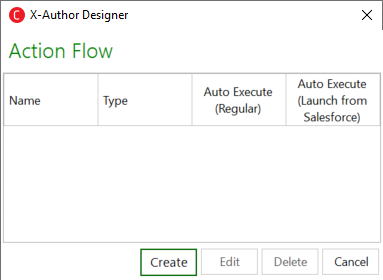
Enter an Action Flow Name and then click Apply.

Note
Each Action Flow will ultimately be associated with an end user menu command, so use a name that clearly represents this flow. When you click Apply, the Action Flow in the left pane is updated with the name you enter.
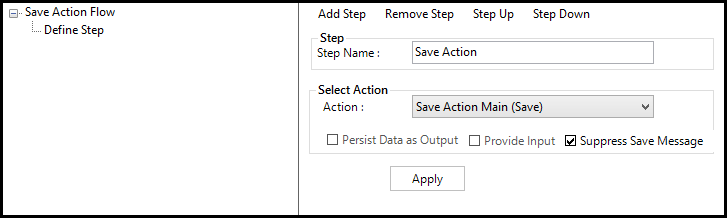
- To add a step in the flow, click Add Step.
On the right pane, under Step, type a Step Name (use any name, such as 1 or Search Account) and then click Apply. Under the Select Action section, select an Action from the list. If this action generates any output, select Persist Data as Output and under the Action Output section, type a Name for the output. You can use any name (like Opps). If this action requires an input, select Provide Input and select an input from the Action Input list. Based on the type of Action, X-Author Designer provides input suggestions. See the Action Flow Check Boxes table below for more information on when to use inputs and outputs.
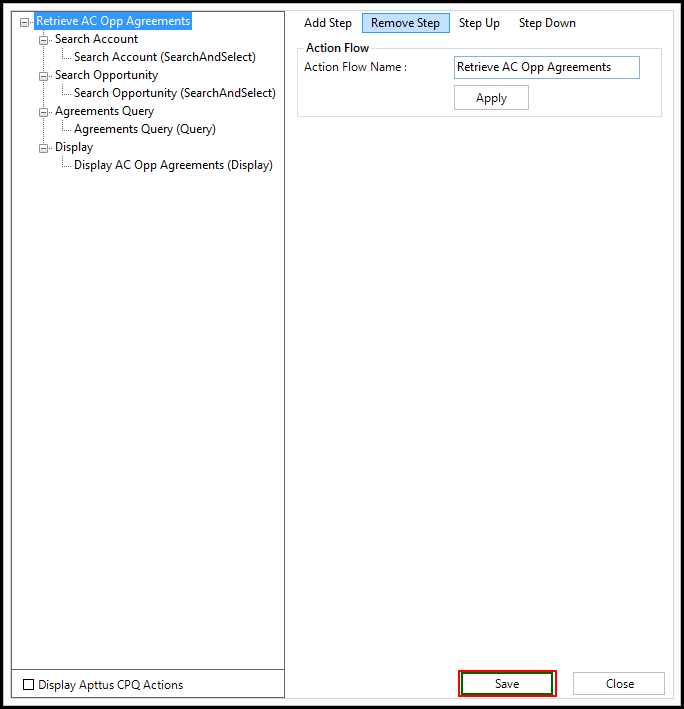
- Repeat steps 3 – 5 to add more than one step. Ensure that you click Apply after each step and notice the hierarchy updated in the left-hand pane.
- To reorder a step in the hierarchy, select the step from the left pane and click Step Up to move the step up in the hierarchy. Click Step Down to move step down in the hierarchy.
- After you have created the Action Flow, click Save and click Save App.
Action Flow Check boxes
| Field | Description |
|---|---|
| Persist Data as Output | Select this check box if an action generates any output. Type a Name for the output. You can use any name. For example, Opps. |
| Provide Input | Select this check box if an action requires input. Select an action from the Action Input list. Based on the type of Action, X-Author Designer provides input suggestions. |
| Suppress Save Message | Select this check box if you have multiple save actions in a single action flow and you want to suppress the save message of that particular action. Note: This check box is enabled for the Save action only. |
Suppress Message Validations
| When no records found in a Save Action check box (App Settings) | Suppress Save Message check box (Action Flow) | Behavior |
|---|---|---|
| Yes | No | The message is not displayed. |
| No | No | The message is displayed. |
| No | Yes | No Records Found for Save message is displayed. |
| Yes | Yes | The message is not displayed. |
| When all records are saved successfully in a Save Action (App Settings) | Suppress Save Message check box (Action Flow) | Behavior |
|---|---|---|
| No | No | The message for each Save action is displayed. |
| No | Yes | The message is not displayed. |
| Yes | No | The message is not displayed. |
| Yes | Yes | The message is not displayed. |
Action Flow Required Inputs and Outputs
| Action | Input | Output |
|---|---|---|
| Check-in | It always requires input because the Excel workbook is saved to an individual record. Although the individual object is already identified when you create the action itself, it is possible you could have used that object in different ways in various action flows. Therefore, the Action Flow requires specific output from a prior action as input to this one. | Never |
| Check-out | It always requires input because the Excel file is opened from an individual record. Although the individual object is already identified when you create the action itself, it is possible you could have used that object in different ways in various action flows. Therefore, the Action Flow needs to have the specific output from a prior action as input to this one. | Never |
| Clear Fields | Never. Clear Fields is tied to a specific Save Map. | Never |
| Display | It always requires input. An output from a prior Action must represent any object on a Display Map. | |
| Macro | Never. | Never |
| Query | Only if INPUT has been used in the query action filter. | Always |
| Dataset | It always requires input. Datasets take the outputs of query action as inputs. Output can be saved as a single dataset. | Always |
| Salesforce Method | Optional. | Optional |
| Save | Never. | Never |
| Search and Select | Input is required only if INPUT has been used in the Search and Select action filter. | Always |
To edit or delete an Action Flow
- Highlight an Action Flow on the Action Flow list.
- Click Edit or Delete.
- To delete an Action Flow that has already been associated with a User Menu button, first, remove the association in the User Menu.
You can auto-execute the action flow and launch an action from Source CRM as well.
To launch an Action Flow when the app is opened in runtime
An Action Flow can be kicked off automatically either when the app is opened directly in Excel or from your source CRM button.
When the App is opened from Excel
- Click Action Flow.
- Select the Auto Execute (Regular) check box for the action flow that should execute automatically.
- Click Cancel.
When the App is opened from a Source CRM button
There are two choices:
- Follow the steps above and select the Auto Execute (Launch from Source CRM) check box
- Execute a different Action Flow for each source CRM button.
For example, if you are creating a quote from an Opportunity, you may want to execute the Create Quote Action Flow from the Create Quote button in your environment. For the Edit Quote, you may want a completely different user experience so you would create a second Action Flow and attach that to the Edit Quote button.