Download PDF
Download page Connecting to your Environment from Excel.
Connecting to your Environment from Excel
Now that you have installed X-Author for Excel, you need to open Excel and connect X-Author to your environment. You can create multiple connections to your environment, switch between instances without leaving Excel, and revoke existing connections.
Connecting to Salesforce from Excel
Use the following process to connect to your Salesforce org.
To connect to Salesforce from X-Author Designer
- Open Excel.
- In the X-Author Designer or X-Author for Excel ribbon menu, click Connect.
If this is the first time you have connected to Salesforce, the Manage Connections window opens.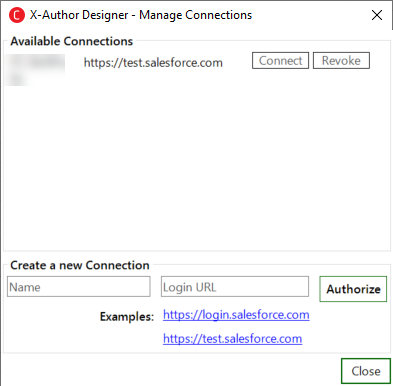
Under the Create a new connection section and in the Name field, enter the Salesforce.com user name.

If you have previously connected to Salesforce, but need to connect to a different org, refer to Switching Salesforce Connections.
- In the Login URL field, enter the URL you use to log in to Salesforce (In many cases, the URL is login.salesforce.com for production orgs and test.salesforce.com for sandboxes. You can click the shortcut for either of these in the Examples section).
- Click Authorize. The Salesforce login window opens.
- Enter your username and password in the provided fields and click Log in to Salesforce.
If you are seeing a blank screen, check if your antivirus is blocking the eowp.exe file. If yes, contact your administrator to whitelist the eowp.exe file.
The X-Author Designer ribbon is fully enabled. Now you can start designing an app or using existing apps.
Connecting to Microsoft Dynamics from Excel
Use the following process to connect to your Microsoft Dynamics instance.
To connect to Microsoft Dynamics from X-Author Designer
- Open Excel.
- In the X-Author Designer or X-Author for Excel ribbon menu, click Connect.
If this is the first time you have connected to your environment, the Manage Connections window opens.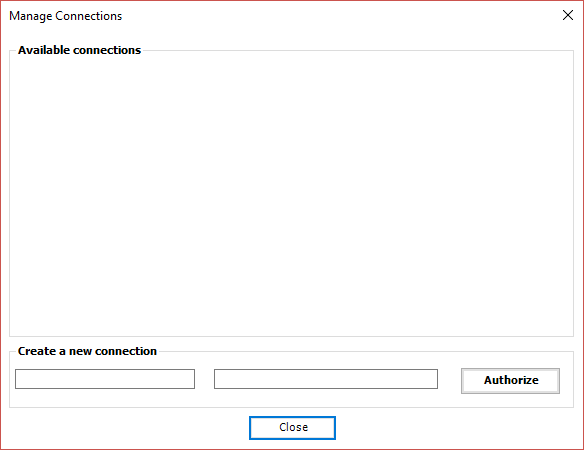
Under the Create a new connection section, in the first field, enter a name for your connection.
If you have previously connected to your environment, but need to connect to a different instance, refer to Switching Connections.
- In the second field, enter the URL you use to log in to your environment.
- Click Authorize. The Microsoft login window opens.
- Enter your username and password in the provided fields and click Sign in.
The X-Author Designer ribbon is fully enabled. Now you can start designing an app or using existing apps.
Connecting to Apttus Omni from Excel
Use the following process to connect to your Apttus Omni instance.
To connect to Apttus Omni from X-Author Designer
- Open Excel.
- In the X-Author Designer or X-Author for Excel ribbon menu, click Connect.
If this is the first time you have connected to your environment, the Manage Connections window opens.
Under the Create a new connection section, in the first field, enter a name for your connection.
If you have previously connected to your environment, but need to connect to a different instance, refer to Switching Connections.
- In the second field, enter the URL you use to log in to your environment.
Click Authorize. The Microsoft login window opens.

If you have previously connected to Microsoft Dynamics CRM, you will see the last user information by default. To log in to your Apttus Omni instance, click "+ Use another account" to log in.
Enter your username and password in the provided fields and click Sign in.
The X-Author Designer ribbon is fully enabled. Now you can start, designing an app or using existing apps.
Adding More Connections
You can use X-Author for Excel to connect to multiple instances of your environment.
To add a connection
- Open Excel.
- In the X-Author Designer or X-Author for Excel ribbon menu, click Switch Connection and select Manage Connections. The Manage Connections window opens.
- Under the Create a New Connection section, enter the name for the connection.
- In the Login URL field, enter the URL you use to log in to your environment.
- Click Authorize. The login window opens.
- Enter your username and password in the provided fields to log in.
The X-Author Designer ribbon is fully enabled. Now you can start designing an app or using existing apps.
Switching Connections
If you have previously connected to an instance and now need to connect to a different instance, then you will need to switch connections because the connection will default to the instance you most recently connected to. Use the following procedure to switch to a different instance.
To switch connections
- In the X-Author Designer or X-Author for Excel ribbon menu, click Switch Connection.
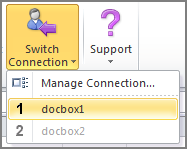
- Select a connection from the drop-down menu. The login window opens.
- Enter your password to log in.
The X-Author Designer ribbon is fully enabled. Now you can start designing an app or using existing apps.
Revoking Connections
You can revoke the connection if you no longer need to connect to an instance. After a connection is revoked, you will no longer see that connection as an option when switching or managing connections.
To revoke a connection
- Open Excel.
- In the X-Author Designer ribbon menu, click Switch Connection and select Manage Connections. The Manage Connections window opens.
- Click the Revoke button next to the connection you want to remove. The Revoke Access confirmation window opens.
- Click Yes to confirm the action.
The connection is no longer available in X-Author.