Download PDF
Download page Application Settings.
Application Settings
The following options are used to affect the runtime user experience, use protected worksheets, and secure Excel file saving and printing.
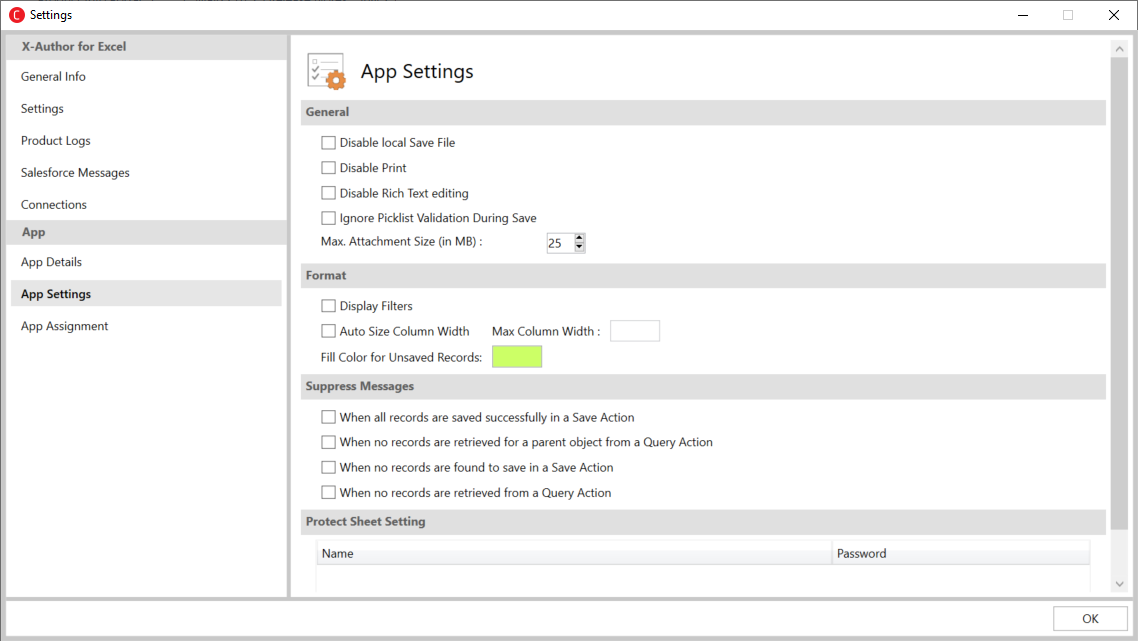
Disabling the Save and Print Menus
To prevent a runtime user from using the Save, Save As, or Save and Send sub-menus of an Excel File menu, click Disable Local Save File.
To prevent a runtime user from using Microsoft Excel's Print menu, click Disable Print.
Disabling Rich Text editing
To prevent a runtime user from adding and editing rich text data, click Disable Rich Text editing. Use this option when you want the rich-text field HTML to be populated in the cells rather than links that allow the user to add or edit rich text.
Ignoring Picklist Validation on Save
To prevent validation of picklist data during Save Actions: Use this option when you want the picklist validation to be ignored when saving the data back to your environment in runtime.
Max Attachment Size Limits in Salesforce
Salesforce has a File Size Limit which limits the size of the attachments to be uploaded for a single record on Salesforce. For more information regarding attachment limits refer, File Size Attachment Limits in Salesforce.
If you increase the file size limits in Salesforce, you can set the file size limit per attachment in a record in X-Author for Excel. Navigate to App Settings and set the Max File Size limit. This limit indicates the maximum size of an attachment that can be uploaded to Salesforce.
Suppose the records in your application comprise the attachment field and have multiple attachments. During insert or upsert, the insert or upsert transaction request is chunked into multiple Salesforce transactions so that all the attachments are inserted or upserted successfully.
Color for Unsaved Records
During runtime when a record is not saved due to an error, the following events occur:
- For a cell: The cell corresponding to the field in the Save map is highlighted based on the selected color.
- For a row: The row containing the error record is highlighted based on the selected color.
Set the color you want for the unsaved records or fields in App Settings.
Suppressing Messages
Select these options to suppress messages for the specific conditions described.
| Field | Description |
|---|---|
| When all records are saved successfully in a Save Action | Select this check box if you want to suppress the messages when all records are saved successfully in a Save Action. |
| When no records are retrieved for a parent object from a Query Action | Select this check box if you want to suppress the messages when no records retrieved for a parent object from a Query Action. |
| When no records are found to save in a Save Action | Select this check box if you want to suppress the messages when no records are found to save in a Save Action. |
| When no records are retrieved from a Query Action | Select this check box if you want to suppress the messages when no records are retrieved from a Query Action. |
Using Protected Worksheets
All Excel sheet protections work with X-Author for Excel provided the password for each protected sheet has been entered. Any worksheets that have been protected will be displayed in the Protect Sheet Setting window. Enter the password for each sheet and click Save.
All the options of the protection settings are now supported per sheet. The protection settings are remembered (per sheet) even if you unprotect the sheets. The protection settings are reapplied when you re-protect the sheets back. X-Author for Excel will not allow the addition of rows or columns in a protected sheet.
To protect a sheet
- Right-click on the sheet that you want to protect and select Protect Sheet.
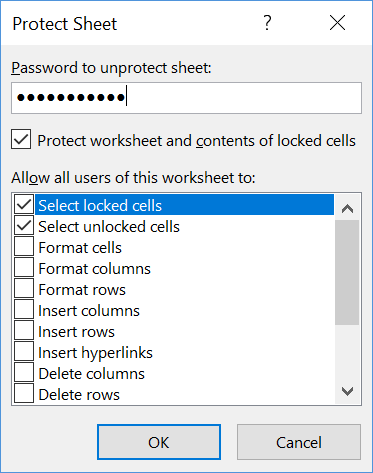
- Set the permissions by selecting appropriate check boxes.
- Enter the password in Password to unprotect sheet text-box.
- Click OK.
Note
You will receive a validation message when you provide a wrong password in App Settings in order to protect the sheet. The name of the sheet is also provided with the validation message.