Download PDF
Download page Document and Folder View Options.
Document and Folder View Options
There are two primary interfaces for working with documents: the Documents view and the Documents Stage.
The Documents View
The Documents view gives a file system-like overview of the documents and folders you can access, as well as recently viewed documents.

You can access the Column feature on the right margin and sort your columns to get the view you want.
From the Documents view, you can access and manipulate folders and files.
You can perform the following actions on files:
- Open a file for review
- Download the file
- Get info about the file
- Label the file
- Change the file's contract status (active/inactive)
- Export as CSV
- Rename the file
- Move the file
- Delete the file
You can perform the same actions on folders, and you can also
- Create a folder
- Share a folder
- Download folders
You cannot change a folder's contract status from this view.
Folders, multiple folders, and multiple files are zipped for download.
The Documents Stage
The Documents Stage presents an overview of available documents and folders, with document views sorted by ownership (my documents or all documents) and by life stage (store-only, received, in review, extracted, unreadable, or deleted).

Sorting, Filtering, and Resizing Columns
Choose a column and click its header to resize it or to sort or filter its contents.
To sort results by a column
Click the header of any column, then click the arrow that appears. This sorts the column alphabetically, chronologically, or numerically (up arrow) or reversed (down arrow).
To filter by a column
You can choose any column and use its contents as filtering criteria.
- Click the menu button (
 ) to the right of the header.
 - Click the filter button (
 ) to the right.
 - Click the checkbox in the filter column to select or unselect values. Unselected values disappear from the column and from your results.
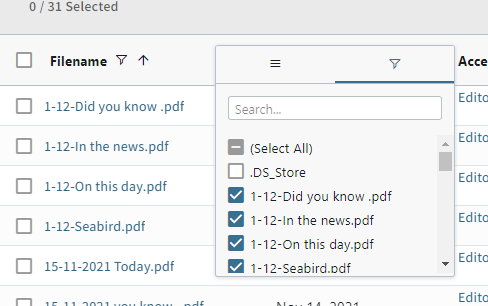
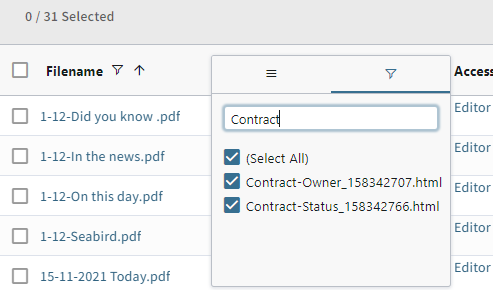
- You can also search for individual or like-named items using the text entry field:
To resize a column
To resize a column, you can either hover over the column boundary, and stretch it manually by clicking and dragging, or:
- Hover over the right side of the column's header, raising the three-line menu button.
- Click the menu button ().:
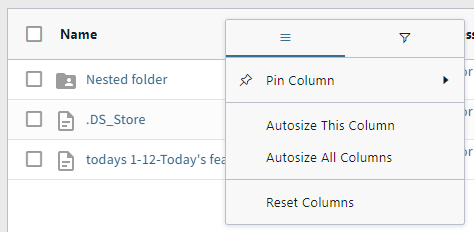
- Select either Autosize This Column or Autosize All Columns to stretch the selected column or all columns to the width of the largest cell.
You can also pin a column to the right or left margin. This enables you to use that column as a visual reference and scroll others freely past it.
If you no longer want to see columns presented as you've chosen, you can revert them to default widths by following the above steps and clicking Reset Columns.
To adjust the order of the columns
To change the order of your columns, click and drag the columns into the order you want. The order you choose is saved and can always be adjusted again.
To add or remove columns
From the pop-up panel to the right of the table, you can:
- View the categories: Default Columns, Fundamentals, Key Terms, User Tags, and Additional Info.
- Search for any column within each column.
Add columns to, or remove them from, your table.
Exporting CSV
The Contract Intelligence (Standalone) product displays files and folders and returns search and filter results in a tabular format. You can export the tags reflected in these tables in comma-separated value (CSV) format for easy manipulation in spreadsheets and other external applications.
Note
You can only see and export data from documents you have access to.
To export CSV files
From the Documents view or Documents Stage:
- Select the files or folders to export, then click the More button (
 ) above the table view.
 - Click Export as CSV from the drop-down menu.
- Direct the save transaction from your browser's file manager.
After performing a search with InSights:
- Click the CSV Export icon (
 ) above the table to the right.
 - Direct the save transaction from your browser's file manager.
Note
Only users with administrative privileges can import CSV files.