Download PDF
Download page Configuring your Data Migration App.
Configuring your Data Migration App
Before your Data Migration App can be finalized and ready to use, you need to specify load behavior, actions and filters for data retrieval.
Determining Load Sequence
By default, Objects retrieved from the source org will load in the sequence listed on the Data Migration screen. If you want to change the load sequence behavior, you need to specify a new load sequence for Objects in the list.
To accomplish this, edit the Load Sequence column for your objects. Use caution when making changes, as load sequence is important when migrating data. Users will encounter errors, for example, if a Child Object load sequence is specified prior to its Parent Object. Also, you cannot finalize the app if there is a number missing in the load sequence or two or more Objects share the same Load Sequence.
Choose a User Action for each Object
Each Object in the Data Migration must have a corresponding action in the runtime app. This allows the user to make use of X-Author's Search and Select or Query actions to request data from the source org during the migration.
To choose actions, click the drop-down menu next to each Object and select either Search & Select or Query.

For both Search & Select and Query actions, the Options are automatically filled based on the Objects and Fields you added to your app. You can make changes to these options as required when you define Filters.
For more information on these actions, refer to Search and Select and Query actions in this guide
Filtering Search and Select and Query Actions
To refine the data selected for migration when the user goes through the Data Migration app Action Flow, you can specify one or more filters for each Object being migrated. The process for defining filters is the same for each action type.
To define Filters for an action:
- Click on the
 Filter icon next to the corresponding action.
 - Define one or more filters to apply to data retrieved for the selected Object and its Fields:
- Use the Expression builder to specify a Value Type, Operator, and Value for your filter.
- Click Add Row to create an additional filter.
Click Add Filter Logic to specify additional logic for the filters you create.

Important
In Microsoft Dynamics, define filter logic within brackets. Example: (1 OR 2), ((1 AND 2) OR 3), ((1 OR 2) AND 3)
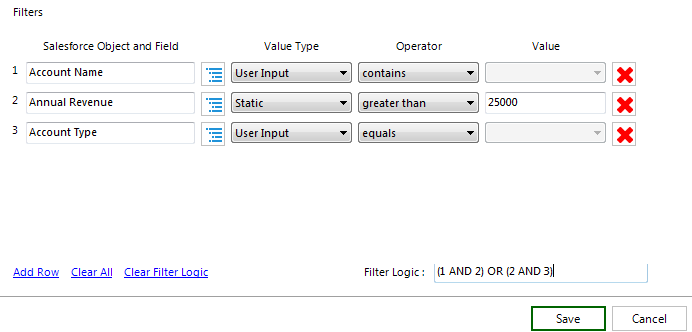
- Click Save when you are finished defining Object and Field filters.
When building filters, you can only create expressions for Objects and/or Fields already added to the app.
For complete instructions on building S&S and Query filters, refer to Query Action.
Specify External ID
This is an optional step that is only required if your Object has more than one External ID. Most Objects will only have a single External ID, but in some cases, an Object will have more than one (for example, you export data for this object to more than one external source). Setting the External ID is important to prevent duplication of records during data migration.
Note
All Objects must have a set External ID. If an Object does not have an External ID set, you will not be able to save the app. It is recommended to configure External ID's in your environment for every Object that you want to migrate before creating the Data Migration app. You can configure External ID's for your Objects in one of two ways:
- Use Conga Metadata utility to create External IDs for each Object you want to migrate. Contact your Conga representative to get access.
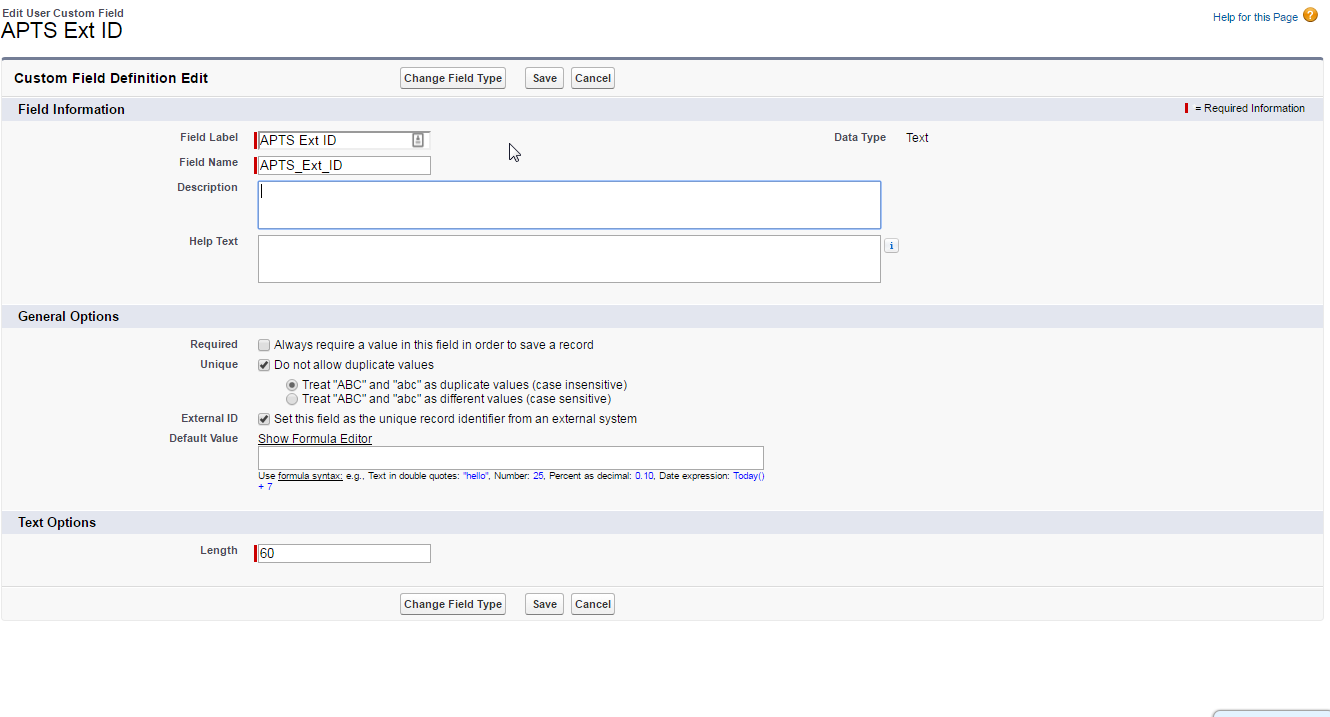
- Configure External ID's for your Objects. Create a text field labeled APTS Ext ID, field name APTS_Ext_ID per configuration in the image below.
- You will need to restart X-Author after adding the External IDs.
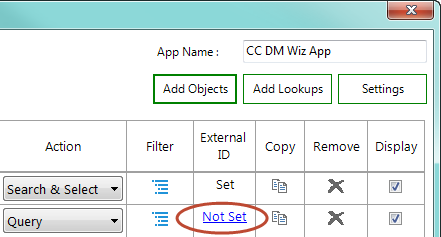
When an Object has more than one External ID, a Not Set link will be visible under the "External ID" column.
To specify External ID for an Object
- From the Data Migration screen, click Not Set under the "External ID" column corresponding to the Object you want to set.
- Using your cursor, highlight the correct External ID field to use for your Object.
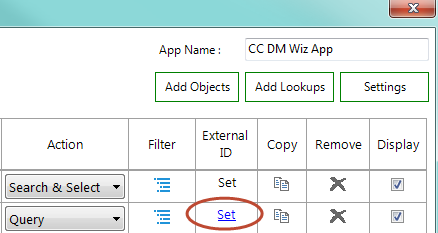
- Click Apply. The chosen External ID is updated in the Data Migration Object listing.
Disabling Worksheets
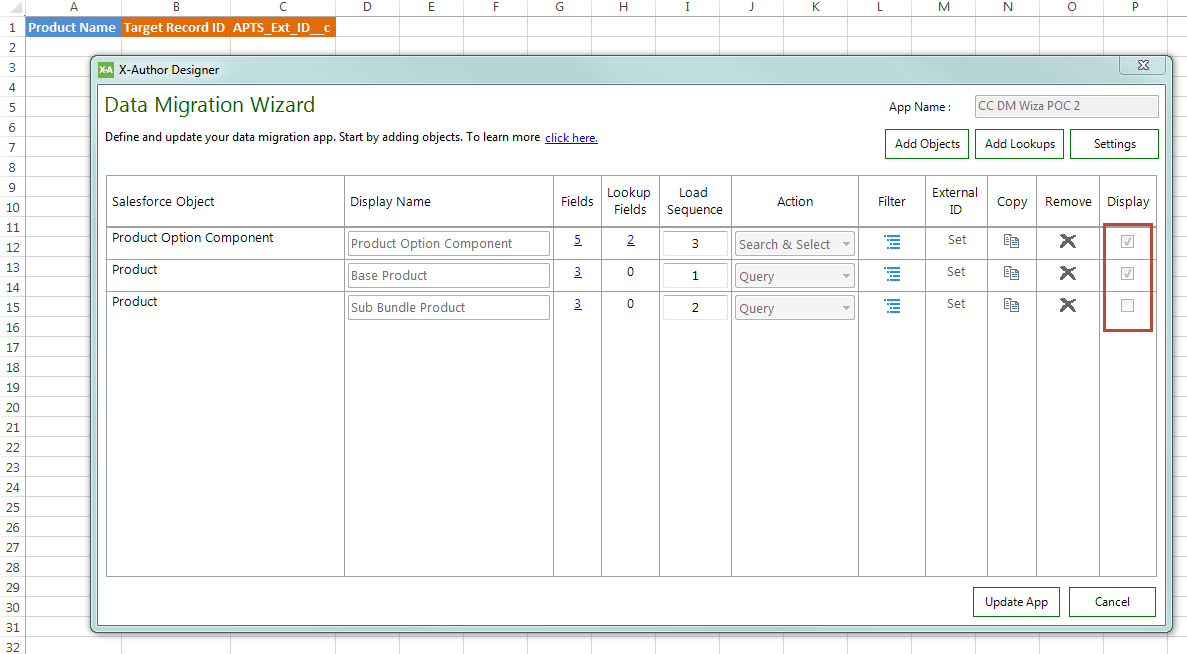
By default, each object you add to your Data Migration app representing a Query or Search & Select action creates a separate worksheet to retrieve data for migration. You can choose to disable creation of a worksheet for specific objects defined in the app. To disable the worksheet for an object, click the corresponding check box under the Display column. After you create the app, the resulting workbook will not create a worksheet for the disabled objects. Any queries for those objects will still execute–the output from those queries can still be used as input for other actions in the migration).
In the below example, the "Sub Bundle Products" object query retrieves data that is then used by the "Product Option Component" query to retrieve records for migration and populated in the Product_Option_Component worksheet. Because "Sub Bundle Products" is only used as input for another query, a worksheet is not required for that data.
For step-by-step instructions on creating a Data Migration Wizard, refer to Using the Data Migration Wizard in the X-Author for Excel Designer and Runtime guide.
Next: Finalizing your app.